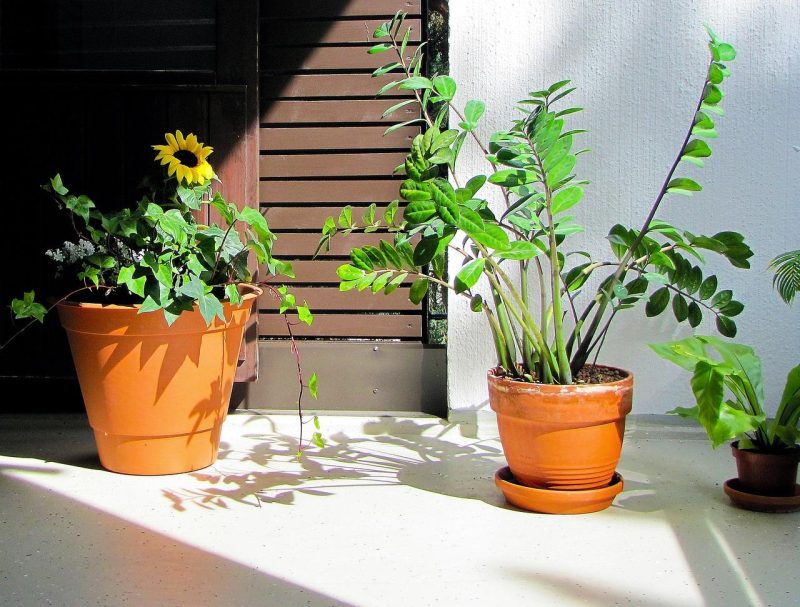
This guide will walk you through the steps needed to successfully propagate your ZZ Plant in water, along with tips and tricks to ensure your cuttings thrive.
Step-by-Step Guide to Propagating ZZ Plant in Water
Step 1: Gather Your Materials
Before starting the propagation process, gather the necessary supplies:
A healthy ZZ Plant from which to take cuttings
A sharp, clean knife or scissors
A clean glass jar or container for rooting in water
Water (preferably distilled or rainwater)
Optional: Rooting hormone (though not necessary)
Step 2: Selecting the Right Cutting
When you’re ready to take cuttings, look for healthy stems with several leaves. A cutting with at least two to three leaves is ideal, as it will provide the cutting with enough energy to develop roots. Avoid stems that appear unhealthy, yellowing, or damaged.
Step 3: Making the Cut
Using the sharp knife or scissors, make a clean cut around an inch below a leaf node. The node is the point on the stem where leaves attach. This is crucial, as roots will emerge from this area. If you have rooting hormone, you can dip the cut end of the stem in it to encourage root growth, although this step is optional.
Step 4: Preparing the Water Container
Fill your glass jar or container with clean water. Ensure that the water level is high enough to submerge the cutting up to the leaf node but not too high that it can cause rot. Clear containers are ideal as they allow you to monitor the cutting for root development.
Step 5: Placing the Cutting in Water
Carefully place the cutting in the water, ensuring that the leaf remains above the waterline. This prevents rot and allows the cutting to access the light it needs. Place the container in a spot that receives bright, indirect sunlight, away from direct rays that may overheat the water.
Step 6: Changing the Water Regularly
To keep the cutting healthy, change the water every week or so. This will help prevent stagnation and reduce the risk of mold or bacteria that can harm the cutting. Use fresh water each time and ensure it is clean.
Step 7: Monitoring Root Development
After a few weeks, you’ll begin to notice roots developing. This process can take anywhere from two to six weeks, depending on factors like light and temperature. As roots form, continue caring for your cutting, ensuring it receives adequate light and fresh water.
Step 8: Transplanting Your Rooted Cutting
Once your cutting has grown roots that are approximately 2-3 inches long, it’s time to transplant it into soil. Prepare a pot with well-draining potting mix (a mix designed for succulents works well) and create a hole in the center for your cutting. Carefully place the cutting in the soil, making sure to cover the base where the roots emerge. Gently pack the soil around the cutting to secure it.
Step 9: Post-Transplant Care
After transplanting, water the newly potted ZZ Plant thoroughly, allowing excess water to drain out from the pot’s bottom. Place the pot in a bright location with indirect sunlight. Monitor your plant for any signs of stress, such as wilting or yellowing leaves. Water only when the top inch of soil feels dry to the touch, as ZZ Plants prefer to dry out between waterings.
Why Propagate a ZZ Plant?

There are numerous reasons to propagate a ZZ Plant. Perhaps you want to create new plants for your home or share them with friends. Maybe you wish to fill an empty space in your decor with more greenery. Additionally, propagating your ZZ Plant is a cost-effective way to expand your collection without purchasing more plants. Finally, it can be very satisfying to watch a plant develop from a simple cutting into a lush, healthy specimen.
Understanding the ZZ Plant

Before getting into propagation techniques, it’s essential to understand the ZZ Plant and how it grows. The ZZ Plant features thick, waxy leaves that store water, enabling it to survive in low-light conditions and with limited watering. Its unique growth habit allows it to thrive in various environments, which also makes it an excellent candidate for propagation.
When is the Best Time to Propagate?

While the ZZ Plant can be propagated at any time of year, the best results typically occur during the growing season in spring and summer. At this time, the plant is actively growing and producing new shoots, making it more likely that your cuttings will root successfully.
Additional Tips for Successful Propagation
To ensure your ZZ Plant cuttings thrive during the propagation process, here are some extra tips that can help maximize your chances of success:
Patience is Key
Rooting can take time, and every cutting is different. Some might root quickly, while others may take weeks. Stay patient during this process, and don’t be discouraged if roots take longer than expected.
Keep Environment Stable
Consistency in the cutting’s environment can aid in quicker root development. Try to keep the temperature between 70°F and 80°F (21°C to 27°C) and avoid placing your cutting near drafts, heaters, or air conditioners.
Avoid Overcrowding
If you’re propagating multiple cuttings, give them ample space in the container. Overcrowding can lead to competition for resources and may result in less successful propagation.
Watch for Pests
While ZZ Plants are generally pest-resistant, it’s essential to monitor the cuttings for any signs of pests. If you notice anything unusual, like small spots or a sticky residue, treat the cutting immediately to prevent damage.
Be Wary of Rot
Over-saturation is the most common issue that leads to cutting rot. After placing the cutting in water, ensure there is no potential for the base of the stem to have direct contact with soil or organic matter as that can lead to fungal issues.
Common Questions About ZZ Plant Propagation in Water
How long does it typically take for ZZ Plant cuttings to root in water?
The rooting process can vary widely but generally takes between two to six weeks. You may notice roots forming sooner or later, depending on environmental conditions.
Can I propagate a ZZ Plant leaf?
While it is technically possible to propagate a single leaf, it is less likely to succeed than using a stem cutting with available nodes. A leaf alone does not have the necessary structure to encourage root growth.
What should I do if my cutting doesn’t root?
If your cutting hasn’t formed roots after several weeks, it could be due to insufficient light, improper water levels, or rot. Evaluate the conditions and consider taking another cutting from the original plant to try again.
Conclusion
Propagating a ZZ Plant in water is an exciting and rewarding process. It’s an excellent way for plant lovers to expand their collection, share with others, or simply add more greenery to their space. By following the steps outlined in this guide—selecting a healthy cutting, monitoring the rooting process, and transitioning your new plant into soil—you can successfully propagate your ZZ Plant.


