In this exploration of chamomile cultivation, we’ll dig into everything you need to know, from selecting the right variety to harvesting and preserving its fragrant blooms.
Understanding Chamomile: Varieties and Uses
Before we embark on the journey of growing chamomile, it’s essential to define what we mean by this beautiful plant. Chamomile is commonly classified into two main varieties: German chamomile (Matricaria chamomilla) and Roman chamomile (Chamaemelum nobile). Each carries its unique characteristics and applications, making them both valuable additions to your garden.
German Chamomile
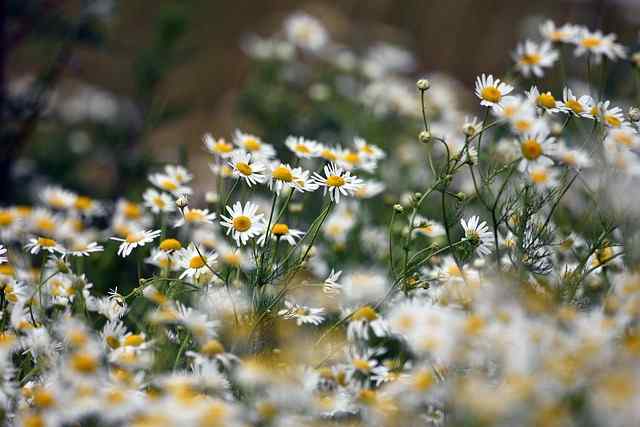
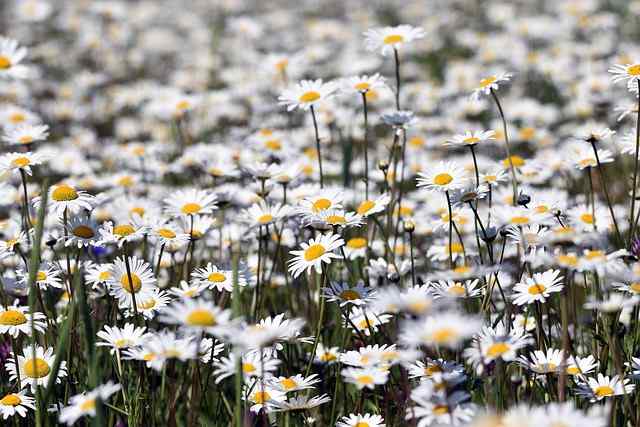
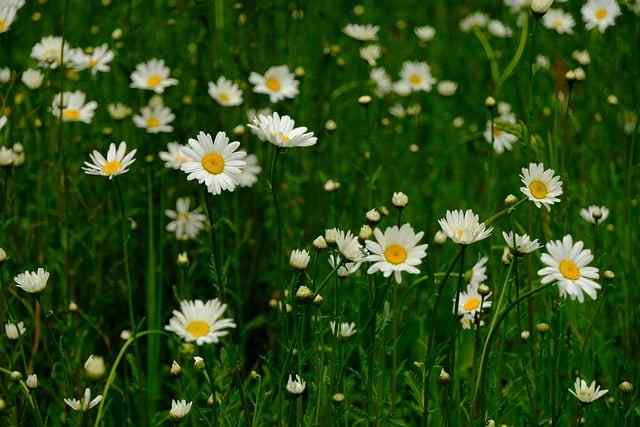
German chamomile is an annual herb known for its upright growth and bushy appearance. It typically reaches a height of about 24 inches. The flowers are white with yellow centers and exude a sweet, apple-like fragrance when dried. This variety is packed with properties that make it ideal for herbal teas and essential oils. It thrives in full sun, producing blooms throughout the summer.
One alluring aspect of German chamomile is its cheerful appearance, adding visual beauty to any space. Many herbalists treasure it for its calming effects, often turning it into a warm bedtime tea.
Roman Chamomile
In contrast, Roman chamomile is a perennial plant that grows close to the ground, usually reaching heights of around 12 inches. Its flowers are similarly beautiful, yet the plant has a more creeping habit, making it a lovely ground cover. Roman chamomile has a slightly stronger taste and is often used in medicinals and culinary dishes, such as in herbal infusions and as a flavoring in certain desserts. Its resilience allows it to return year after year, making it a favorite for gardeners looking for lasting beauty.
Choosing Your Chamomile
Selecting a variety may depend on your gardening goals. If you’re seeking a robust, perennial option that returns each year, Roman chamomile is your best bet. Alternatively, if you’re eager to grow herbal tea that offers an intense flavor and calming properties, German chamomile is your go-to.
Preparing Your Garden: Location and Soil

Now that you’ve chosen the type of chamomile that best suits your needs, it’s time to prepare your garden space. Chamomile thrives in well-drained, fertile soil and prefers full sun. However, it can also tolerate partial shade, making it versatile for various garden layouts.
Soil Preparation
First, assess your garden’s soil. Chamomile favors slightly acidic to neutral soil pH—between 6.0 and 7.0. To enrich your soil, add organic matter such as compost or well-rotted manure. This will improve soil texture, enhance drainage, and provide essential nutrients.
You can check soil pH with a simple test kit from a gardening center. If your soil is too alkaline, adding elemental sulfur can help adjust its pH. A well-draining soil is critical, as waterlogged roots may lead to rot—something chamomile absolutely despises.
Location
When it comes to choosing a location, opt for a spot that enjoys at least 6–8 hours of direct sunlight daily. Morning sun followed by afternoon shade can also work wonders, especially in hotter climates. You may want to consider planting chamomile near other herbs that thrive under similar conditions, like basil or mint, creating a delightful aromatic garden.
Sowing Seeds: Timing and Techniques
Once the soil is ready and the site is selected, it’s time to sow the seeds. Timing is crucial. Generally, chamomile seeds can be sown in spring after the last frost or in late summer for a fall crop.
Seed Starting Indoors
If you live in a region with shorter growing seasons, starting seeds indoors can give you a head start. Use biodegradable pots filled with seed starting mix. Sow the seeds about 1/4 inch deep, watering gently to avoid displacing the seeds. Place the pots in a warm, sunny spot or under grow lights. Once seedlings emerge—typically within two weeks—ensure they receive ample light to encourage strong growth.
Direct Sowing Outdoors
If you’re planting directly outdoors, prepare your garden bed by creating rows or a small patch with ample spacing for the plants to grow (approximately 12 inches apart). Scatter the seeds lightly over the bed and gently rake the soil to cover them. Keep the soil moist but not soggy, as consistent moisture is needed during germination.
Thinning Seedlings
Once your seedlings are about 3–4 inches tall, you’ll want to thin them out. This is essential to allow enough space for healthy growth. Aim for about 12 inches between plants to promote better airflow and reduce disease risk.
Watering and Maintenance

Chamomile is a relatively low-maintenance plant, but it does require some attention, especially during its early growth stages.
Watering
While chamomile can tolerate drought conditions once established, it’s crucial to keep the soil consistently moist while the plants are young. Water deeply but infrequently, allowing the soil to dry out between waterings. Overwatering should be avoided, as too much moisture can lead to root issues.
Weeding and Mulching
Regularly check for weeds, as they can compete with chamomile for nutrients and water. Mulching can help suppress weed growth while also maintaining soil moisture. An organic mulch layer of straw or wood chips not only keeps moisture in but can also contribute to soil fertility as it decomposes.
Fertilizing
Chamomile doesn’t require heavy feeding, but an application of a balanced organic fertilizer during the growing season can support robust plant health. Always follow the manufacturer’s instructions to avoid over-fertilizing.
Managing Pests and Diseases
Although chamomile is generally pest-resistant, certain nuisances can sometimes plague your plants. Understanding pests and diseases is crucial to successful cultivation.
Common Pests
Aphids and spider mites are the most common pests that may invade your chamomile plants. You can prevent and manage these pests by encouraging natural predators, such as ladybugs, or using insecticidal soap if infestations become severe.
Fungal Diseases
To mitigate the risks of fungal diseases such as powdery mildew, be sure to practice good airflow habits through proper spacing. Avoid overhead watering to keep foliage dry. In times of high humidity, applying a fungicide can help protect your plants.
Harvesting Chamomile: Timing and Techniques

Harvesting is perhaps one of the most satisfying parts of growing chamomile. Knowing when and how to harvest can make all the difference in the quality of your chamomile tea or extract.
Timing the Harvest
The optimal time to harvest chamomile flowers is when they’re fully open and still vibrant in color, usually in late morning after the dew has dried. At this stage, the essential oils are most concentrated, maximizing flavor and benefits.
Harvesting Techniques
To harvest chamomile, simply snip the flowers off the stems using garden scissors or pruners. It’s best to collect them in the late morning to ensure peak potency. Gently place the blossoms in a basket or other container to avoid crushing them.
Drying and Preserving Chamomile
After harvesting, turning your fresh chamomile into dried flowers enhances its shelf life and usability.
Drying Process
The drying process is simple but requires patience. Lay the freshly harvested flowers in a single layer on a clean, dry towel or use a drying rack. Alternatively, you can bundle them together, hanging them upside down in a cool, dark, and dry area with good airflow. After several days to a week, the flowers should feel crisp to the touch.
Storage
Once dry, store your chamomile flowers in an airtight container, away from direct sunlight, to preserve flavor and potency. Glass jars or dark-colored containers work well. Properly stored chamomile can last for up to a year, retaining its lovely fragrance and taste.
Brewing the Perfect Cup of Chamomile Tea

With your dried chamomile in hand, you can now explore the delightful art of brewing chamomile tea.
Choosing Water and Temperature
When preparing chamomile tea, the quality of water matters. Use filtered or spring water, as tap water can contain chlorine or other minerals that may alter flavor. Bring the water to a gentle boil—about 200°F (93°C)—before steeping the chamomile.
Brewing Methods
To brew:
Loose Tea: Use about 1–2 teaspoons of dried chamomile flowers per cup of water. Steep for 5–10 minutes to achieve your desired strength.
Tea Bags: If you prefer the convenience of tea bags, opt for high-quality brands with pure chamomile flowers.
Additions: Enhance your tea by adding honey for sweetness, lemon for citrusy brightness, or even a touch of lavender for a calming blend.
Enjoying the Moment
Brewing chamomile tea is not only about the drink itself. It’s a ritual—taking a moment to inhale the soothing aroma, feel the warmth of the cup in your hands, and enjoy the simple pleasure of a fragrant brew.
Beyond Tea: Exploring Additional Uses of Chamomile

Chamomile’s versatility extends beyond a calming cup of tea. Its myriad uses make it a valuable asset in your herbal repertoire.
Culinary Uses
In the culinary world, chamomile can be added to desserts, salad dressings, or even used as a flavoring for custards. Its gentle, floral flavor adds a delightful touch to various recipes.
Skin Benefits
Chamomile is well-known for its calming effects, not just internally but also externally. Infusions can be used in skincare applications, such as compresses for irritated skin or as a soothing soak in baths.
Essential Oil Extraction
Chamomile essential oil is prized for its anti-inflammatory and soothing properties. While you can extract it at home, purchasing high-quality, therapeutically useful oils may be more practical and effective for most.
Conclusion: The Joy of Growing Chamomile
Growing chamomile is not just about cultivating a plant; it’s about tending to a tradition steeped in history and healing. From its healing properties to its delightful taste, chamomile brings joy and serenity into our lives.