In this comprehensive guide, we will explore the best methods for dividing aloe plants, ensuring your propagation endeavors are successful. Whether you’re a novice gardener or a seasoned plant parent, our discussion will cover everything from the biology of the aloe plant to practical tips for repotting the pups. Let’s delve into the world of aloe division!
Understanding Aloe Plants and Their Growth Habits
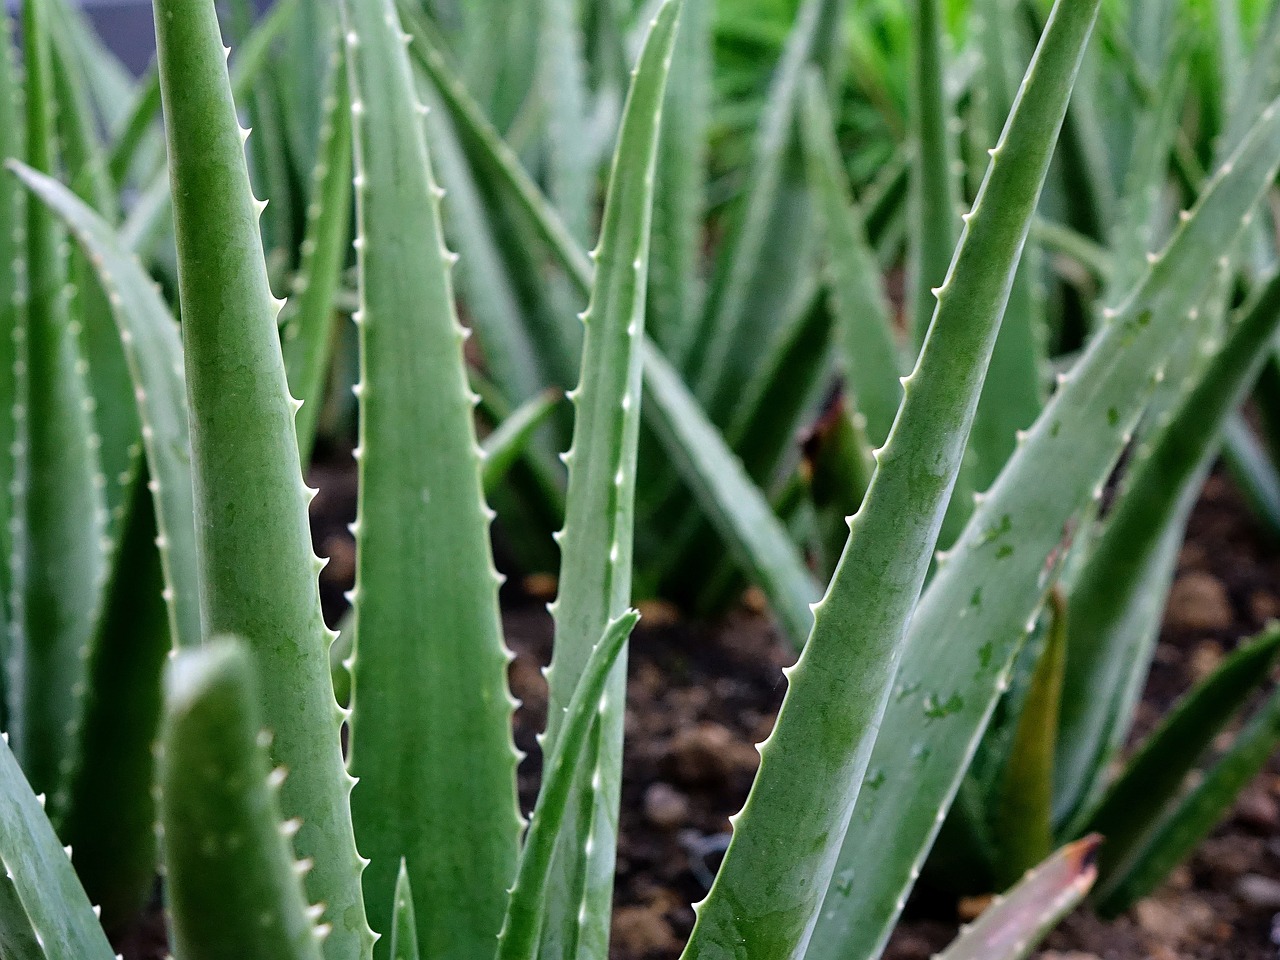
Before embarking on the division process, it’s essential to understand the growth patterns of aloe plants. Native to arid regions, aloes store water in their fleshy leaves, enabling them to thrive in drought-like conditions. The most common variety, Aloe vera, grows in rosettes and can reach about two feet in height. As it matures, aloe plants produce offsets at the base, resulting in a cluster of plants that can over time appear quite congested.
Dividing these pups is not just a gardening chore—it’s an opportunity to witness and promote growth. Each offset can develop into an independent plant, benefiting from space and resources to thrive. The decision to divide your aloe plants can be influenced by various factors such as plant health, the desired aesthetics of your garden, or simply the desire to gift a piece of your cherished aloe to a friend.
Timing Your Aloe Division

Choosing the right time to divide your aloe plants is crucial for successful propagation. Aloe vera thrives in warmer months, typically between spring and early summer. This period aligns with the natural growth cycle of the plant, allowing for robust root establishment following division.
Signs that your aloe plant is ready for division include the appearance of multiple offsets that are at least a few inches tall. A good rule of thumb is to wait until the pups have reached a size of 4-6 inches. Dividing aloe plants when they are actively growing will minimize stress and enhance the potential for successful adaptation in their new environment. Moreover, it’s best to select a day when the weather is mild—an overly hot or cold day can inhibit the plant’s ability to recover.
Preparing for Division: Tools and Materials
Arming yourself with the right tools and materials is essential before diving into the division process. The following items will make your experience smoother and more efficient:
Sharp, Clean Knife or Garden Shears: For clean cuts that reduce damage to the roots of both the parent plant and the offsets.
Gloves: Aloe leaves contain a sap that can irritate some people’s skin; gloves protect against this while providing a better grip on the plant.
Small Pots: These will be used for the newly divided pups. Ensure they have adequate drainage holes.
Well-Draining Potting Mix: A cactus or succulent potting mix will suffice.
Watering Can or Spray Bottle: For hydration post-division, which is crucial for the future health of the plants.
Optional: Rooting Hormone: While aloe is resilient and roots easily, using a rooting hormone can enhance the division outcomes, especially for larger offsets.
Having these tools on hand will make your division process efficient and enjoyable, saving you time and ensuring a smooth transition for the plants.
Step-by-Step Guide to Dividing Your Aloe Plants

Now that you are well-equipped and have chosen the right time for division, you can begin the process. Here’s a detailed, step-by-step guide to help you through dividing your aloe:
1. Preparation of the Area
Choose a clean, well-lit workspace, preferably where you will eventually keep the divided pups. Lay down newspaper or old towels for easy cleanup of soil and debris.
2. Remove the Aloe Plant from Its Pot
Gently grasp the base of the aloe plant and wiggle it free from its pot. If it’s stubborn, you can tap the sides of the pot or use a tool to loosen the soil around the root ball. Avoid pulling on the leaves, as this can lead to damage.
3. Examine the Root System
Once out of the pot, you’ll notice the roots running along the bottom and sides. The visible offsets will often be connected by roots; examine this network closely to determine where best to divide.
4. Identify the Pups
Look for pups that are at least a few inches tall and have developed their own roots. It’s best to divide the pups that are around 4-6 inches high; any smaller may struggle to establish themselves post-division.
5. Carefully Separate the Offsets
Using your sharp knife or shears, make a clean cut close to the base of the pup, ensuring you include some roots with each offset. Aim for a clean separation rather than tearing to avoid damage to the plant tissue. If the roots are tangled, you might need to work them apart gently.
6. Trim Excess Roots
If the roots of the pups are extensive, you can trim them back somewhat to encourage new growth. However, be cautious—not to remove too much, as this may stress the plant.
7. Let Them Heal
Before repotting, allow the divided pups to sit in a dry, shaded area for a couple of days. This helps callous over any cuts made during division, reducing the risk of rot once they are potted.
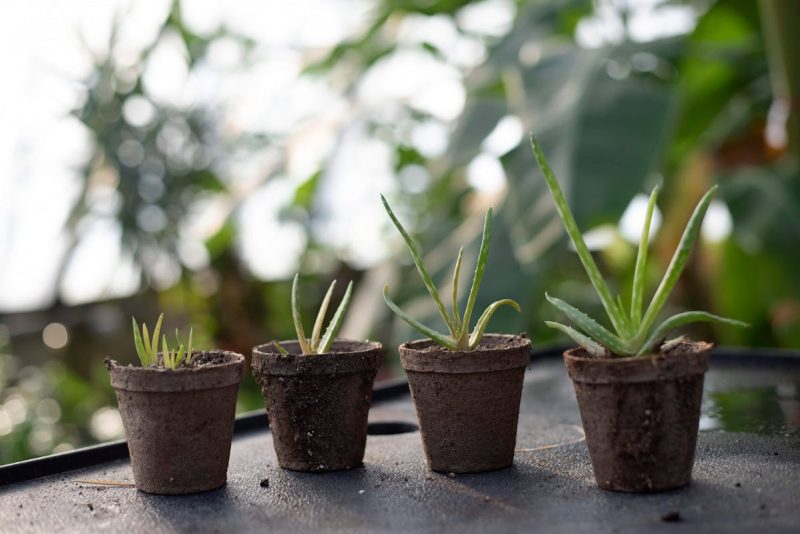
8. Repot the Pups
After a few days, prepare small pots with fresh, well-draining potting mix. Plant each pup at the same depth it was growing previously, ensuring the root system is properly buried while leaves remain above the soil. Firm the soil around the base, ensuring stability.
9. Water Sparingly
After repotting, lightly mist the soil or water sparingly. Avoid soaking the soil at this stage; the goal is to keep the plant hydrated without overwhelming the new roots.
10. Provide Proper Care
Place the newly potted pups in a location with bright, indirect sunlight. Avoid direct sunlight until they have established roots, as they may be more prone to sunburn. Monitor soil moisture during the first few weeks; letting the soil dry out completely between watering helps prevent rot.
Nurturing Your Divided Aloe Plants: Post-Division Care

After dividing your aloe plants, nurturing them properly is the key to ensuring they thrive. Aloe plants are relatively low-maintenance, but attention to their needs during this sensitive recovery period is essential.
Light
After division, these young pups should be slowly acclimatized to their light environment. Strong sunlight can be overwhelming at first. Gradually introduce them to brighter light by starting in a location with filtered sunlight for a week or two, allowing them to adapt before moving into more direct light.
Water
Understanding the watering needs of newly divided aloe is critical. With their smaller root systems, they require less water than established plants. Start with light waterings, allowing the top inch of soil to dry out completely before rewatering. Overwatering can lead to root rot, a common issue when dealing with succulents.
Humidity and Temperature
Aloe plants prefer dry environments, making them ill-suited for excessive humidity. Ensure that their environment mimics their native habitat with good airflow. Aloe plants thrive in temperatures between 60-75°F (15-24°C) but can tolerate slightly warmer conditions. However, be cautious of drafts and cold windows during the winter months.
Fertilization
During the initial month after division, it’s wise to refrain from fertilizing newly divided pups. Their primary concern is establishing roots. Once you see new growth, you can begin to fertilize lightly with a diluted succulent fertilizer every few months during the growing season (spring and summer).
Common Challenges After Division
While dividing aloe plants can yield great joy, it is not without its challenges. Understanding potential issues can help you be better prepared:
Root Rot: This is the most critical issue that arises after division. Signs include wilting leaves, mushy roots, or a foul smell from the soil. If you suspect root rot, check the roots. Trim away any dark or mushy roots, replant in fresh soil, and reduce watering until the plant recovers.
Sunburn or Shock: Newly divided aloe can experience transplant shock, often showing signs of stress such as shriveling or discoloration. If you suspect this is happening, return the plant to a less harsh environment, and be patient as it adjusts to its new situation.
Pest Infestation: Though aloes are usually pest-resistant, aphids and mealybugs can occasionally become problematic. Regular inspection can help you catch infestations early. Remove pests using a cotton swab dipped in rubbing alcohol or by rinsing the plants under a gentle spray of water.
Benefits of Dividing Aloe Plants
The benefits of dividing aloe plants extend beyond merely increasing your plant collection. Here are some compelling reasons to engage in this gardening practice:
Healthier Plants: Dividing helps reduce competition for resources among offset and parent plants. Improved airflow and access to nutrients lead to healthier overall plants.
Gift Giving: Divided pups make perfect gifts for friends or family; there’s something special about sharing a piece of your garden with a loved one. An aloe plant symbolizes healing and wellness—sending the gift of aloe can be a heartfelt gesture.
Home Decor Flexibility: Dividing aloes allows for creative decor possibilities. With many new aloe plants, you can create visually appealing arrangements or use them to fill empty spaces in your home.
Increased Variety: If you experiment with different varieties of aloe, division allows you to curate a diverse collection, showcasing the interesting shapes and colors of various species alongside your favorite Aloe vera.