This guide covers every aspect of growing artichokes in pots, ensuring that you have all the information you need to succeed.
Choosing the Right Artichoke Varieties

When considering growing artichokes in containers, the first step is to select the appropriate variety. There are two primary types of artichokes: green globe and purple artichokes, as well as additional options that cater to specific climates and growing conditions.
Green Globe Artichokes: This is the most common variety, known for its large, round buds and unique flavor profile. Green globe artichokes have a robust yield, making them a favorite among gardeners and chefs alike. They thrive in various climates, adapting well to different growing conditions, and tend to produce clusters of buds throughout the growing season.
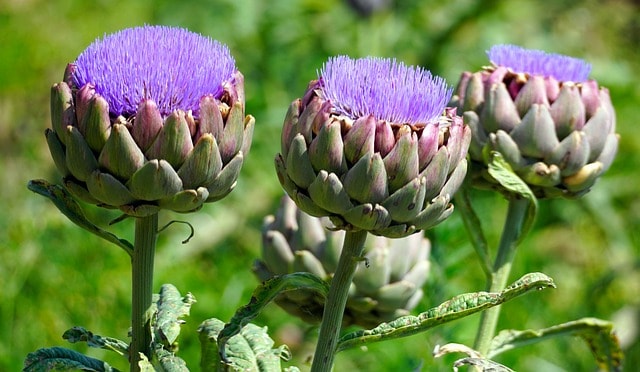
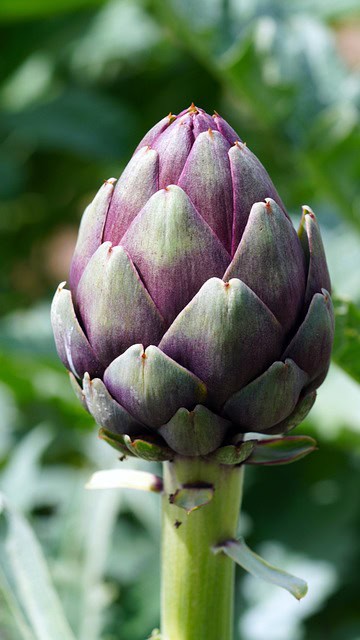
Purple Artichokes (Violetto): These artichokes are notable for their deep purple color and have a slightly sweeter, more refined flavor than their green counterparts. They often produce smaller buds, making them well-suited for container gardening. Their striking appearance also adds visual interest to your garden, perfect for showcasing in outdoor or indoor settings.
Imperial Star: This hybrid variety is especially well-suited for regions with cooler climates or shorter growing seasons. Unlike many perennial artichokes that take time to mature, Imperial Star is bred to produce edible buds in the first growing season. This makes it an exceptional choice for first-time gardeners or those looking to maximize their productivity in limited time frames.
Baby Artichokes: These are immature artichokes harvested before they reach full size. They can be a delightful addition to any container garden and can offer a different culinary experience. Baby artichokes are often sweeter and tender, making them an excellent choice for salads and sautéing.
When selecting a variety, consider your local climate, the space you have, and the type of artichoke flavors you prefer. Perennial varieties may be more suitable for regions where they can survive winter, while annual varieties like Imperial Star are fantastic for cooler areas or first-time growers.
What You’ll Need
Starting your artichoke garden in pots requires some essential tools and materials to ensure a thriving plant. Being properly equipped can make all the difference.
Equipment / Tools

Gardening Trowel: This handheld tool is crucial for digging, planting, and moving soil around your containers. A sturdy trowel allows for precise planting of seeds or seedlings and helps in maintaining your potted artichokes.
Pruning Shears: Sharp, quality pruning shears are necessary to keep your plants healthy. Regular pruning helps in managing plant size, encourages new growth, and is essential when it comes time to harvest.
Watering Can or Hose with a Spray Nozzle: Consistent watering is crucial for artichokes. A watering can, particularly one with a long spout, allows for targeted watering. Alternatively, a hose with a spray nozzle can help deliver a gentle shower to avoid dislodging soil or damaging young plants.
Soil Thermometer: This tool can assist in checking soil temperature during planting and growing, which is vital for maintaining optimal conditions. Artichokes prefer soil temperatures between 65°F and 75°F for the best germination and growth.
Garden Gloves: Protect your hands while working with soil and plants. Gloves help prevent skin irritation from any thorns on the plants and keep your hands clean.
Materials
Quality Potting Soil: Choosing a high-quality potting mix designed for container plants is paramount. Look for soil that includes organic matter, such as compost, to provide essential nutrients while ensuring good drainage.
Fertilizer: Invest in a balanced fertilizer, either organic or synthetic, to promote healthy growth. Choose one that contains essential macronutrients like nitrogen, phosphorus, and potassium, to provide a comprehensive nutrient profile for your artichokes.
Mulch: Organic mulch can help retain moisture in the soil and suppress weeds around your plants. It also adds aesthetic appeal to your container garden while supporting soil health as it breaks down.
Plant Markers: If you plan to grow multiple varieties, plant markers can help you keep track of which variety is in each pot. You can either purchase pre-made markers or make your own from materials like wooden stakes or stones.
Garden Stakes: As artichokes grow taller, they may require some support to prevent them from toppling over. Bamboo stakes or other garden supports can be placed in the pot to help stabilize the plants.
Choose and Prepare Containers
The right container is critical for the health of your artichokes. Here’s what to consider when choosing and preparing your pots.
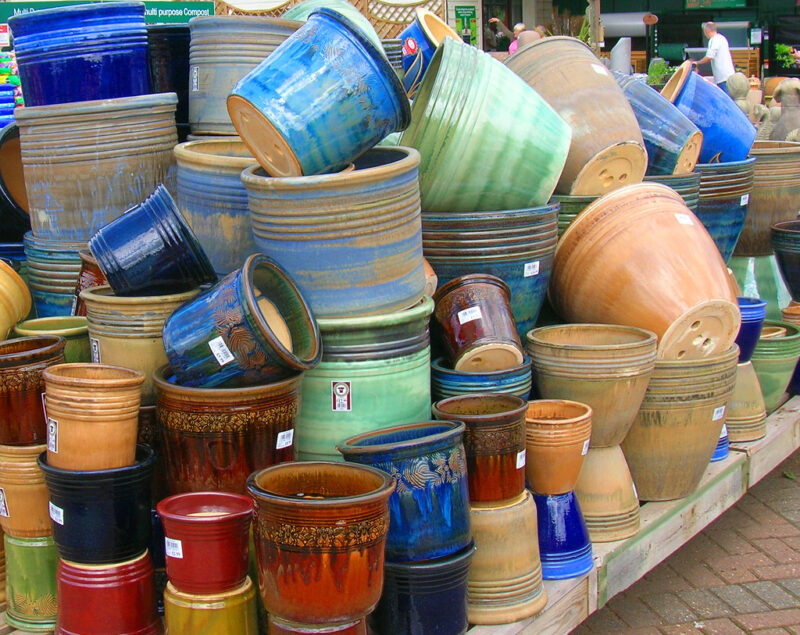
Type of Pot
Plastic: Lightweight and easy to move, plastic pots come in various colors and sizes. They are also relatively affordable and resistant to cracking. Make sure to choose UV-resistant plastic to avoid degradation from sunlight, and select options that complement your gardening aesthetic.
Clay: Terracotta and other clay pots are porous, allowing for significant air circulation, which is advantageous for root health. However, these containers can dry out quickly, requiring more frequent watering. Clay pots are particularly suitable for moderate climates and not ideal for very arid or humid regions.
Glazed Ceramic: These pots combine durability with aesthetics, featuring vibrant colors and intricate designs. The glaze helps retain moisture better than unglazed clay but can still be heavy, so consider that if you plan to move your containers often.
Fabric Pots: Grow bags, made from a breathable fabric, promote air pruning of roots and provide excellent drainage. They are lightweight, making them ideal for small spaces and urban gardening. Fabric pots can also be folded and stored easily when not in use, adding convenience for seasonal gardeners.
Size
Artichokes need ample space to grow. Choose pots that are at least 18 to 24 inches in diameter and 18 inches deep. A larger container promotes healthier root development, which is crucial for producing robust plants. Keep in mind that the deeper the pot, the more soil it will hold, allowing for better moisture retention—essential for the health of your artichokes.
If you opt for multiple plants in a single container, ensure that each plant still has enough space to grow. A wider pot will be required to avoid overcrowding, which can lead to competition for nutrients and water, ultimately hampering the plants’ overall growth and productivity.
Drainage
No matter which type of pot you select, make sure that it has adequate drainage holes to prevent waterlogging, which can lead to root rot. If you have chosen pots without drainage holes, consider adding a layer of coarse gravel at the bottom to facilitate drainage or drilling holes for proper water escape.
You can also elevate pots using pot feet or bricks to enhance drainage. This ensures that any excess water can escape freely and keeps the base of your pots from staying too wet, which can invite fungal diseases.
Planting Instructions
Once you have your containers ready, it’s time to get planting. Here’s how to do it effectively.
Prepare the Potting Soil
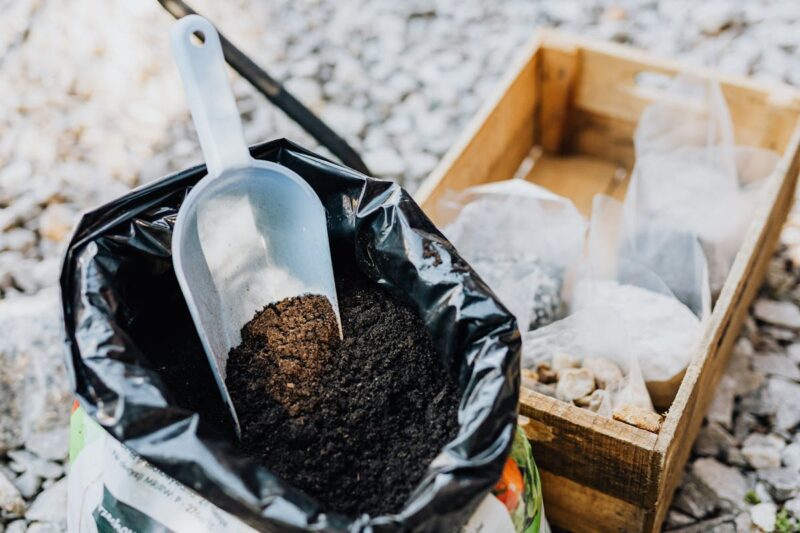
Start with a quality potting mix, possibly one formulated specifically for vegetables or container plants. To prepare your soil, consider mixing it with organic compost or well-rotted manure to enhance fertility. This not only provides a balanced nutrient profile but also improves soil structure and moisture retention.
Fill the pot with the soil mix, leaving a few inches from the top to prevent overflow during watering. Ensure the soil is packed lightly to prevent large air pockets which can hinder root growth.
Moisten the soil lightly before planting to provide the right level of hydration for your seedlings. The soil should feel damp but not soggy. Make sure to mix water evenly throughout the soil to encourage consistent moisture.
Water
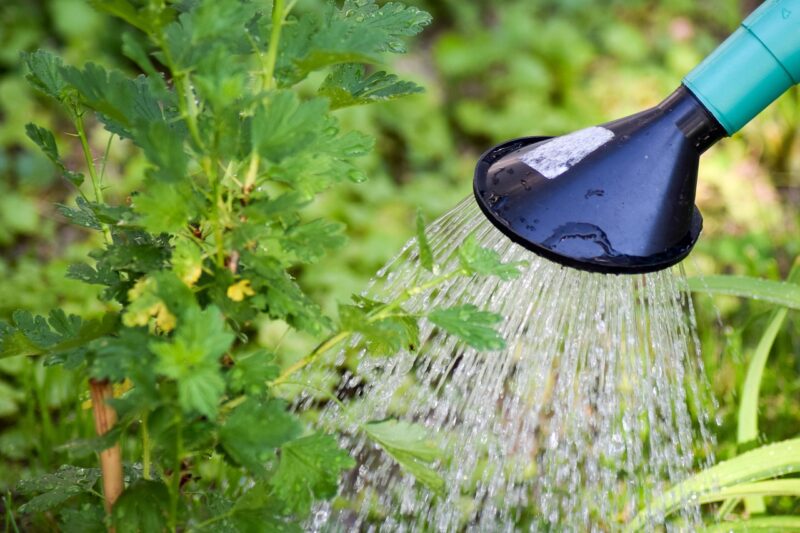
Watering your artichokes after planting them is crucial. Saturate the soil thoroughly, ensuring it reaches the root zone. However, avoid making it soggy since overwatering can lead to root rot.
Artichoke plants prefer evenly moist soil. After the initial watering, allow the top inch or two of soil to dry out slightly before the next watering. During the growing season, consider checking the moisture level regularly—especially in warmer months—by sticking your finger into the soil. If the top couple inches feel dry, it’s time to give them a good drink.
Fertilize
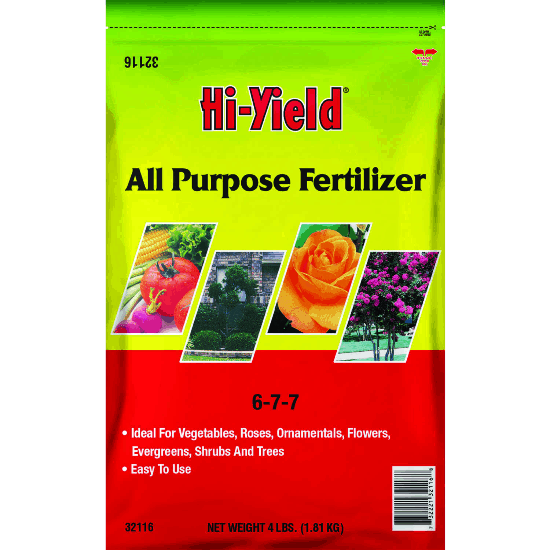
Applying fertilizer is essential for supporting artichokes’ growth. After planting, use a balanced fertilizer according to package instructions. A slow-release fertilizer is often the best choice, providing continuous feeding throughout the growing season.
Aim to fertilize every 4-6 weeks during the growing season to keep your plants nourished. As the buds begin to form, consider switching to a fertilizer higher in potassium and phosphorus to promote bud development and overall plant health. Always follow the manufacturer’s suggested rates to avoid over-fertilization, which can damage your plants.
Care Instructions
Artichokes require ongoing care to ensure a successful harvest. Here’s how to keep your plants flourishing, focusing on environmental needs and routine maintenance.
Sun Exposure

Artichokes love sunlight! Choose a location that receives at least 6 to 8 hours of direct sunlight daily. If your pots are on a balcony or patio, ensure they are positioned to maximize sun exposure. If your area has particularly intense sun, some afternoon shade can be beneficial to prevent scorching of the leaves.
In cooler climates, sun exposure becomes more critical, as the warmth from sunlight helps stimulate growth early in the season. Conversely, in extremely hot climates, monitor your plants closely and consider using shade cloth to protect your crops from harsh afternoon sunlight.
Stick to a Water Schedule

A consistent watering schedule is essential. Artichokes prefer moist but not waterlogged conditions. During their growth phase, aim to water them deeply once or twice a week, depending on weather conditions. Consider using a drip irrigation system if you’re growing several pots to ensure consistent moisture levels without risking overwatering.
As your artichokes mature, especially before harvesting, you may need to increase the watering frequency if you notice the top few inches of soil drying out quickly. It’s important to maintain even moisture, especially during bud formation and hot weather when plants can use more water.
Protect From Excessive Heat and Freezing Temperatures
Artichokes are fairly hardy but can struggle in extreme temperatures. During heatwaves, provide some shade for your plants to protect them from burning; a lightweight fabric or shade cloth can work wonders here. You may also need to increase watering frequency during these hotter periods.
In colder climates, consider moving your pots to a more sheltered area or wrapping them with thermal blankets to protect the roots during freezing temperatures. Use mulch around the base of the plant to insulate the roots, but don’t allow mulch to touch the stems, which can promote rot.
If frost is in the forecast, particularly late in the season, be proactive by bringing your pots indoors or into a greenhouse for protection. With some heat, time, and attention, your artichokes can thrive regardless of weather challenges.
Harvesting Artichokes in Pots/Containers
Knowing when and how to harvest your artichokes is crucial for flavor and texture.
Timing: Artichokes are typically ready for harvest when the buds reach about 3 to 6 inches in diameter. This usually occurs about 6 to 8 months after planting, depending on the variety. It is essential to harvest before the buds begin to flower; once they open and bloom, they lose their culinary appeal and can become tough and less flavorful.
Method: Use sharp pruning shears to cut the buds just above the stem, ideally aiming to leave a short piece of stem attached to the bud. This method helps encourage further growth and may yield additional smaller buds.
Follow-Up: After harvesting the main buds, smaller buds may form. Allow these to grow and harvest again; you can often get multiple harvests from one plant when taken care of properly. In ideal conditions, plants may produce buds continuously until the end of the growing season.
Keep in mind that younger buds are usually more tender and flavorful than larger, more mature ones.
Storage: For any buds you don’t consume immediately after harvest, store them unwashed in the refrigerator in a breathable plastic bag or wrapped in a damp towel. They can typically last about 1-2 weeks, maintaining their best quality when stored properly.
Repotting Instructions

While growing artichokes in containers can be rewarding, they may occasionally outgrow their pots or require more nutrient-rich soil. Here’s how to repot effectively.
Timing
Ideally, repot in early spring before the growing season kicks in. This gives the plant a head start, leading to better growth. Repotting can also be performed in late summer, especially if you start to notice signs of root crowding.
Choose a Larger Pot
Select a new container that is one size up from the current pot, ensuring it’s at least 2 to 4 inches larger in diameter. If your artichoke is considerably larger, you might want to jump up two sizes to ensure ample room for root growth.
Remove the Plant
Gently remove the artichoke from its current pot. Work around the edges and bottom of the pot to loosen compacted soil, ensuring you do not damage the roots in the process. If the plant is root-bound, you may need to gently break some of the outer roots to encourage healthier growth in the new environment.
Prepare the New Pot
Add a layer of fresh potting soil to the bottom of the new pot. Place the artichoke in the center and fill around the sides with soil, making sure the top of the root ball is level with the soil surface. Taper the soil lightly up to the stem but avoid piling it directly on the crown of the plant to prevent suffocation.
Water
Water thoroughly after potting to help settle the soil and remove any air pockets. This also rehydrates the plant and assists in acclimating it to its new space. After repotting, monitor the moisture levels closely, adjusting the watering schedule as necessary for the newly established plant.
Pests and Diseases

Growing artichokes in containers can sometimes make them susceptible to pests and diseases. Being proactive in prevention is critical.
Common Pests
Aphids: These small, soft-bodied insects can cluster on budding leaves and are notorious for sucking sap from plants, weakening them. Insecticidal soap or neem oil can effectively control them. Regularly inspect your plants to catch infestations early.
Snails and Slugs: Slugs and snails can munch on leaves, especially young ones. To deter them, you can use diatomaceous earth around your pots or create barriers using copper tape strips, which slugs dislike crossing.
Spider Mites: Check for webbing and yellowing leaves; if you spot these signs, spraying with water can help dislodge them. For larger infestations, insecticidal soaps or horticultural oils can help manage their numbers.
Cutworms: These caterpillars can cut tender seedlings at the base. Protect new transplants with collars made of cardboard placed around the stem to prevent them from attacking the plant’s base.
Common Diseases
Powdery Mildew: This fungal issue can arise in overly humid conditions. Ensure good air circulation between plants, avoid overhead watering, and provide space between the containers to limit fungal growth. If you spot powdery mildew, you can apply fungicidal treatments or homemade solutions, such as baking soda mixed with water.
Root Rot: The primary risk of overwatering, root rot can devastate your plants. Ensure your pots have adequate drainage and adjust your watering schedule to allow proper soil drying between waterings. If your plant shows signs of root rot (e.g., wilting despite adequate moisture), you may need to remove the plant and cut away affected roots before repotting into dry soil.
Fusarium Wilt: This soil-borne fungus can lead to yellowing leaves and wilting if plants are stressed. Crop rotation, using disease-resistant varieties, and keeping pots clean can help mitigate the risk of this disease.
Regularly inspect your plants and act promptly to address any pest or disease threats. Keeping your artichokes healthy requires observation and quick intervention as needed.
FAQ
Q: Can I grow artichokes indoors?
A: Yes, you can successfully grow artichokes indoors provided they receive enough light! Natural sunlight through a south-facing window may suffice, but consider using grow lights during seasons with limited natural illumination to support consistent growth.
Q: How long do artichokes take to grow?
A: Generally, artichokes take about 6-8 months to mature, depending on the variety and growing conditions. With proper care, you could enjoy your first harvest by late summer or early fall if planted in spring.
Q: Do artichokes need a lot of water?
A: Artichokes prefer consistently moist soil, so it’s essential to ensure that they don’t dry out between waterings. However, they do not thrive in waterlogged conditions. Adhere to a deep watering schedule rather than frequent light sprinkling to give roots a good soak.
Q: Can I save seeds from my artichokes?
A: While technically possible, saving seeds from hybrid varieties can lead to unpredictable results in future plants. It’s typically more reliable to purchase seeds or seedlings from reputable sources for consistent results, ensuring that you know precisely what you’re planting.
Final Thoughts
Growing artichokes in pots and containers opens up a world of delightful possibilities for both seasoned gardeners and beginners alike. With thoughtful preparation, care, and a little patience, you can enjoy the satisfaction of harvesting your own fresh, tender artichokes right from your balcony or patio. Whether you choose the classic green globe or the striking purple variety, your efforts will not only yield delicious rewards but add unique beauty to your garden space.