Heliconia is not only admired for its stunning, colorful flowers and lush, large leaves, but it also serves as an exotic touch in both tropical gardens and home decor. If you’re in a climate that isn’t suitable for in-ground planting, growing heliconia in pots or containers is an excellent alternative.
Choosing the Right Heliconia Varieties

Selecting the right heliconia variety is the first step in ensuring a successful and vibrant display. Various species and hybrids exist, each with unique characteristics and care requirements.
Popular Varieties
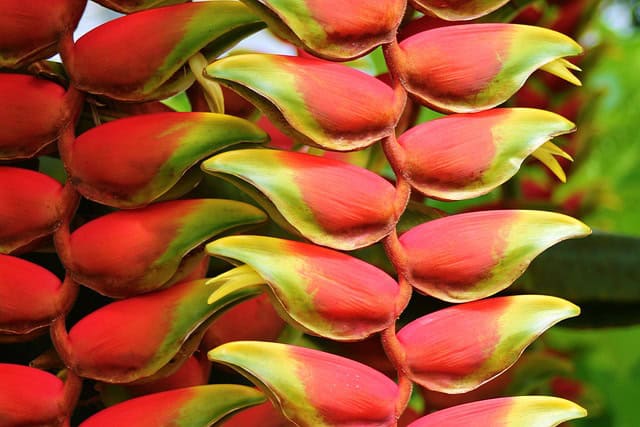
Heliconia rostrata: This variety is perhaps the most recognizable due to its showy, pendant-like clusters of bright red and yellow flowers. Each bract resembles a lobster claw, giving it the common name. Besides its stunning appearance, this plant can grow up to 6 feet tall, making it an impressive addition to any garden or patio.
Heliconia bihai: With broader leaves and larger inflorescences, Heliconia bihai adds drama wherever it’s planted. Its blossoms emerge in striking orange, yellow, and red hues, providing a vivid splash of color. This variety can grow to heights of about 8 to 10 feet and benefits from more space in a larger pot.
Heliconia psittacorum: Known for its small stature, this species grows up to 3 feet tall and produces vibrant yellow and red flowers that resemble the colors of a parrot. Its compact growth habit makes it suitable for smaller spaces like balconies or small gardens.
Heliconia angustifolia: Featuring slender leaves and more elongated flowers, this variety is also tolerant of various growing conditions, making it a versatile choice for budding gardeners. It complements container gardens well due to its relatively modest size, growing to about 3-4 feet.
Factors to Consider
When choosing a heliconia variety, think about the environmental conditions and the spot where you plan to place your pots. Considerations should include:
Light: Some varieties prefer direct sunlight while others thrive in partial shade.
Size: Larger plants may require sturdier containers and more anchoring support to withstand heavy winds, especially when outdoors.
Growth Rate: Fast-growing species can require more frequent repotting and care.
Choosing a variety wisely can lead to years of enjoyment and vibrant growth in your home or garden.
What You’ll Need
To embark on your heliconia journey successfully, you must arm yourself with the right tools and materials. Here is an expanded list of what you’ll require:
Equipment / Tools

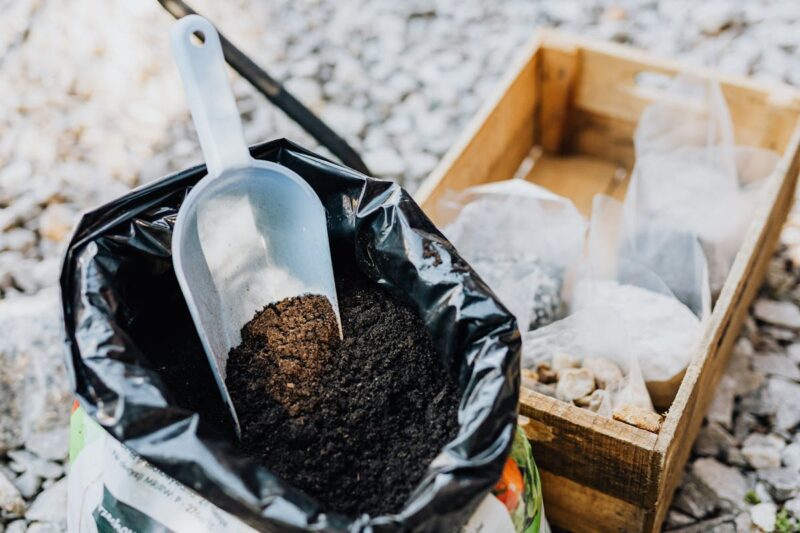
Shovel or Trowel: Essential for digging, moving soil, and planting. A trowel is particularly handy for scooping soil into pots and transplanting smaller plants.
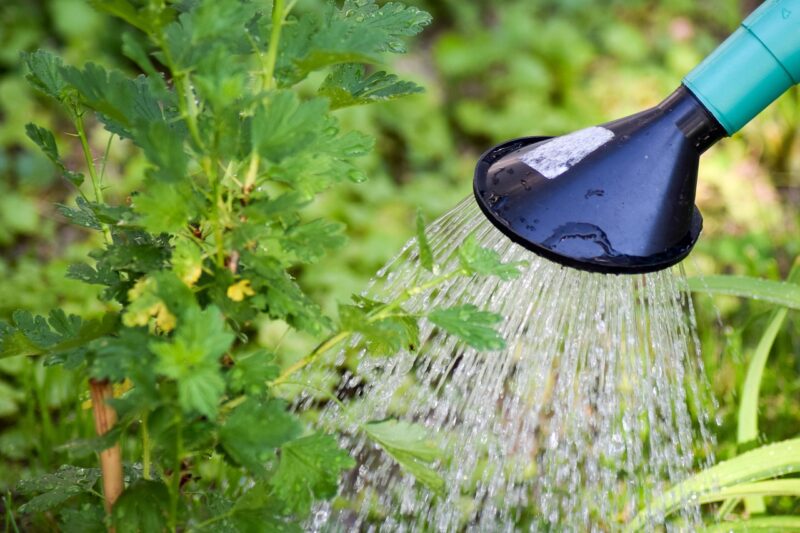
Watering Can: A good-quality watering can will allow you to provide just the right amount of water, especially important for retaining optimal moisture levels in pots.
Pruning Shears: These are important for regular maintenance, allowing you to trim away any dead foliage and encourage new blooms while shaping the plant as it grows.
Soil Knife: Useful for digging precise holes for planting and dividing root systems if needed, this tool can be invaluable during the potting process.
Gloves: Wearing gloves protects your hands from soil, irritants, and potential pests. They also offer grip when handling pots and equipment.
Measuring Spoon: For precise measuring of fertilizers, especially useful if dealing with concentrated or powdered nutrients.
Materials
Quality Potting Mix: Look for a potting soil that promotes drainage and contains organic matter. This ensures your heliconia has access to the nutrients it needs while preventing water retention, which can lead to root rot.
Fertilizer: A slow-release 10-10-10 or an organic fertilizer formulated for tropical plants promotes vigorous growth and vibrant blooms. Liquid fertilizers can also be beneficial as a supplemental feeding during the growing season.
Mulch: Organic mulch helps to retain moisture in the soil and suppress weeds. Using materials like shredded bark or coconut coir can also provide a slow release of nutrients as they decompose.
Watering Tray or Saucer: A tray placed under the pot can catch excess water, maintaining humidity in dry conditions while protecting surfaces from water leakage.
Choose and Prepare Containers
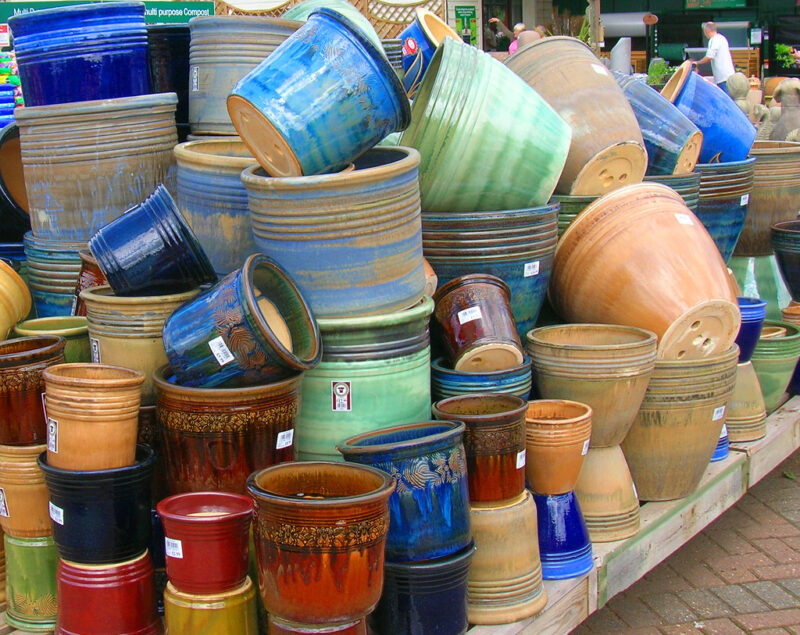
The choice of container is crucial, as it affects both growth and aesthetics. A well-sized and well-chosen pot can make all the difference in the plant’s health and vibrancy.
Type of Pot
Plastic: These pots are lightweight and often more affordable, offering good insulation for the roots. They come in various colors, shapes, and sizes, which means they can fit in with any decor. However, make sure to monitor the moisture levels, as plastic can retain water longer than other materials.
Clay: Terracotta pots are porous and allow for good air circulation, which helps prevent root rot. They retain moisture but may require more frequent watering. They provide a classic, rustic aesthetic and are generally robust against the elements.
Ceramic: Beautifully glazed ceramic pots can add a decorative touch to your patio or garden. Ensure that any decorative ceramic pot has drainage holes, as water pooling can quickly lead to decay.
Size
Choosing the right size pot is essential for the aeration and growth of your heliconia. Generally, a pot with a diameter of at least 12-16 inches is suitable for smaller varieties and 18-24 inches for larger ones. The depth of the pot should also be adequate to allow roots to extend comfortably. A larger pot can house fuller, bushier plants and reduce the frequency of repotting.
Drainage
Proper drainage is non-negotiable for successful heliconia growth. Using pots with multiple drainage holes is ideal. If dealing with a cachepot, ensure that the inner pot has drainage. You can also improve drainage through:
Gravel Layer: Adding a layer of gravel or small stones at the bottom of your pot can facilitate excess water drainage while preventing the potting mix from sinking down into the drainage holes.
Screening: Placing a piece of landscaping fabric or other breathable material over the drainage holes can help keep soil in while still allowing water to escape.
Taking these steps ensures your heliconia roots can breathe, absorb nutrients effectively, and flourish.
Planting Instructions
Once you’ve selected your heliconia and gathered your materials, it’s time to plant. Following these instructions closely helps establish a strong foundation for growth.
Prepare the Potting Soil
A quality potting mix not only provides nutrition but also ensures proper drainage and aeration. To prepare:
Moisten the Mix: Before planting, wet the potting mix thoroughly. A well-hydrated mix helps eliminate dry pockets that can shock the roots once transplanted.
Blend Additives: If desired, mix in some slow-release fertilizer and amendments such as perlite or coconut coir for enhanced drainage and moisture retention. This can improve the overall texture and nutrition of your potting medium.
Water
After setting the potting mix in your container, water it to help it settle and avoid air pockets. Gently pour water in a circular motion to ensure even saturation. The soil should feel damp but not waterlogged.
Fertilize
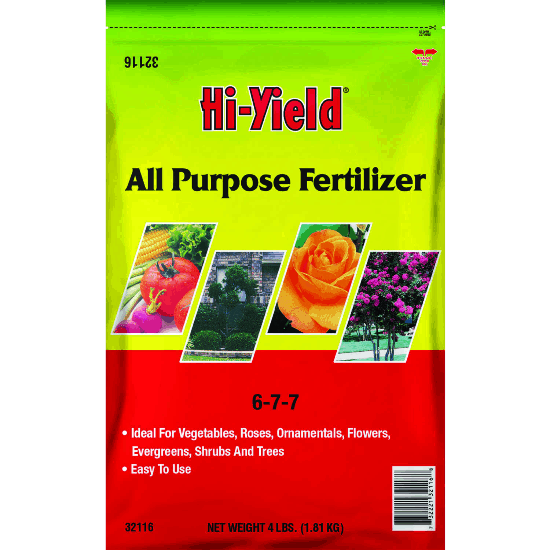
Adding fertilizer during planting helps provide nutrients as the heliconia establishes. Choose an appropriate organic or balanced fertilizer, and mix it well into the soil before planting.
Planting the Heliconia
Once your soil is ready, follow these steps to plant the heliconia:
Create a Hole: Use your hands or a trowel to dig a hole in the center of your pot, roughly the size of the plant’s root ball. Ensure the hole is deep enough to accommodate the entire root system.
Remove the Plant: Carefully take the heliconia out of its nursery pot. If the roots are tightly bound, gently massage them to break them apart without damaging them.
Position Your Plant: Set the heliconia in the planted hole and fill in soil around the sides, applying pressure gently to eliminate excess space. Ensure that the top of the root ball is level with the surface of the soil. An uneven surface can lead to water pooling, which can cause root rot.
Water Again: After planting, water thoroughly once again to help the potting mix settle around the roots. This will also provide moisture to the plant immediately after transplanting.
Care Instructions
Once planted, your heliconia will require ongoing care to thrive. Here are detailed care instructions:
Sun Exposure

Heliconias flourish in bright light, thriving with about 6-8 hours of sunlight daily. While they’re tropical plants enjoying warmth, they can be sensitive to direct, harsh afternoon sun, which may scorch their leaves. To provide optimal light conditions:
Choosing the Right Spot: An east- or west-facing window or shaded patio can offer the best light, filtering sunlight to reduce the risk of sunburn.
Rotate Plants: If your heliconia is indoors and positioned by a window, periodically rotate the pot every few weeks to promote even growth on all sides and prevent the plant from leaning toward the light source.
Stick to a Water Schedule

Establishing a consistent watering schedule is crucial. During the growing season (spring and summer), aim to keep the potting medium consistently moist without being soggy.
Watering Frequency: Depending on the humidity levels and temperature, you may need to water every 3-7 days. Check the moisture at soil level by sticking your finger into the soil 1-2 inches deep. If it feels dry, it’s time to water.
Watering Technique: Water at the base of the plant to avoid wetting the foliage, which can invite fungal issues. Ensure water drains freely from the base, allowing the root system to breathe.
Protect From Excessive Heat and Freezing Temperatures
Heliconias thrive at warm temperatures but can be sensitive to extremes. To ensure the plant’s well-being:
Heat Management: If you live in a particularly hot area, providing shade during the hottest parts of the day can prevent stress and damage. Using shade cloth or moving pots to shaded areas can help keep them cool.
Cold Protection: If you reside in cooler climates, consider bringing your pots indoors when nighttime temperatures fall below 50°F (10°C). Any sudden temperature changes can shock the plant, stunting growth or even causing damage. If leaving them outside, consider using frost cloths or coverings during cold snaps.
Repotting Instructions

As heliconias grow, they will fill up their pots and may begin to outgrow them. Repotting refreshes their environment and provides space for healthy growth.
Timing
The ideal time to repot heliconia is in early spring when the plant wakes from dormancy and begins to put on new growth. During this time, the roots can adapt to their new space, allowing for robust growth throughout the warmer months.
Choose a Larger Pot
When repotting, select a pot that is larger than the current one by at least 2-4 inches in diameter. Ensure the new container also has drainage holes to prevent any water retention issues.
Remove the Plant
Gently turn the pot sideways to release the plant, tapping the edges if necessary. Be cautious when pulling the plant out to minimize stress on the roots.
Inspect Roots
Check for any root diseases or rot. Healthy roots should appear white. Trim away any mushy or dark roots with clean shears. If root-bound, gently loosen some of the tightly packed roots for better growth in the new soil.
Transplant
Place the heliconia in the new pot and fill it with fresh potting mix. Ensure the root ball is positioned at the same soil level as before, and avoid burying the crown.
Water Well
After repotting, give the plant a thorough watering to help settle the soil, ensuring there are no air pockets around the roots.
Pests and Diseases

Like any plant, heliconias can be susceptible to pests and diseases. Regularly monitoring your plant can help catch issues before they become severe.
Common Pests
Spider Mites: Often appearing in dry conditions, these minute pests can lead to leaf discoloration and eventual leaf drop. Monitor for fine webbing on the undersides of leaves. Increasing humidity and using neem oil spray or insecticidal soap can help eradicate these pests.
Aphids: These small, green, or black insects suck sap from young growth, potentially leading to stunted growth. If you notice sticky residue on leaves (honeydew) or curled leaves, aphids may be present. They can often be treated with insecticidal soap or a strong spray of water.
Mealybugs: Recognizable by their white, cottony appearance, mealybugs can cause considerable harm to plants if not managed. Similarly, rubbing alcohol on a cotton swab directly on the bugs can kill them, or using systemic insecticides may be necessary for larger infestations.
Diseases
Root Rot: One of the most common diseases facing heliconias, root rot is caused by overwatering or insufficient drainage. To prevent this, ensure proper watering practices and pot drainage.
Fungal Infections: These infections can manifest as leaf spots or mold on leaves, primarily due to high humidity or poor airflow. Promoting airflow, ensuring dry foliage during watering, and using fungicide treatments can help manage this risk.
By staying vigilant and maintaining good care practices, you can minimize the impact of pests and diseases on your heliconia.
FAQ
How often should I fertilize my potted heliconia?
You should fertilize your heliconia every 4-6 weeks during the growing season with a balanced, slow-release fertilizer. Reduce the frequency during the winter months, as the plant’s nutrient demands will decrease while it is not actively growing.
Can I grow heliconia indoors?
Yes, heliconias can be grown indoors, but they’ll need a bright location with plenty of indirect sunlight. A south-facing window can work well, while you may need artificial grow lights in low-light situations.
What temperature is best for growing heliconia?
Heliconias thrive best in temperatures ranging from 60°F to 85°F (15°C to 29°C). They are not cold-hardy and should be protected from temperatures below 50°F (10°C) to avoid stress or damage.
How long will it take for my heliconia to bloom?
It can take the newly planted heliconia around one year or longer to bloom, depending on the environmental conditions, care, and variety. Once established, however, they may provide blooms continuously for several months during the growing season.
Can I propagate my heliconia?
Yes, heliconias can be propagated through division. When repotting mature plants, you can carefully separate the root clumps, ensuring each section has roots and foliage. Plant the divisions in appropriate potting mixes and provide the same care.
Final Thoughts
Growing heliconia in pots allows you the flexibility to enjoy these spectacular plants in various settings, whether on your patio, balcony, or living room.