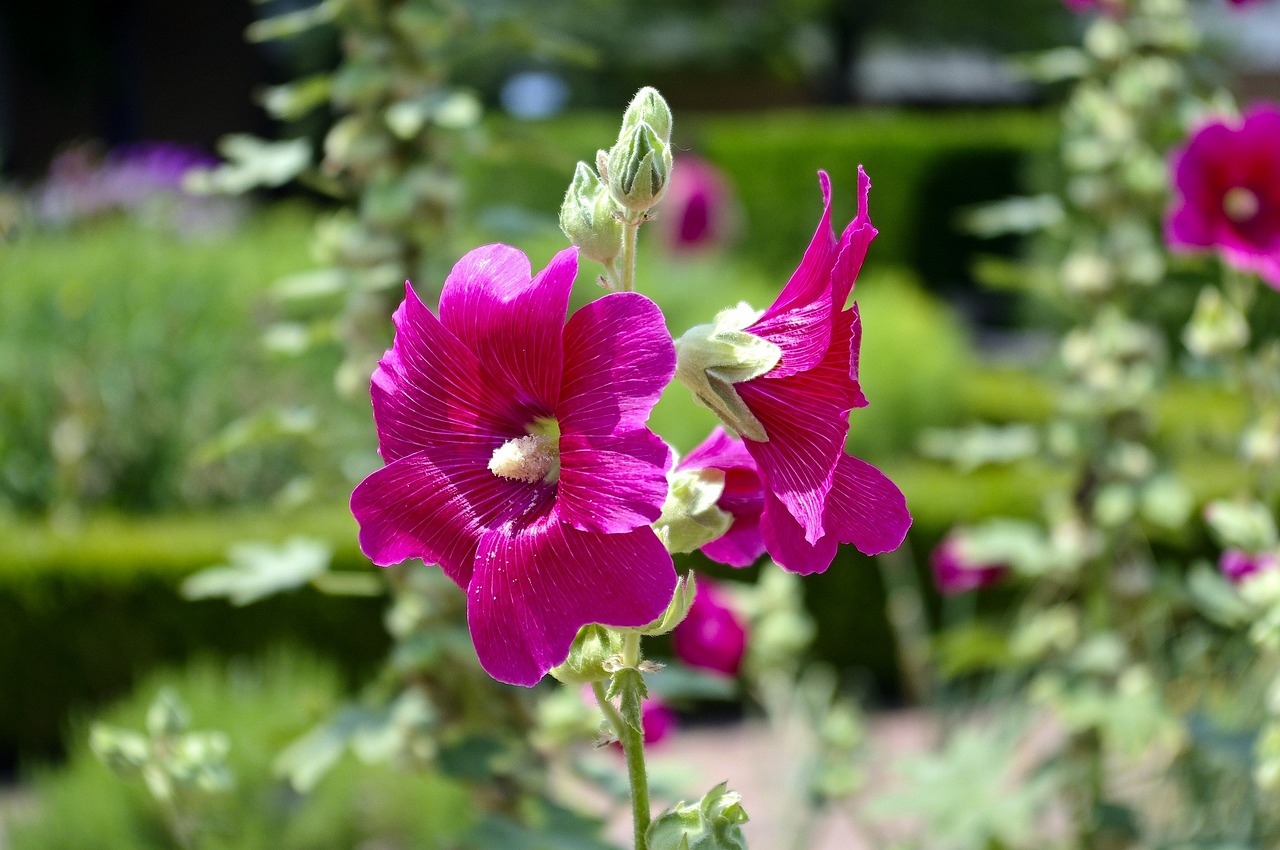
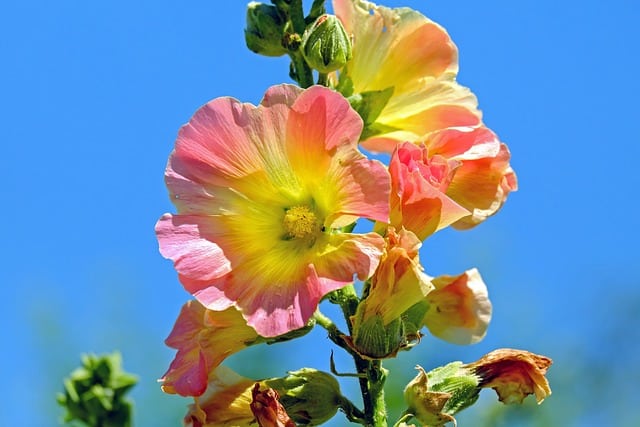
Hollyhocks are beloved garden plants, known for their towering flower spikes and vibrant colors. They can create stunning vertical interest, adding beauty and charm to any outdoor or indoor setting. Growing hollyhocks in pots or containers is an excellent choice for gardeners with limited space or for those who simply want to add a splash of color to their patios or balconies.
Choosing the Right Hollyhock Varieties
When selecting hollyhock varieties for container gardening, you’ll want to consider their height, bloom time, color, and resistance to disease. While all hollyhocks are beautiful, some specific varieties perform better in pots.
Alcea rosea ‘Chaters Double’: This variety is famous for its stunning double blooms, available in shades of pink, white, yellow, and burgundy. Growing up to 6 feet tall, it does well in large containers.
Alcea rosea ‘Majorette’: If you’re looking for a more compact variety that is perfect for patio gardening, the ‘Majorette’ hollyhock is your best bet. This plant typically reaches about 2 to 3 feet and boasts bright, large flowers.
Alcea rosea ‘Spring Compact’: As the name suggests, this variety stays smaller and is ideal for container gardening. It usually grows to about 1 to 2 feet, making it an excellent option for smaller pots or mixed arrangements.
Alcea rosea ‘Black’: This fascinating variety has dark, almost black blooms that can add a dramatic flair to your container garden. It grows tall like the traditional hollyhocks, so ensure you have a sturdy pot.
Keep in mind local climate conditions and the specific needs of the varieties you choose. Hollyhocks thrive in full sun and are typically biennial or short-lived perennials, so you may want to start seeds yearly for continuous flowering.
What You’ll Need
Planting hollyhocks in pots requires specific tools and materials. As you prepare, gather the following equipment and materials to set yourself up for success.
Equipment / Tools

Gardening Gloves: Protect your hands from dirt and irritants while making the planting process more comfortable.
Trowel: A hand trowel is essential for digging and transplanting. A sturdy, well-designed trowel can make planting smoother and less labor-intensive.
Watering Can or Hose: Select a watering can with a long spout if you’re working with smaller pots, making it easier to water directly without spilling. Alternatively, a gentle hose attachment can help reach all your potted plants easily.
Pruning Shears: Invest in a sharp pair of pruning shears for deadheading and trimming back growth. Regular maintenance promotes healthy plants and encourages further blooming.
Measuring Cup: Use a measuring cup or scoop for precise fertilizer measurements. This ensures that every plant receives the appropriate amount without the risk of over-fertilization.
Drill or Knife: A power drill or sharp utility knife is useful for making drainage holes in containers that lack them. Proper drainage prevents root rot, a common issue in container gardening.
Materials
Pots or Containers: Choose sturdy pots that can withstand the elements. Containers that are larger (12 to 20 inches in diameter) will allow for proper root development.
Potting Mix: A high-quality potting mix is crucial for container gardening. Choose a mix that is well-draining and enriched with organic materials. Avoid using garden soil, which can compact and suffocate the roots.
Fertilizer: Use a balanced, slow-release fertilizer or an organic option. An NPK ratio of 10-10-10 is a good choice to provide essential nutrients throughout the growing season.
Mulch: Organic mulch, such as shredded bark or straw, not only helps retain moisture but also suppresses weeds and adds organic material to the soil as it breaks down.
Choose and Prepare Containers
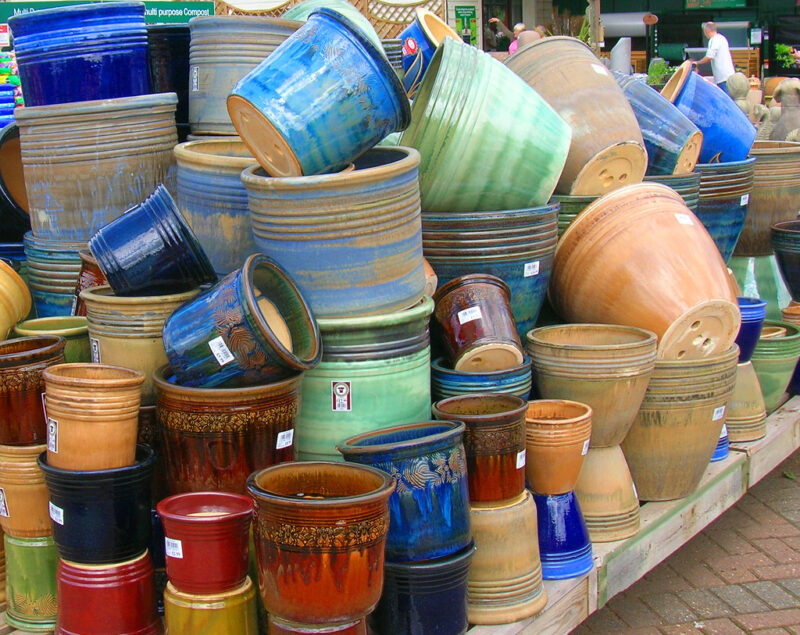
Choosing the right container for your hollyhocks is an integral part of their successful growth, affecting their health and scalability.
Type of Pot
Plastic Containers: Lightweight and durable, plastic pots are excellent for container gardening. They hold moisture effectively, which is beneficial for hollyhocks, which prefer evenly moist soil. Furthermore, they come in a myriad of colors and designs, allowing you to choose pots that match your style.
Clay Pots: Offering the advantage of breathability, clay pots allow excess moisture to escape. However, they can dry out faster than plastic, which requires a bit more dedication to watering. Additionally, clay pots can be quite heavy, especially when filled with soil, so you may want to consider this if you plan on frequently rearranging your garden.
Metal/Decorative Pots: Metal containers can add a rustic or modern look to your display. However, be mindful that they can heat up quickly in the sun, potentially harming root systems. Ensure that metal pots are well-drained to allow for heat dissipation and prevent root rot.
Size
The size of the container significantly impacts the growth potential of hollyhocks. A pot should ideally have at least 12 to 16 inches in diameter for the smaller varieties and up to 20 inches deep for taller types. The larger the pot, the more room the roots have to grow and the more moisture it will retain, which is valuable during hotter months.
Drainage
Effective drainage is critical for plant health in containers. Ensure that your chosen pots have multiple drainage holes at the bottom. If you’re using decorative pots without holes, consider placing the flower pot into a larger one filled with pebbles, or regularly monitor soil moisture levels to prevent drowning the roots.
Planting Instructions
Proper planting techniques will set your hollyhocks up for success and ensure healthier growth.
Prepare the Potting Soil
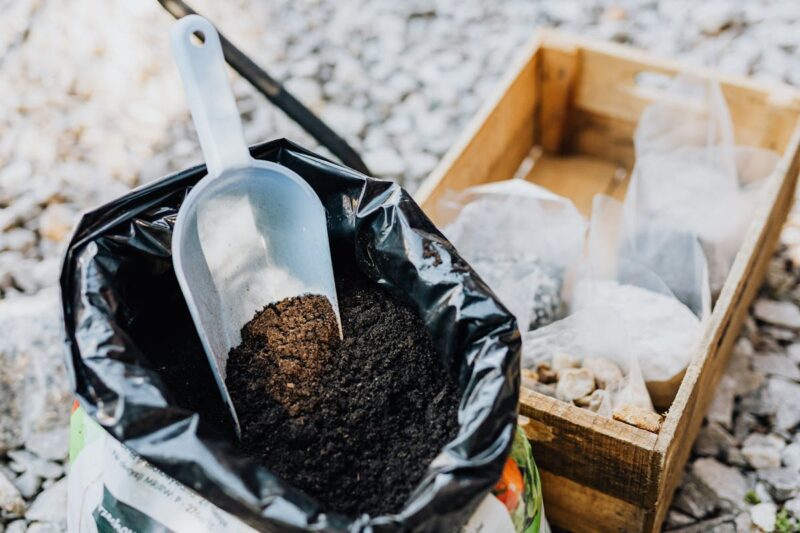
Begin by filling your container with a well-aerated potting mix. Mixing in equal parts of compost will offer additional nutrients. Aim for a soil texture that’s light yet retains enough moisture—this balance is essential for healthy root growth. To improve drainage, consider adding perlite or coarse sand to the soil mix, which provides space for air and prevents compaction.
Water
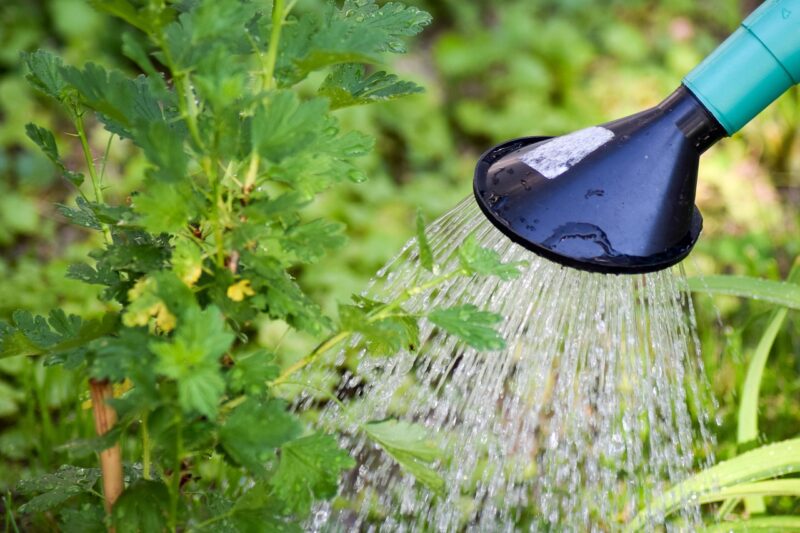
Before planting seeds or seedlings, water the potting mix until uniformly moist. This will help settle the soil and reduce air pockets that can impede root growth. When planting seeds directly, ensure the soil is moist but not overly saturated. Overwatering can drown seeds or young roots.
Fertilize
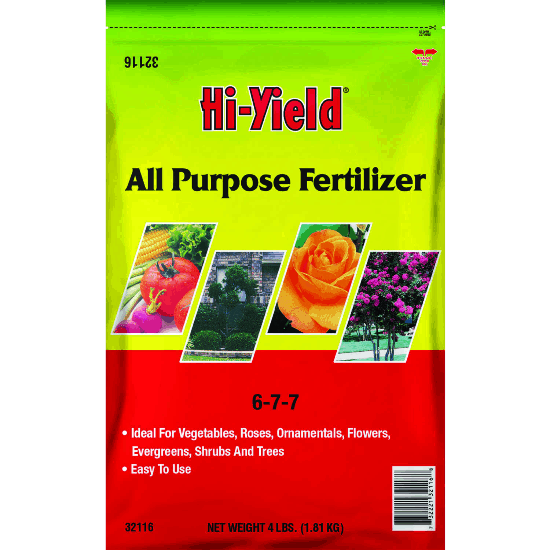
Incorporating a slow-release fertilizer will provide ongoing nourishment. Follow package instructions for dosage, as too much fertilizer can lead to nutrient burn. Consider supplementing with liquid fertilizer every few weeks during the growing season to further enhance growth and blooming.
Care Instructions
Once your hollyhocks are established, proper care will ensure they thrive and produce bountiful blooms.
Sun Exposure

Hollyhocks flourish in full sun, needing at least 6 to 8 hours of direct sunlight each day. Evaluate your outdoor space for the best spots and consider seasonal shifts; some locations may be sunny in summer but more shaded in winter. If your area is particularly warm, providing light afternoon shade can help reduce heat stress in the plants, as young seedlings can be sensitive to intense sunlight.
Stick to a Water Schedule

Establish a steady watering routine based on your climate and pot size. During the growing season, especially with the summer heat, watering may need to be done daily or even twice a day, particularly in hot and dry areas. In cooler seasons, check the moisture of the soil before watering—hollyhocks prefer moist soil but can suffer if it remains soggy. Consider using mulch to retain soil moisture and reduce evaporation.
Protect From Excessive Heat and Freezing Temperatures
In excessively high temperatures, consider relocating pots to a more sheltered space during peak sunlight. You can also use shade cloths to protect your plants without blocking too much light.
For locations that experience cold winters, protect your pots through insulation if they cannot be moved indoors. Wrap them in burlap or bubble wrap, and consider mulching heavily around the base of the plants. Pot plants are more prone to freezing because of their limited root insulation compared to ground-grown plants.
Repotting Instructions

As hollyhocks grow, they may outgrow their pots, necessitating repotting to ensure continued healthy growth.
Timing: Late spring is an ideal time to repot once your hollyhocks have emerged and are growing actively. This gives them enough time to adjust to their new environment before summer.
Choose a Larger Container: Aim for a pot that is at least 1 to 2 sizes larger than the current one. This allows plenty of room for the roots to expand and reduces the frequency of repotting.
Prepare New Soil: Fresh potting soil is essential for providing new nutrients. Mix in some compost to enrich the soil.
Remove the Plant: Gently slide the hollyhocks out of the old pot. If the plant is resistant, gently squeeze the sides of the container to loosen the soil while tapping the bottom to release the root ball.
Trim Roots: Inspect the roots; if you see any root circling or densely packed, trim them with sterilized shears. Pruning the roots encourages new growth.
Resettle the Plant: Place the root ball into the new pot and fill surrounding space with fresh potting soil. Packing the soil gently ensures stability without compacting it too tightly, which can hinder drainage.
Water Well: After repotting, water the plants thoroughly to help them establish in their new container.
Pests and Diseases

Hollyhocks, like all plants, can be susceptible to pests and diseases. Awareness and early action are vital.
Common Pests
Aphids: Small but mighty, these pests love to cluster on the soft new growth of hollyhocks, sucking sap and weakening the plant. Regularly inspecting plants is key. You can spray them with a strong jet of water to dislodge them or use insecticidal soap if the invasion is extensive.
Spider Mites: These tiny pests thrive in dry conditions and can quickly damage your hollyhocks. Affected plants might exhibit stippling on leaves or webbing. Increasing humidity around the plants can help deter them. For serious infestations, however, neem oil or insecticidal soap can provide effective control.
Fungal Infections: Keep an eye out for the signs of fungal infections such as leaf spots or white powdery mildew. To prevent these issues, ensure your plants have ample air circulation, and avoid overhead watering, which can promote fungal growth. If you notice any signs, prune affected areas and consider fungicides that are safe for edible plants if you’re growing hollyhocks for culinary uses.
FAQ
1. Can hollyhocks be grown as annuals? Yes, though hollyhocks are primarily biennial or perennial, you can treat them as annuals by sowing seeds each spring. This approach ensures ongoing blooms without the wait for longer-lived varieties to establish.
2. When is the best time to plant hollyhocks in pots? The optimum planting time for hollyhocks in pots is late spring, after the danger of frost has passed. If starting from seed, begin indoors around 6-8 weeks before the last expected frost date to give them a head start.
3. Are hollyhocks deer-resistant? Generally, hollyhocks are resistant to deer, though they may occasionally nibble on them if other food sources are scarce. Applying deer repellent or placing barriers around your plants can provide a safeguard if deer are a concern in your area.
4. How often should I fertilize my potted hollyhocks? Fertilize hollyhocks every 4 to 6 weeks during the active growth period. During dormancy in late fall or winter, you can suspend fertilization as the plants will not require it.
5. Can I save seeds from my hollyhocks? Yes! After flowering, allow seed pods to dry and mature on the plant. Once harvested, store seeds in a cool, dark place until you’re ready to plant them in the following season.
Final Thoughts
Growing hollyhocks in pots presents an excellent opportunity to experience the beauty of these stunning flowers, even in limited space. By selecting suitable varieties, using proper containers, and providing thorough care, you can successfully cultivate hollyhocks that will bloom beautifully throughout the growing season.