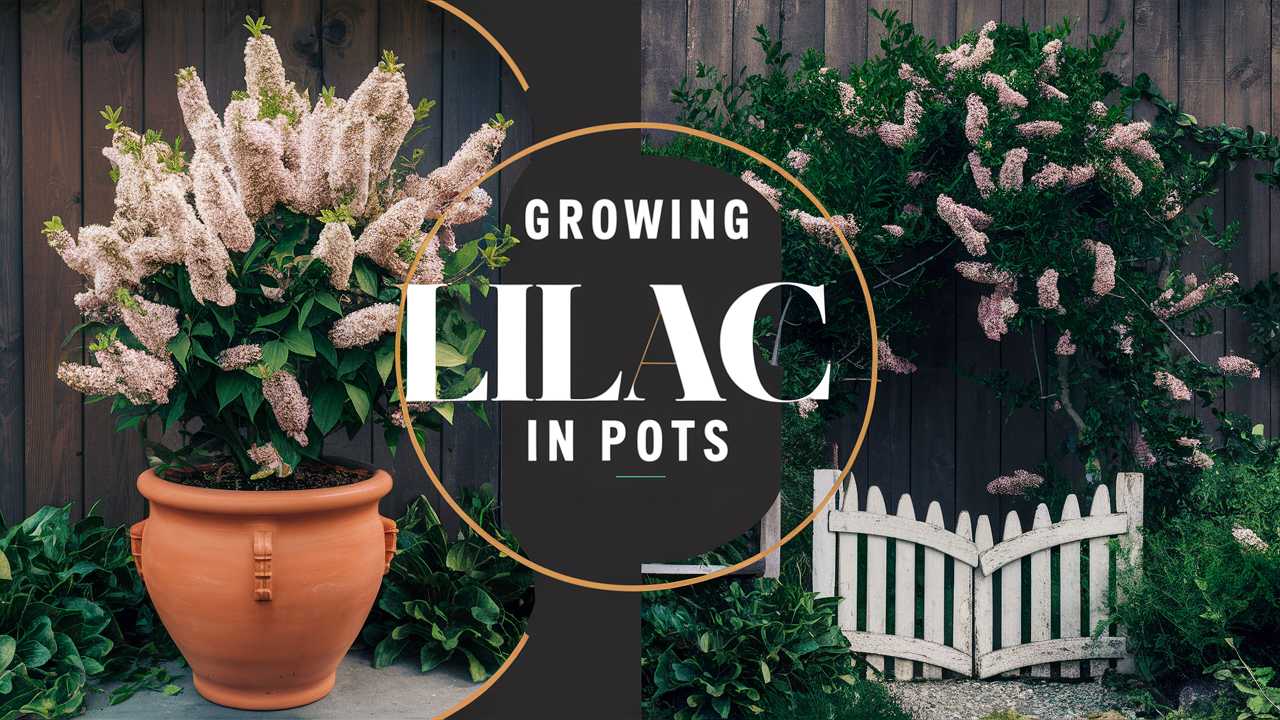
In this detailed guide, we will explore everything you need to know to successfully grow lilacs in containers, from selecting the right varieties to care and maintenance.
Choosing the Right Lilac Varieties
Selecting the correct lilac variety is vital to ensure successful growth in pots. Not all lilacs are well-suited for container life due to their size and growth characteristics. Here’s a deeper look into which varieties to consider, ensuring that you’ll find one that fits your space and aesthetic.
Dwarf Varieties: Dwarf lilacs are ideal for pot cultivation. Varieties such as Syringa meyeri (Meyer lilac) grow to about three feet tall and bloom beautifully, making them manageable for container gardening. Another excellent choice is Syringa patula (Palibin lilac), which stays compact and produces lovely lilac-colored flowers.
Compact Cultivars: For those who desire the classic large blooms and scent of traditional lilacs, smaller cultivars offer an option. ‘Miss Kim’ is a well-known compact version of the common lilac (Syringa vulgaris) with a charming fragrance and abundant bloom. ‘Blue Skies’ is another compact selection, showcasing stunning blue-purple flowers without taking up too much space.
Hardiness Considerations: Ensure that the lilac variety you select is suited to the USDA hardiness zone where you live. Most lilacs are hardy in zones 3-7, but it’s essential to check specific variety recommendations to prevent disappointment.
Growth and Maintenance: Consider the eventual size and growth habit of the lilac you choose. Smaller varieties will not only fit better in containers but will also require less pruning, making them easier to manage for novice gardeners.
By thoughtfully selecting a lilac variety that aligns with your gardening goals and space limitations, you set the stage for a healthy, flourishing plant.
What You’ll Need
Getting started with container lilac gardening requires a few essential tools and materials tailored to adequately support the health and growth of your lilacs. Below is an expanded look at what you’ll need to gather.
Equipment / Tools

Planting Trowel: A sturdy planting trowel helps with digging holes in the soil and transferring plants into containers efficiently.
Pruners or Shears: They are necessary for trimming back any unwanted growth and for deadheading flowers to encourage new blooms.
Garden Gloves: Protect your hands while cultivating and caring for your lilacs, particularly when dealing with soil or pruning.
Watering Can or Hose: A watering can is perfect for gentle watering without overwhelming your plants. If you use a hose, be sure it has a spray attachment to deliver water more subtly.
Soil Fork or Spade: Useful for mixing potting soil and planting amendments, ensuring your soil is aerated and ready for planting.
Moisture Meter: An optional but helpful tool for monitoring soil moisture levels, preventing both overwatering and underwatering.
Materials
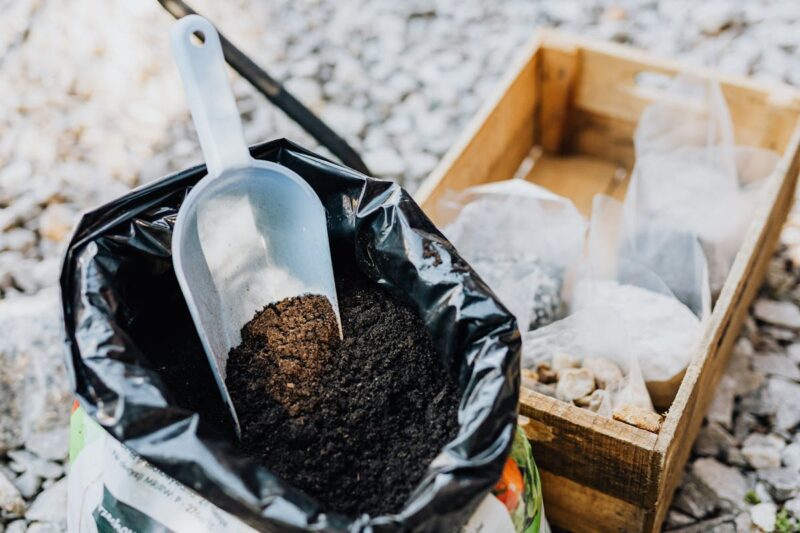
Quality Potting Soil: Select a specialized potting mix designed for flowering plants. A light, well-draining blend will support root development and prevent waterlogging.
Organic Mulch: Using organic mulch like wood chips or straw helps conserve moisture, regulate soil temperature, and suppress weeds around your lilacs.
Fertilizer: Gradual-release fertilizers or those formulated specifically for flowering plants will support healthy blooms and robust root systems. Look for fertilizers that contain a balanced ratio of nitrogen, phosphorus, and potassium.
Pots or Containers: Choose sturdy ceramic, plastic, or clay pots that suit your aesthetic. Make sure they are large enough for healthy growth—at least 18-24 inches in diameter for most lilac varieties.
By gathering these tools and materials, you’ll be well-prepared to embark on your lilac-growing journey, setting yourself up for success.
Choose and Prepare Containers

Proper container selection and preparation are crucial steps in ensuring your lilacs thrive. Let’s delve deeper into the specifics of choosing and preparing containers effectively.
Type of Pot
Plastic Pots: These functional pots are lightweight and relatively inexpensive. They retain moisture well but can also heat up quickly in direct sunlight, so be aware of your watering needs. Plastic pots are excellent for beginners because they’re portable and easy to manage.
Clay Pots: While more durable and aesthetically pleasing, clay pots are heavier and can wick moisture away quickly. They provide greater air exchange, contributing to healthier root systems. However, this means regular watering is essential to prevent the plant from drying out. For optimal growth, consider using clay pots with a protective lining if you’re in a particularly dry climate.
Ceramic and Decorative Containers: While attractive, ensure they have proper drainage holes. Look for containers with vibrant designs or colors that complement your outdoor space while serving a functional purpose.
Size
The size of the pot is imperative for lilacs. Choose pots that can accommodate root growth. For most lilac varieties, start with 18-24 inches in diameter and 14-18 inches deep. These dimensions provide sufficient space for roots while balancing the size of the plant above the soil.
Drainage
Good drainage is fundamental to successfully growing lilacs in pots. Ensure that your container has proper drainage holes at the bottom, as stagnant water can lead to root rot, a common issue for container plants.
If Using No-Drainage Pots: While it’s generally not recommended, you can use a no-drainage pot by adding a layer of gravel or small stones at the base to facilitate drainage. Keep a close watch on soil moisture to prevent rot.
Saucers: If you place pots on a surface that absorbs water, consider using saucers to catch excess water and prevent damage to surfaces while ensuring the soil does not stay drenched.
Preparing your containers meticulously sets the foundation for healthy lilacs, allowing them to flourish with the right conditions for growth.
Planting Instructions
Now comes the exciting part: planting your lilacs! This section covers vital steps and techniques to ensure that your little lilac garden gets off to a great start.
Prepare the Potting Soil
The quality of the potting soil can make a significant difference in the health of your lilac. Here’s how to prepare the soil effectively:
Mix Composition: Use a high-quality potting mix designed for flowering plants. You can enhance its performance by incorporating perlite or vermiculite to improve drainage. Mixing in compost or well-rotted manure will provide essential nutrients to support healthy root and flower development.
Moisture Content: Before planting, moisten the potting mix lightly. It should be damp but not soggy. This helps minimize transplant shock and allows the roots to establish more seamlessly.
Water
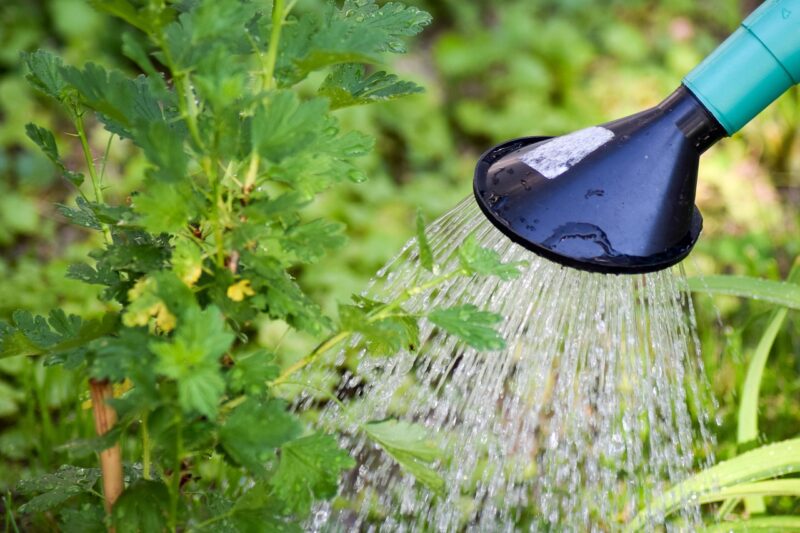
Once you’ve planted your lilac in its container, a thorough and careful watering is essential. Here’s how to go about it:
Give It a Good Soaking: Water the lilac deeply until you see water draining from the bottom of the pot. This ensures that the entire root system receives adequate hydration.
Establish a Routine: After planting, check the moisture regularly. Initially, you can water every few days. Monitor the soil—if it’s drying out too quickly, consider adjusting your watering schedule.
Fertilize
Lilacs are moderate feeders and benefit from being fertilized. Here’s how to ensure your lilac gets the right nourishment:
Type of Fertilizer: Use a slow-release fertilizer that contains balanced nutrients, such as 10-10-10 or a flower-specific mix that emphasizes phosphorus.
Application Schedule: Apply the fertilizer in early spring when new growth is starting. Following the manufacturer’s guidelines on quantity ensures you don’t over-fertilize, which can harm the plant.
Top-dressing: You can also apply a layer of compost on top of the soil annually to enrich the root zone as the plant matures.
By planting effectively and providing tailored care, you set the stage for abundant flowering and vibrant growth throughout the growing season.
Care Instructions
Caring for lilacs in pots is a fulfilling process that involves regular attention to their needs. Here are critical aspects of lilac care to keep in mind.
Sun Exposure

Lilacs are sun-loving plants and thrive best in full sunlight, requiring at least six hours of direct sun each day. Positioning your lilacs thoughtfully will optimize their growth potential.
Best Locations: Plant your containers in sun-drenched areas like south or southeast-facing patios, balconies, or yards.
Provide Afternoon Shade in Extremely Hot Climates: If you live in a region with blazing afternoons, consider placing your lilacs where they receive shade during the hottest part of the day to protect them from excessive heat stress.
Rotate Containers: If feasible, regularly rotate your potted lilacs during the growing season to ensure even light exposure around the plant; this helps maintain balanced growth and beautiful blooms.
Stick to a Water Schedule

Consistency in watering is vital for container plants, particularly in the volatility of outdoor conditions.
Checking Soil Moisture: Invest in a moisture meter to help gauge when it’s time to water. Take the guesswork out by checking the soil’s moisture level versus sticking to a strict schedule.
Watering Techniques: Water deeply but less frequently rather than giving light, frequent waterings. This encourages deep root penetration, which leads to a more resilient plant.
Signs of Water Stress: Watch for signs of underwatering (drooping leaves, dry soil) or overwatering (yellowing leaves, mushy roots) and adjust your watering practices accordingly.
Protect From Excessive Heat and Freezing Temperatures
Container gardening brings additional temperature challenges that need addressing:
Heat Protection: During hot spells, watch for signs of heat stress, such as wilting or brown leaf edges. If temperatures soar, provide temporary shade with garden cloth or move pots to a less intense sun location.
Winter Care: In colder climates, prepare your lilacs for winter by either bringing pots into an unheated garage or wrapping them in burlap to insulate against freezing temperatures. Alternatively, sink pots into the ground to help shield roots from severe cold.
Mulching: In winter, apply organic mulch around the base of the pots to insulate the roots, retaining some warmth and moisture.
By diligent care and attention to environmental changes, your lilacs can thrive and provide lovely blooms season after season.
Repotting Instructions

Repotting lilacs is necessary for maintaining their health and vigor as they grow. Here is the step-by-step process for effectively repotting your lilacs:
Timing
Best Timing for Repotting: The optimal time to repot your lilacs is early spring right before the new growth starts or in the fall after they have completed blooming. Avoid doing this during extreme heat or when the plant is actively working on new flower sets.
Assessing Need for Repotting: Signs that your lilac needs repotting include roots growing out of the drainage holes, stunted growth despite appropriate care, or a lack of blooms.
Choose a Larger Pot
Selecting a New Container: Move to a pot that is 2-4 inches wider and deeper. The size should allow for continued root growth without unnecessary confinement.
Gentle Removal
Extracting the Plant: Carefully remove the lilac from its existing pot. Loosen the soil around the root ball gently, taking care not to damage fragile roots. If the soil is compacted, you may need to run a spade around the sides to free it.
Transplant Carefully: Place the root ball in the center of the new pot, then backfill with fresh potting mix, ensuring the plant sits at the same depth as before.
Fill with Fresh Soil
Completing the Potting: Fill around the root ball with fresh potting soil, pressing gently to eliminate large air pockets but taking care not to compact it too tightly.
Water Well: After repotting, water your lilac thoroughly until you see water escaping from the drainage holes. This helps settle the soil around the roots.
Allow Time to Adjust: After repotting, give your lilac a couple of weeks to acclimatize to its new container before resuming any fertilization.
Repotting, while requiring some effort, ensures your lilacs have enough space and nutrients for continued growth, blooming, and lush foliage.
Pests and Diseases

Though lilacs are generally robust, like all plants, they can encounter pests and diseases. Proactively managing these worries will help keep your lilacs healthy and thriving.
Common Pests
Aphids: Small green or black soft-bodied insects may cluster on new growth and flower buds. They suck sap from the plant, leading to weakened foliage and distorted growth. Control infestations using a vigorous spray of water or insecticidal soap for effective treatment.
Spider Mites: Spider mites are tiny, spider-like pests that thrive in dry conditions. They create fine webs, often found on the undersides of leaves, causing yellowing leaves. Increasing humidity can help repel them; introducing ladybugs is another natural option.
Scale Insects: These pests can cause leaf wilting and nutrient deficiency. Sap-sucking scale can be controlled by applying horticultural oil or insecticidal soap to eradicate them effectively.
Common Diseases
Powdery Mildew: This fungal disease is characterized by white, powdery spots on leaves caused by high humidity or overcrowded conditions. Improve air circulation around your lilac; organic fungicides can also be used as a preventative measure.
Root Rot: Overwatering can lead to root rot, resulting in mushy, brown roots. Ensure your pots have drainage holes, and monitor your watering routine closely. If you suspect root rot, remove the plant from the pot, trim away infected roots, and replant in fresh soil.
Prevention Strategies
Healthy Environment: Regularly inspect your lilacs for signs of pests or diseases and take action as soon as you spot an issue.
Good Cultural Practices: Proper watering, adequate sunlight, and maintenance through pruning and fertilizing will lead to healthier plants that are better able to resist pests and diseases.
By incorporating preventative measures and remaining vigilant, you will be able to keep your lilacs healthy and minimize pest and disease issues.
FAQ
Let’s address some frequently asked questions to clarify common concerns of lilac enthusiasts.
Can lilacs be grown indoors in pots?
Yes, while lilacs generally thrive outdoors, they can be grown indoors. Select a dwarf variety and place it in a sunny window that receives ample light. Since indoor conditions may not replicate outdoor climates, bloom frequency and vigor may reduce.
How often should I water my potted lilac?
Watering frequency depends significantly on environmental conditions. In general, ensure the top inch of soil is dry before watering again; this may be every few days during hot weather. Monitor moisture levels closely, as overwatering can lead to root rot.
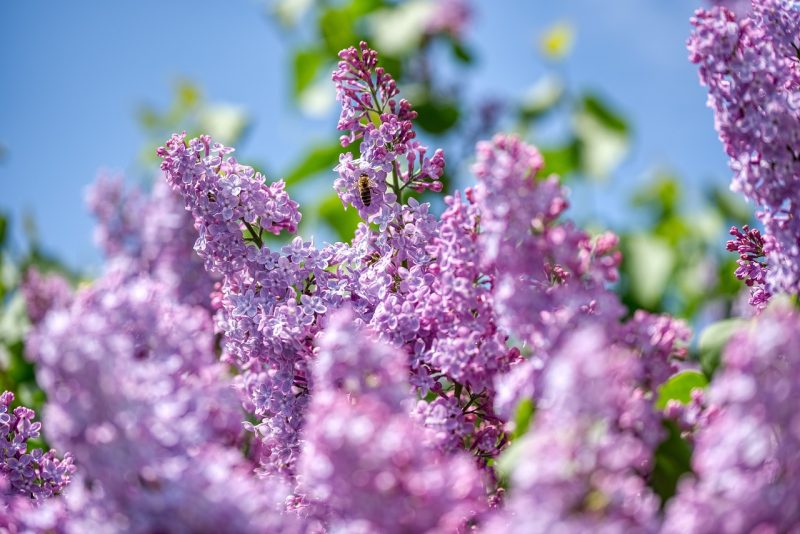
When do lilacs bloom?
Lilacs typically bloom in mid-spring, often between late March and early June, depending on your location and the specific variety. After the blooms open, you can expect them to last several weeks, bringing delightful fragrance and beauty.
How do I prune my lilacs?
Pruning lilacs should occur immediately after flowering to encourage new growth and maintain their shape. Remove dead or overcrowded branches, cutting back just above healthy buds to promote vigorous growth. Avoid excessive pruning, as lilacs bloom on old wood from the previous seasons.
Final Thoughts
Growing lilacs in pots is a satisfying pursuit that allows you to enjoy these classic beauties, even in limited spaces. With a little knowledge and commitment, you can cultivate healthy lilacs right on your patio or balcony.