In this guide, we will explore everything you need to know about growing morning glories in pots, from choosing the right varieties to maintaining healthy plants.
Choosing the Right Morning Glory Varieties
To kick-start your morning glory journey, it’s vital to select the right variety that best suits your gardening needs. Morning glories belong to the Convolvulaceae family and include a multitude of species and cultivars, each with unique aesthetic traits and growth habits. Here are some popular varieties to consider:
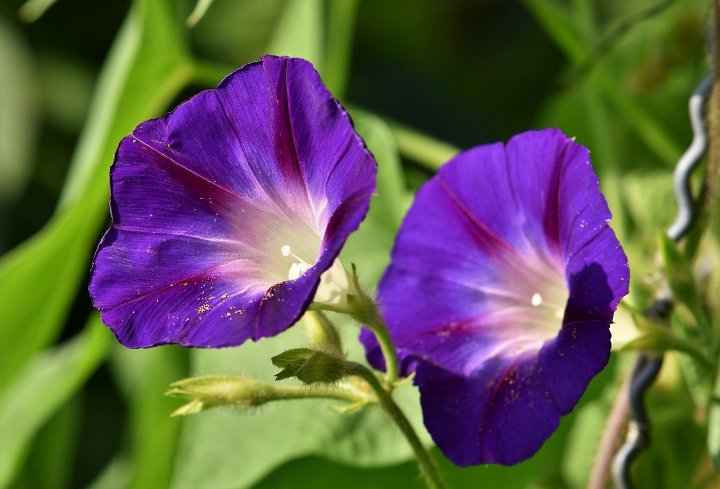
Ipomoea tricolor (Heavenly Blue): Renowned for its stunning sky-blue flowers, this variety is a favorite among gardeners. It typically grows between 6 to 12 feet, making it a fantastic choice for draping over trellises or fences.
Ipomoea purpurea (Grandpa Ott’s): With deep purple blossoms adorned with pink highlights, this heirloom variety is not only beautiful but also hardy. It offers vigorous growth and can reach up to 10 feet tall.
Ipomoea batatas (Sweet Potato Vine): While usually grown for its decorative foliage, this variety also produces charming flowers. Its leaves come in a range of vibrant colors, including green, purple, and bronze.
Ipomoea lobata (Spanish Flag): Unique for its two-toned blooms that transition from yellow to red, this variety displays a more novel appearance and grows about 3-10 feet long.
What You’ll Need
Getting started with morning glories requires some essential equipment and materials to ensure a successful planting experience.
Equipment / Tools

Before planting, gather these tools to aid in the process:
Trowel: A small hand trowel will be invaluable for digging, planting, and amending soil. Look for one with a comfortable grip to ease repetitive digging tasks.
Watering Can or Hose: A watering can is ideal for pouring water directly into pots, especially for smaller containers. A hose with a gentle spray attachment works well for larger container setups.
Pruning Shears: Maintaining your plants is crucial for optimal growth and flowering. Pruning shears allow for accurate trimming to promote bushier growth and remove dead leaves or spent flowers.
Ruler or Measuring Tape: When planting seeds or seedlings, measuring depth and spacing is crucial for proper plant development.
Gloves: Protecting your hands while working with soil and plants helps prevent skin irritations and injuries.
Materials
In addition to the tools, ensure you have the following materials handy:
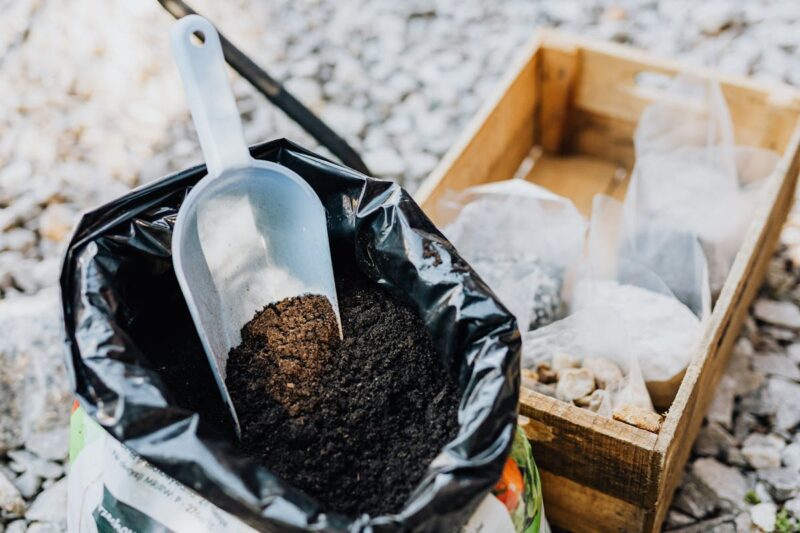
Potting Mix: A high-quality potting mix is essential for achieving healthy morning glories. Look for one enriched with organic matter and nutrients. Avoid garden soil, as it can compress and inhibit drainage.
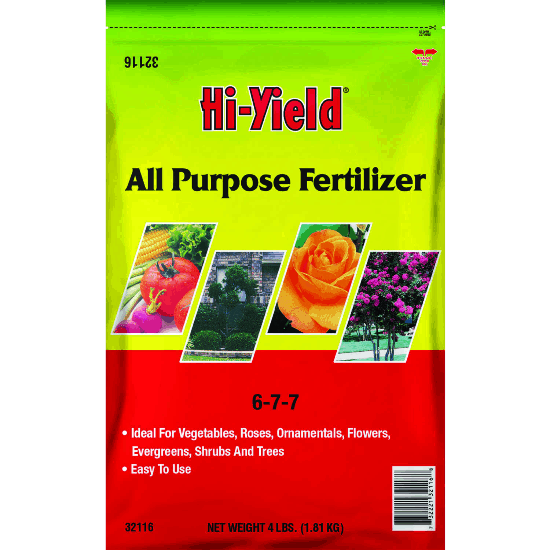
Slow-release Fertilizer: This type of fertilizer gradually releases nutrients, providing your morning glories with a consistent supply of nourishment over time. Look for a balanced formula, such as 10-10-10 (NPK – Nitrogen, Phosphorus, Potassium).
Mulch: Organic mulch, such as pine bark or straw, can help retain moisture in the soil, regulate temperature, and suppress weeds around your pots.
Choosing and Preparing Containers

The right container plays a significant role in the growth of your morning glories. Here’s an expanded view of what to consider when selecting and preparing your pots.
Type of Pot
Plastic:
Plastic pots are user-friendly — they are lightweight and typically less expensive than clay alternatives. They are excellent at retaining moisture, which can be beneficial for morning glories needing consistent watering. However, if you live in a hot climate, consider moving them to a more shaded area during peak heat hours or using light-colored pots to minimize heating effects.
Clay:
Clay pots are traditional and allow for better air circulation thanks to their porous nature. This feature can promote healthier root development. However, remember that clay pots can dry out faster, so you’ll need to monitor watering more closely to avoid stress on your plants.
Size
When selecting a pot, size matters. Morning glory plants have extensive root systems; hence, a pot that is at least 12 inches in diameter is recommended. A larger pot not only allows for more root growth but also helps retain moisture over longer periods, making mid-summer care easier.
Drainage
Good drainage is invaluable for keeping your morning glories healthy. Ensure that your pots come equipped with drainage holes to prevent water accumulation at the bottom. If you’re using decorative pots without holes, consider layering stones or gravel at the bottom to act as a barrier, allowing excess water to escape while preventing soil from washing away.
Planting Instructions
With everything prepped, it’s finally time to plant your morning glories! Here’s how to do it effectively:
Prepare the Potting Soil
Start by preparing your potting mix with a slow-release fertilizer. Mix these thoroughly to ensure the fertilizer is evenly distributed throughout the soil. It is advisable to follow the recommended ratios because too much fertilizer can lead to unfavorable growth conditions.
Fill your pot about three-quarters full with the prepared mix. Avoid skimping on soil depth, as morning glories require space for root expansion.
If planting seeds, create an indentation in the center of the potting mix that’s about an inch deep. For seedlings, create a small hole just big enough to accommodate the root ball.
Water
Before you begin the planting process, it’s important to pre-moisten your potting soil. Spray or water the soil lightly until it is damp but not saturated. This helps the seeds or seedlings establish roots more effectively.
For seeds, it’s beneficial to soak them overnight in water prior to planting. This soaking can enhance germination rates by softening the seed coat.
When planting seedlings, gently remove them from their original containers, taking care not to disturb their root systems. Place them into the indentation you created and cover them lightly with soil.
Fertilize
For established seedlings, applying more slow-release fertilizer into the top layer of soil can provide long-lasting, nutrient-rich conditions for growth. If using seeds, wait a few weeks after germination before beginning a fertilizer regimen, as too much can hinder early development.
Care Instructions
Your morning glories will require ongoing care to ensure they thrive. Here are some key care tips to follow:
Sun Exposure

Morning glories flourish best under full sunlight conditions. Aim for at least 6-8 hours of direct sunlight each day; this exposure induces vigorous growth and promotes the production of colorful blooms. If you find your plants seem to be stretching toward the light or blooming sparsely, it may be a sign they aren’t receiving enough sun.
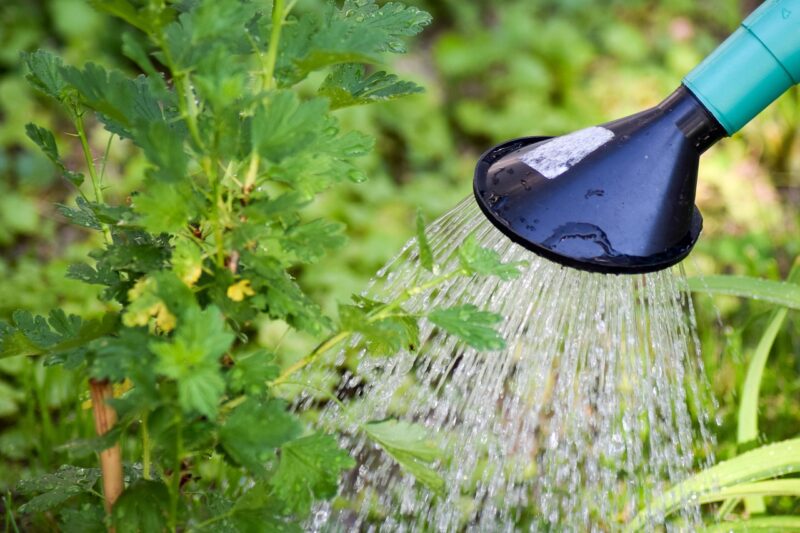
Stick to a Water Schedule

Establishing an effective watering schedule is vital. Generally, watering once the top inch of soil feels dry is an excellent guideline. Morning glories prefer deep watering, soaking the soil thoroughly so that the roots can access moisture effectively. Ensure excess water does not pool in the saucer beneath the pot, as this can lead to root rot.
During particularly hot days, your morning glories may need watering every day, while cooler, rainy days will require you to scale back. During periods of high humidity, you may also reduce watering to avoid sogginess.
Protect From Excessive Heat and Freezing Temperatures
Morning glories can thrive in warm temperatures, but excessive heat can stress the plants. Consider setting up temporary shade cloths or moving pots to areas with afternoon shade if temperatures soar above 90°F (32°C).
Conversely, morning glories can be sensitive to frost and freeze. If you live in a region with cool winters, keep an eye on forecasted frost dates and consider bringing pots indoors or wrapping them in protective materials such as burlap or frost blankets.
Repotting Instructions

As morning glories flourish and grow, they may eventually outgrow their containers. Here’s how to approach repotting when needed:
Select a Larger Container: Choosing a pot that is 2 inches wider in diameter than the current one allows for additional root development and space.
Gently Remove the Plant: Carefully extract your morning glory from its original pot. Gently loosen the root ball to avoid damage, especially if the roots are tightly coiled.
Add Fresh Potting Mix: Pour fresh potting soil into the bottom of the new pot. Place the morning glory in the center of the pot, then fill around the edges with more potting mix.
Water Thoroughly After Repotting: Once repotted, water the plant deeply to settle the soil around its roots. Check for drainage to ensure water flows freely from the bottom.
Repotting should generally be done in the spring when the plant enters its active growing phase.
Pests and Diseases

Monitoring your morning glories for pests and diseases is paramount to ensuring they remain healthy. Below are some common threats to be vigilant of:
Pests
Aphids: These minute green or black insects may cluster on the undersides of leaves and suck out sap, which can hinder growth. If you notice an infestation, spraying them off with water or applying insecticidal soap can help.
Spider Mites: Particularly problematic in hot, dry conditions, spider mites produce fine webbing and can cause leaf discoloration. Increase humidity around your plants by misting or using a pebble tray to deter them.
Whiteflies: These small flying insects can be found on the undersides of leaves and can drain vitality from your plants. Sticky traps can help monitor their presence, and insecticidal sprays can control outbreaks.
Diseases
Morning glories, like all plants, can be susceptible to various diseases, particularly if moisture levels are not controlled. Common issues include:
Powdery Mildew: A fungal disease that manifests as a white powdery coating on leaves, typically indicating too much humidity or inadequate air circulation. To combat it, ensure proper spacing between plants and avoid overhead watering. Treat infected plants with fungicidal sprays as needed.
Root Rot: A chronic issue stemming from oversaturation, root rot results in wilting and yellowing leaves. To manage this, drain your pots thoroughly and avoid watering until the top layer of soil dries.
Regularly inspecting your plants and ensuring proper growing conditions can mitigate many of these potential problems.
FAQ
To address common concerns and clarify myths surrounding morning glories, here are some frequently asked questions:
How long does it take for morning glory seeds to germinate?
Seeds generally germinate in 7-14 days, depending on environmental conditions. Warm, moist soil and appropriate sunlight can expedite the process.
Can morning glories grow in partial shade?
While morning glories can tolerate partial shade, they will struggle to produce abundant blooms. Aim for direct sunlight for at least 6 hours to ensure vibrant flower production.
Do I need to prune my morning glories?
Pruning is optional but beneficial for promoting bushier plants and enhancing flower production. Regularly trim any dead or wilting leaves and spent flowers to encourage new growth and maintain an attractive appearance.
How often should I fertilize my morning glories?
A balanced, slow-release fertilizer should be applied every 6-8 weeks during the growing season for optimal plant health. Avoid excessive fertilization, as this can lead to poor blooming and unhealthy growth.
Final Thoughts
Growing morning glories in pots presents a wonderful opportunity to enjoy their charm and beauty in even the smallest of spaces. By selecting the right varieties and providing proper care, you can create a stunning display of these delightful flowers that will not only please your eyes but also attract pollinators and add cheer to your environment.