
As the warm days of summer fade into the cooler evenings of fall, October presents a golden opportunity for gardeners in USDA Zone 9 to enhance their home gardens. This region, known for its mild winters and extended growing season, allows for a variety of crops to flourish during this transitional time.
Garlic
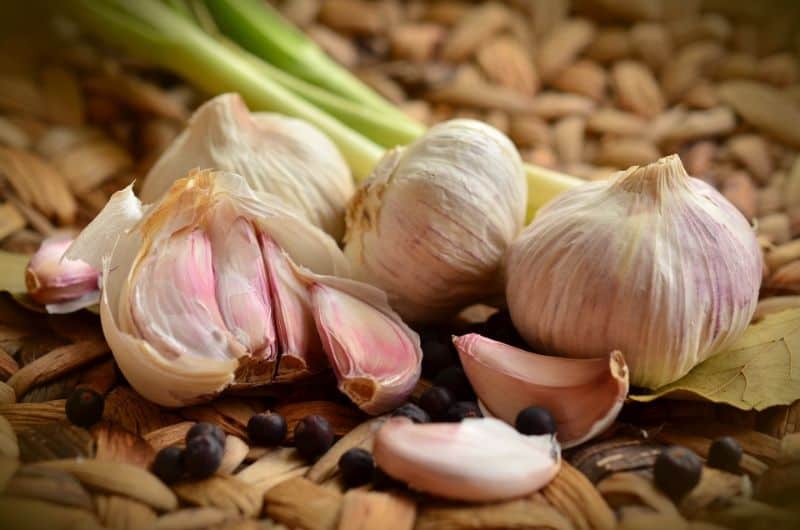
October is perhaps the most critical month for garlic cultivation in Zone 9. This is the time when you can plant both softneck and hardneck varieties, ensuring a robust crop come summer. Garlic thrives in well-drained soil rich in organic matter, so before planting, enrich your garden beds with compost or well-rotted manure.
When planting, space your garlic cloves—pointed end up—approximately six inches apart, with rows about one foot apart. This spacing allows for air circulation, which helps prevent disease. A key tip is to plant your cloves at a depth of two to three inches; this depth provides them with insulation from cooler soil temperatures while encouraging good root development.
Water your garlic adequately after planting to help settle the soil around the cloves. However, avoid over-watering, as garlic is susceptible to rot if the soil remains soggy. Mulching with straw or shredded leaves can help preserve moisture, regulate soil temperature, and suppress weeds during the winter months.
One unique consideration for growing garlic in Zone 9 is to select varieties that are both high-yielding and disease-resistant, especially as humid conditions can promote fungal issues. Varieties such as ‘California Early’ and ‘Spanish Roja’ are great options for this climate. As the garlic establishes itself, resist the urge to harvest too early; wait until the lower leaves turn brown, typically around mid-summer, for optimal flavor and potency.
Peas
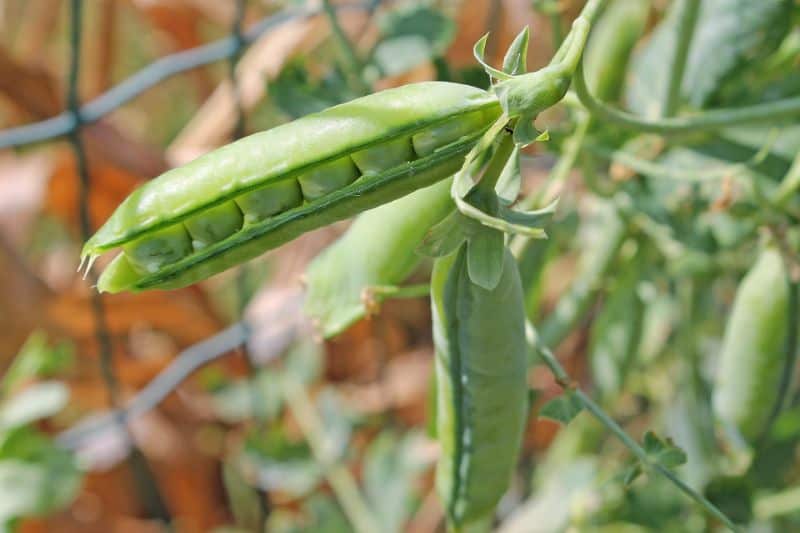
October is also a prime time to plant peas in Zone 9. Cool crops like peas thrive in colder temperatures, making the fall planting advantageous as they can be sown directly into the soil as soon as it cools down. Sugar snap peas and snow peas are particularly well-suited for this climate, and they not only offer delightful crunch and sweetness but also contribute vital nitrogen back into the soil through their root nodules.
To plant peas, choose a sunny spot in your garden and prepare the soil by loosening it to a depth of about twelve inches and incorporating organic compost to enhance soil structure. For optimal growth, sow the seeds one inch deep and about two inches apart. Given their tendency to climb, consider installing a trellis or using netting for support, as this encourages better airflow around the plants and maximizes harvesting ease.
While peas require consistent moisture, be cautious of overwatering; a light soak is preferred over saturation. Soil should remain damp but not waterlogged. As your peas begin to sprout, mulch around the base to help retain soil moisture and deter weeds.
One fantastic tip for growing peas in October is to practice succession planting. By staggering your seed planting every two weeks, you can enjoy a continuous harvest throughout the season, ensuring that your garden remains productive as summer fades into fall.
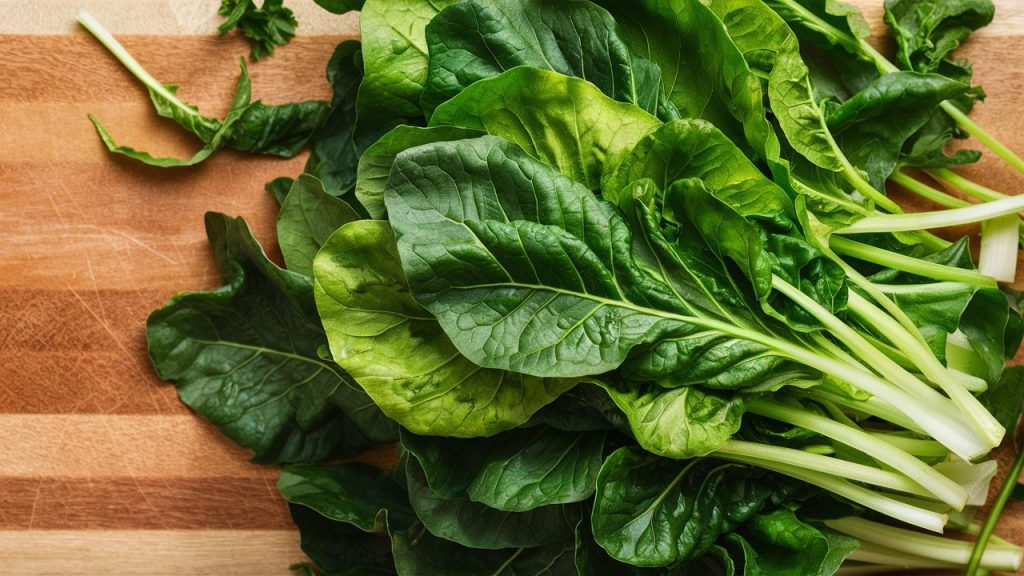
Spinach
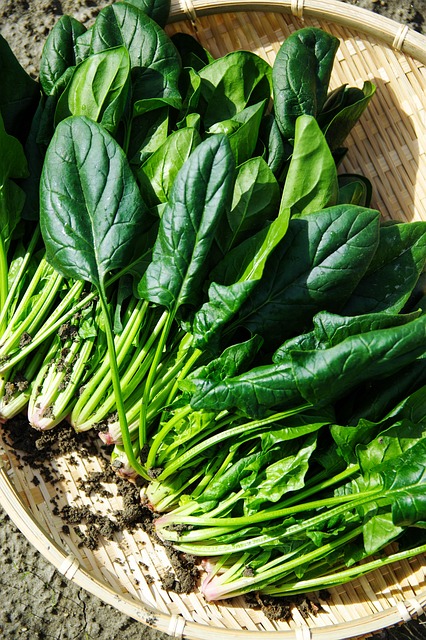
Spinach is a staple leafy green that thrives in the cooler climate of October and is particularly productive in Zone 9. This nutrient-packed vegetable is versatile and can be enjoyed in salads, smoothies, or as a cooked green, making it a must-have for any autumn garden.
To prepare for planting spinach, ensure your garden beds are clear of previous crops and debris. Spinach prefers slightly acidic to neutral soil, so checking the pH and amending with sulfur if necessary can promote healthy growth. You can sow spinach seeds directly into the soil about half an inch deep and approximately two inches apart. This spacing allows the plants room to grow while ensuring they receive adequate sunlight.
Fall-planted spinach often has the benefit of slower growth due to cooler temperatures, which can lead to sweeter and more tender leaves. Water your seedlings consistently until they establish roots; however, watch for drought stress, especially as the weather begins to cool. Applying a thin layer of mulch can help maintain moisture and regulate soil temperature.
For those looking to extend their spinach harvest, consider employing a row cover or cloches to protect the tender greens from unexpected frosts. Spinach is notably frost-tolerant; thus, a little protection can help improve yields well into the winter months.
When planning your spinach harvest, you can start picking outer leaves once the plants are about three to four inches tall, promoting bushier growth while allowing younger leaves time to mature. Be sure to incorporate spinach into your dishes shortly after harvesting to enjoy its rich flavor and nutritional benefits while fresh.
Carrots
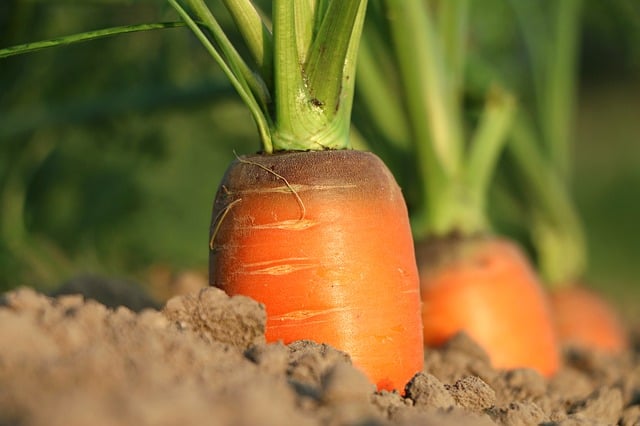
October is an excellent time to sow carrots in Zone 9, as the cooler temperatures provide the perfect conditions for these root vegetables to develop sweet, tender flavors. Carrots thrive in loose, sandy loam soil that drains well. To prepare your garden bed, work in plenty of organic matter such as compost to improve soil texture, as compacted soil can hinder their growth and lead to malformed roots.
When sowing carrots, choose a well-drained area and plant seeds about a quarter to a half inch deep, spacing roughly two inches apart. Since carrot seeds are tiny, you may consider mixing them with sand to facilitate even spacing. Notably, carrots benefit from light soil compaction as they germinate, so it’s helpful to gently press them down after planting.
Watering is crucial during the germination phase, which can take 14 to 21 days. Keep the soil evenly moist—carrots prefer consistent moisture to ensure uniform growth and prevent cracking. To reduce water evaporation and minimize weed competition, apply a light layer of organic mulch when seedlings are a few inches tall.
Harvesting carrots can take anywhere from 70 to 100 days, depending on the variety and desired size. You can pull them when they reach about half an inch to an inch in diameter for baby carrots, or leave them longer for fully grown roots. Notably, carrots can be harvested well into the winter, provided the soil isn’t frozen, giving you the chance to enjoy fresh, crunchy produce even during colder months.
Radishes
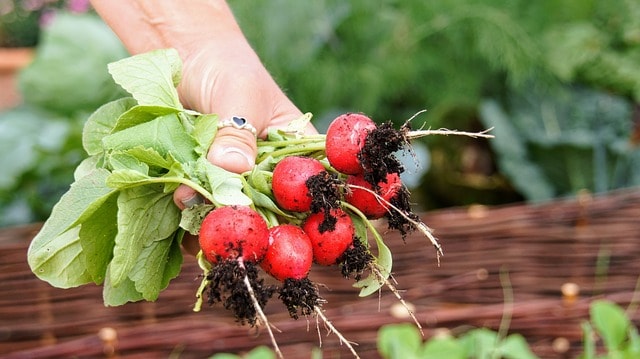
Radishes are another fantastic crop to plant in October within Zone 9. Fast-growing and easy to cultivate, they are perfect for gardeners looking for a quick harvest. With a variety of types ranging from round, red globes to elongated French breakfast varieties, these root vegetables can liven up any meal.
To prepare for planting, select a sunny spot with well-draining soil. Radishes prefer slightly acidic conditions, so aim to maintain a pH between 6.0 and 7.0. Sow radish seeds about half an inch deep and two inches apart, allowing enough space for their rapid growth. Because they grow quickly—many varieties are ready to harvest in as little as 25 days—they can be sown alongside slower-growing companion crops like carrots or beets.
As radish seedlings emerge, they require regular watering to ensure tender, crisp roots. Inconsistent moisture can lead to woody or spicy roots, which are less desirable. They are relatively low-maintenance; however, be vigilant about weed control, as they are sensitive to competition.
One unique advantage of planting radishes is their ability to be harvested at different stages, depending on your preference. Baby radishes can be enjoyed when they’re still small and tender, while mature ones can be harvested at about two inches in diameter. Additionally, radish greens are edible and nutritious, adding to their overall value. You can sauté them or toss them in salads for a peppery kick.
Bok Choy (Pak Choy)
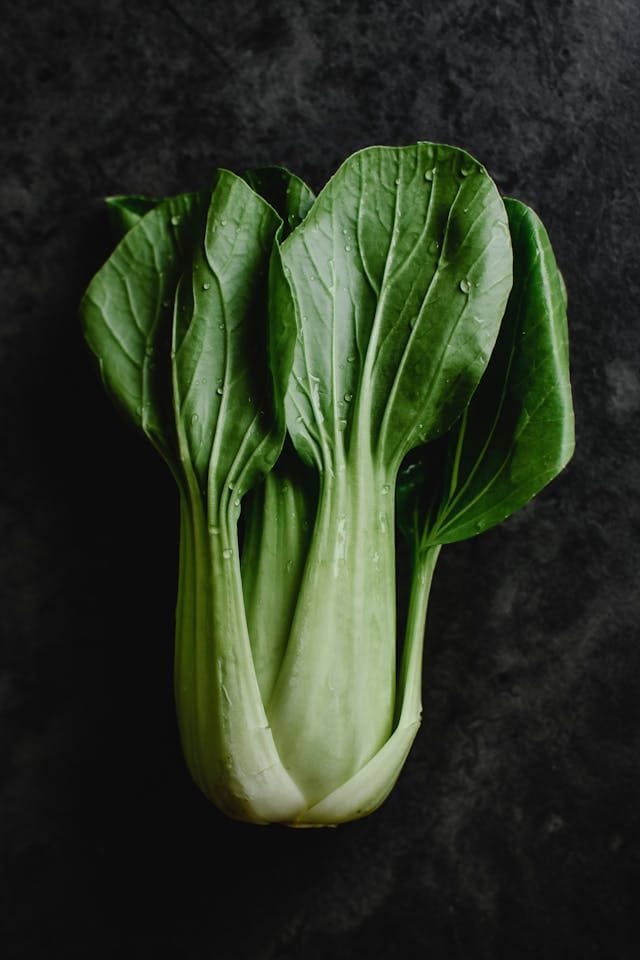
Bok choy, or pak choy, is a versatile leafy green perfect for October planting in Zone 9. This member of the cruciferous family thrives in the cool weather of fall, producing crisp stalks and tender leaves that are delicious in stir-fries or added to soups.
When planting bok choy, select a location with plenty of sunlight and well-draining soil, enriched with organic matter to provide essential nutrients. Sow seeds directly in the ground about half an inch deep, spacing them approximately six inches apart. This spacing allows for adequate air circulation and room for the plants to grow.
Bok choy has a relatively short growing season, typically taking about 45 to 60 days to reach maturity. Regular watering is crucial to prevent the plants from bolting, which is when they flower prematurely due to stress from high temperatures or drought. Ensure the soil remains consistently moist, but not waterlogged—this balance is key for optimal growth.
In addition to monitoring moisture, pay attention to spacing. Thinning your seedlings to about one foot apart as they grow will prevent overcrowding, ensuring that each plant has sufficient room to expand.
Harvesting bok choy can be done at various stages; you can cut the outer leaves while allowing the center to continue growing, or you can harvest the entire plant when they reach six to twelve inches in height. Bok choy is not only delicious but also packed with vitamins A, C, and K, making it a healthy addition to your garden.
Swiss Chard
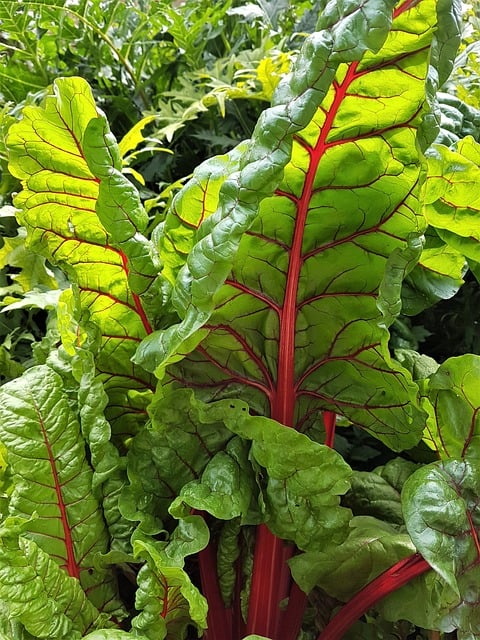
Swiss chard is a remarkable leafy green that not only adds vibrant color to your garden but is also exceptionally nutritious. Known for its deep green leaves and vivid stems—often in shades of red, yellow, or white—this vegetable thrives in the cooler temperatures of October in Zone 9.
When planting Swiss chard, begin by selecting a site that receives at least six hours of full sunlight daily. The soil should be well-draining and rich in organic matter; adding compost before planting can increase nutrient content and help improve soil structure. Sow the seeds about half an inch deep, placing them 2-4 inches apart, as Swiss chard can grow quite large.
Regular watering is essential for Swiss chard, especially in the dry spells that sometimes occur during fall. Keep the soil consistently moist but avoid over-saturation to prevent root rot. One unique aspect of Swiss chard is its resilience; it can withstand light frosts and, with protective measures like row covers, can even continue growing throughout the winter in some cases.
As the plants mature, you can begin harvesting the outer leaves while allowing the inner leaves to grow. This method not only ensures a continuous supply throughout the season but also encourages bushier growth. Swiss chard can be harvested multiple times and is often more tender and flavorful after exposure to cooler temperatures.
Romaine Lettuce
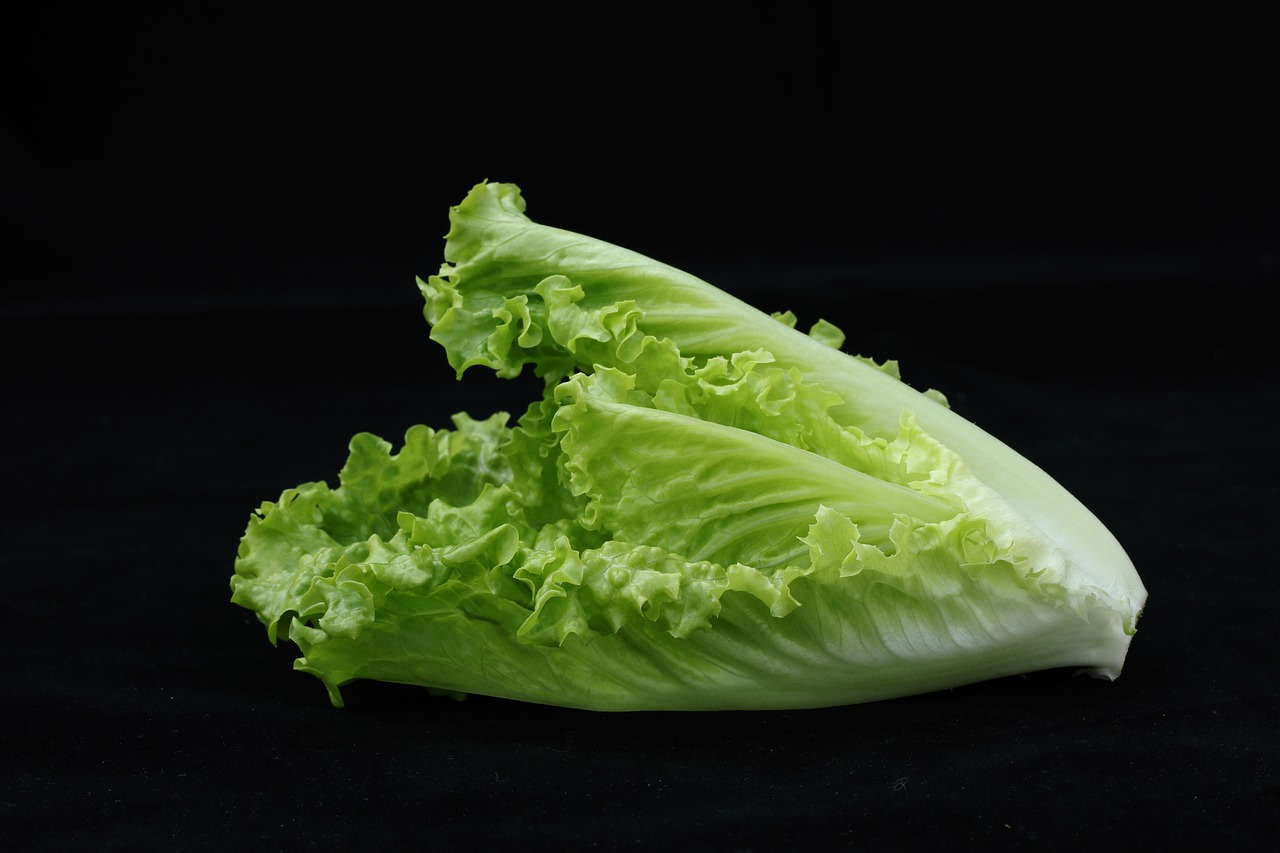
Romaine lettuce is a cool-season crop that does exceptionally well when planted in the fall. It is a staple for fresh salads and sandwiches, appreciated for its crisp texture and slightly sweet flavor. October is the ideal time to start planting romaine in Zone 9, as the cooler conditions encourage healthy growth without the threat of bolting that warmer temperatures can provoke.
Prepare the soil by loosening it to a depth of at least six inches and mixing in compost to enrich its nutrient profile. Sow romaine seeds directly into the garden about a quarter to a half inch deep and approximately one inch apart. Given that seedlings prefer cooler temperatures, planting them in a partially shaded area can help protect them from excessive heat while they are still young.
Once seedlings emerge, thin them out to about 12 to 18 inches apart at the base to allow ample space for growth. Regular watering is crucial, particularly in the early stages, to establish a healthy root system. Ensure to water at the base to avoid splashback which can promote fungal diseases.
Romaine lettuce has a relatively fast growth cycle, often ready for harvest in as little as 70 days. You can begin harvesting the outer leaves, allowing the center of the plant to continue developing. If left undisturbed, romaine can grow quite large, but you can choose to harvest the entire head when it reaches a desirable size.
One interesting tip for romaine growers is to practice succession planting. By sowing new seeds every couple of weeks throughout October, you can stagger your harvest, ensuring fresh lettuce for many weeks to come.
Beets
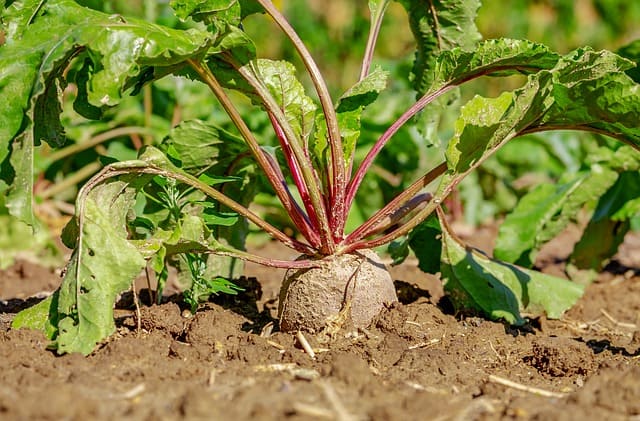
Beets are a fantastic choice for October planting in Zone 9, celebrated for their earthy flavor and vibrant color. From the deep crimson of traditional beets to golden and striped varieties, these root vegetables are visually stunning and incredibly nutritious.
To grow beets, first choose a sunny spot with well-drained soil. Enrich the soil with plenty of organic matter, such as compost, to support robust growth. Sow beet seeds about 1 inch deep and 2-4 inches apart. Be mindful that beet seeds are actually clusters of multiple seeds; once the plants grow, thin them so that each beet has sufficient room to expand.
Consistent moisture is key for growing beets; keeping the soil evenly moist throughout their growing period will help encourage cylindrical, smooth shapes. Mulching can be beneficial to help conserve moisture while also suppressing weeds.
Beets typically take around 50 to 70 days to mature. They can be harvested when they reach about 1-3 inches in diameter for young, tender roots, which are ideal for salads. Alternatively, you can allow them to grow larger for cooking. Interestingly, the greens of beet plants are also edible and highly nutritious, so don’t hesitate to harvest them for salads or sautéed dishes as you harvest the roots.
One unique trait of beets is their tolerance to frost; they often sweeten after exposure to colder temperatures, making October an ideal month to plant. If you’re patient, you can delight in not only the roots but also the fresh greens, creating a diverse and healthy addition to your fall and winter meals.
Kale
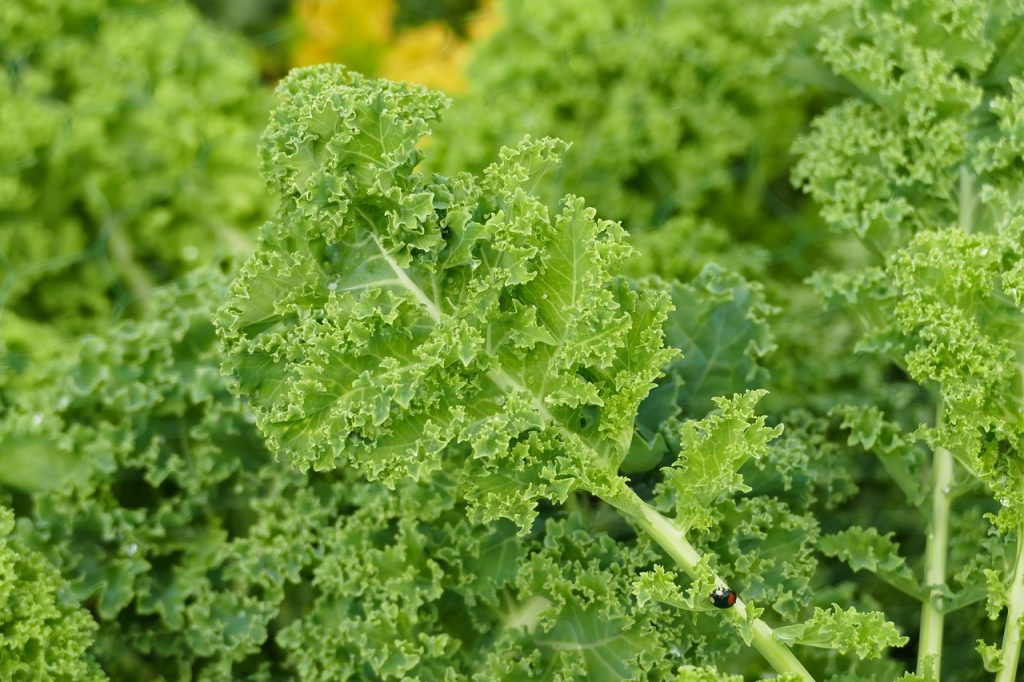
Kale is among the hardiest greens you can plant in October, well-suited to the cool fall and winter months in Zone 9. Packed with nutrients, this leafy green can handle frost, which often enhances its flavor, making it sweeter as temperatures drop. Its versatility in cooking—whether used in salads, soups, or smoothies—makes it a popular choice for home gardeners.
To plant kale, select a sunny location in your garden that receives at least 6 hours of direct sunlight. The soil should be rich in organic matter, so mixing in compost or well-rotted manure before planting can greatly benefit your kale. Sow the seeds about ¼ to ½ inch deep, spaced approximately 12 inches apart to allow for ample growth. However, if you’re short on space, you can also grow kale in containers, ensuring they are at least 12 inches deep.
Watering is essential, especially during the germination of kale seeds, which usually takes about 7-10 days. Consistent moisture will help your plants establish a strong root system. As the plants grow, be sure to water them deeply about once a week, allowing the top inch of soil to dry out between waterings.
Kale’s unique characteristic is its ability to grow throughout the winter months. For gardeners in Zone 9, this means you can enjoy fresh kale leaves long after the first frost. When harvesting, pick the younger leaves from the outer part of the plant, allowing the center to continue growing. Regular harvesting promotes bushier plants and higher yields.
Celery
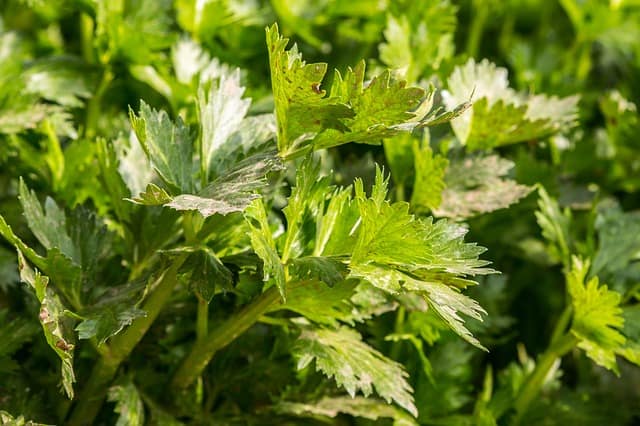
Celery is another cool-season crop that you can sow this October in Zone 9. It is a nutrient-dense vegetable that adds flavor and crunch to various dishes. While celery may have a reputation for being a bit finicky, with the right care and conditions, it can yield impressive results.
Start by choosing a location with full sun for at least six hours a day and enriched, well-draining soil. Celery prefers a slightly acidic pH of 6.0 to 6.8, so test your soil and amend it as necessary. To start, sow celery seeds about a quarter of an inch deep in seedlings trays or directly in the garden bed, ensuring they are spaced about 6 inches apart to allow for their robust growth.
One key to successful celery cultivation is consistent watering. Celery has a high water content and requires steady moisture to develop well. Ensure the soil remains moist but not soggy, particularly during its early growth stages. Investing in a drip irrigation system can help maintain consistent soil moisture without waterlogging.
Once the seedlings are about 4-6 inches tall, you can begin thinning them out to give remaining plants the space to grow. Celery typically takes 70 to 100 days to mature, and you can begin harvesting when the stalks reach the size you prefer. For optimal flavor, harvest celery in the morning.
An interesting fact about celery is that it can withstand light frosts, making it a viable crop well into winter. With proper mulching or row covers, you can continue harvesting well beyond October, giving you fresh celery for winter soups and stews.
Leeks
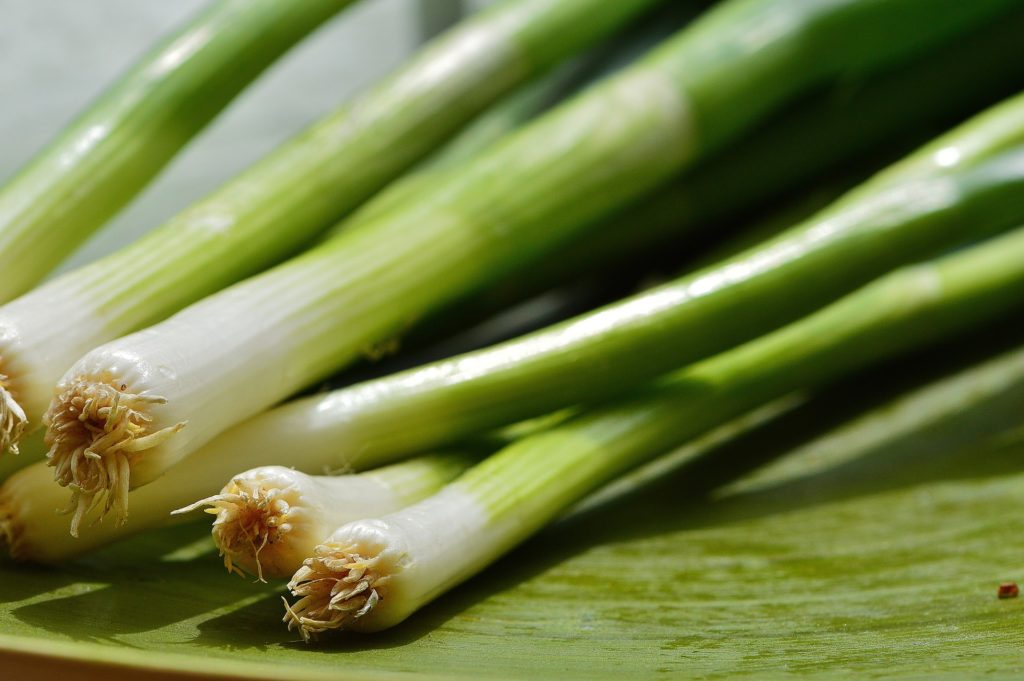
Leeks are often considered the unsung heroes of the fall garden, and October is an excellent time for planting them in Zone 9. Similar to their onion relatives, leeks offer a milder flavor and tender texture, making them an attractive addition to a variety of dishes, from soups to risottos.
Prepare your garden bed by cultivating loose, well-draining soil enriched with compost to ensure nutrients are readily available to your leeks. Sow leek seeds about ¼ to ½ inch deep, with approximately 6 inches between them to allow for their full expansion. Alternatively, many gardeners prefer to start leeks indoors and transplant them once they’re about 6-8 inches tall; this practice can give your plants a head start.
Regularly watering leeks is crucial for their growth. While they don’t require soaking, maintaining consistent moisture will help develop the characteristic long white stalks that leeks are known for. In addition, growers can practice a method known as “blanching,” where leeks are mound soil around the base of the plants as they grow. This prevents sunlight from reaching the lower stalks, resulting in more tender, sweeter leeks.
Leeks generally take a while to mature, ranging from 90 to 120 days, so patience is key. Begin harvesting your leeks when they reach a desirable width, which can be done at any point after they start to form sizable stems.
Collard Greens
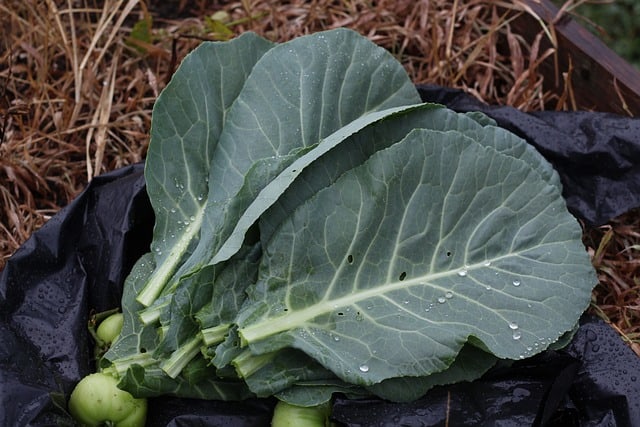
Collard greens are a staple in many southern cuisines, known for their hearty leaves and robust flavor. This leafy green thrives in cooler weather, making October an ideal month to plant them in Zone 9. Rich in vitamins A, C, and K, collard greens are not only delicious but also incredibly nutritious.
To start, choose a location that receives full sun for at least six hours a day. Collard greens do best in well-draining soil rich in organic matter, so incorporating plenty of compost or aged manure prior to planting is beneficial. Seeds should be sown about ½ inch deep and spaced 12 to 18 inches apart in rows, allowing ample room for the plants to grow.
Collard greens are relatively low maintenance. They prefer consistent moisture, so regular watering is essential, especially during dry spells. It’s important to monitor the moisture of the soil; remember that while they enjoy water, they do not thrive in waterlogged conditions. A balanced fertilizer applied about a month after planting can also promote healthier growth.
Harvesting collard greens is typically done by cutting the outer leaves, allowing the inner leaves to mature. This method prolongs the harvesting period and ensures that you have fresh greens available for several months. Collards are known for their frost tolerance, which means they can often be harvested well into winter, with even greater sweetness post-frost.
Mustard Greens
Mustard greens are another versatile leafy green that can flourish in the fall garden. Their peppery flavor adds vibrant zest to salads and sauté dishes, making them a delicious and attractive addition to any meal. October is an excellent month in Zone 9 to sow mustard seeds directly into your garden, taking advantage of the cooler temperatures to enhance their growth.
Select a site that offers full sun—around 6-8 hours a day is optimal—and amend your soil with organic material for improved fertility. Sow mustard seeds about ¼ inch deep and space them 2-4 inches apart. Since mustard greens tend to grow more plentifully, be prepared to thin them out later to avoid overcrowding.
Moisture is key to harvesting tender mustard greens, and they require regular watering, especially while they’re young. Keeping the soil consistently moist but not soggy is essential for achieving the best flavor and texture. To add a layer of protection against pests, consider using floating row covers after planting; this will also help retain soil moisture.
Harvesting mustard greens can begin when they are young and tender, typically around 30-40 days after germination. You can pull off the outer leaves while allowing the inner leaves to grow, providing a continual harvest. Additionally, similar to collard greens, mustard greens can improve in flavor after a light frost, adding to their appeal as an October planting choice.
Tomatoes
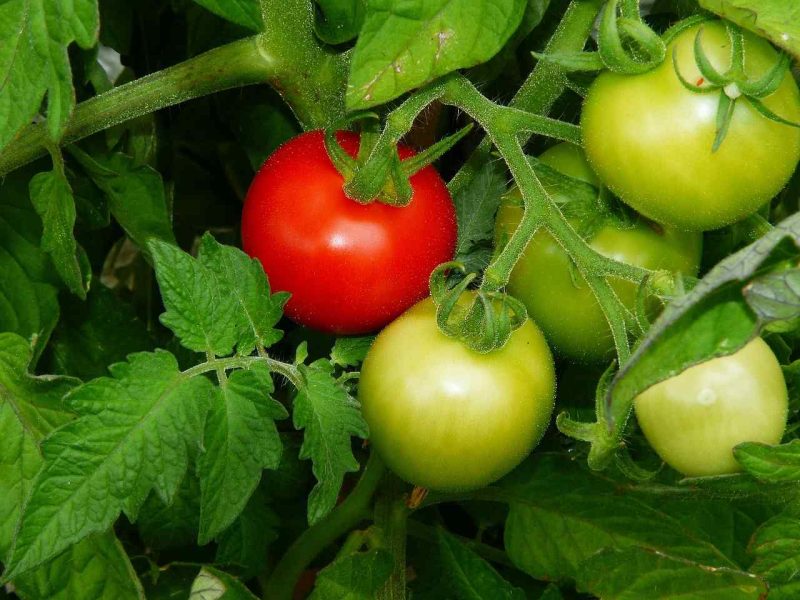
While most gardeners think of tomatoes as a summer crop, October is also a strategic time for planting some varieties in Zone 9. Fast-maturing or short-season tomato varieties can still produce fruit before the colder months. This is especially important for those looking to maximize their yields from a late-season planting.
Choose a sunny spot with at least eight hours of sunlight, as tomatoes thrive in warm conditions. When planting, ensure the soil is rich with organic matter and well-draining. Dig holes deep enough to place the seedlings, up to the first set of leaves, as this encourages a strong root system. Space your tomato plants approximately 24-36 inches apart to allow for proper airflow and growth.
Regular watering is critical for tomato plants, especially during the heat of autumn. Providing consistent moisture helps minimize issues like blossom end rot and cracked fruit. A layer of mulch can be beneficial, retaining soil moisture while suppressing weeds. Additionally, applying a balanced fertilizer every few weeks will help support healthy growth and fruit production.
While these late plantings may yield fewer fruits than their summer counterparts, you can still enjoy fresh tomatoes into the fall. With the right care, some determinate varieties can successfully produce a harvest by late November. Keep an eye on nighttime temperatures, and if frost is predicted, consider using row covers, cloches, or even plastic sheets to protect your plants.
Beans
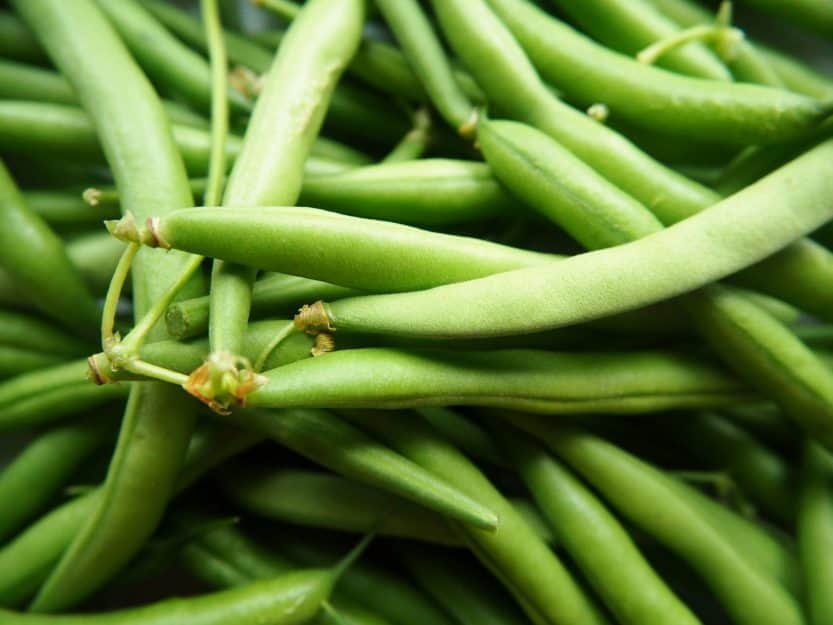
While many gardeners think of beans as warm-season crops, certain varieties are well-suited for planting in October in Zone 9. Bush and pole beans, particularly snap and shell beans, can be sown for a late-season harvest that adds nutritious and fresh flavors to your dishes. Beans are nitrogen-fixing plants, enhancing soil health while also providing an excellent source of protein and fiber.
To get started, prepare your garden bed by ensuring well-drained soil enriched with organic matter. Beans prefer slightly warm soil, so aim to plant when soil temperatures reach around 60°F. Sow seeds about 1 inch deep and space them 1-2 inches apart for bush types; if planting pole varieties, provide trellises for support. Be mindful of the spacing, as pole beans will require more room to grow tall and productive.
Regular watering is essential for successful bean cultivation, particularly during germination. A deep watering once a week is generally sufficient, allowing the soil to dry slightly between waterings to prevent root rot. Beans are fairly resilient, but they do benefit from protection against harsh winds, making row covers a handy addition to your toolkit if you’re expecting unpredictable weather.
As the plants grow, they’ll reward you with abundant yields, often ready for harvest within 60-75 days after planting. Harvest beans regularly to encourage new blossoms and prolong production. Fresh beans can be enjoyed raw, steamed, or in a variety of cooked dishes, making them a versatile addition to your October garden.
Peppers
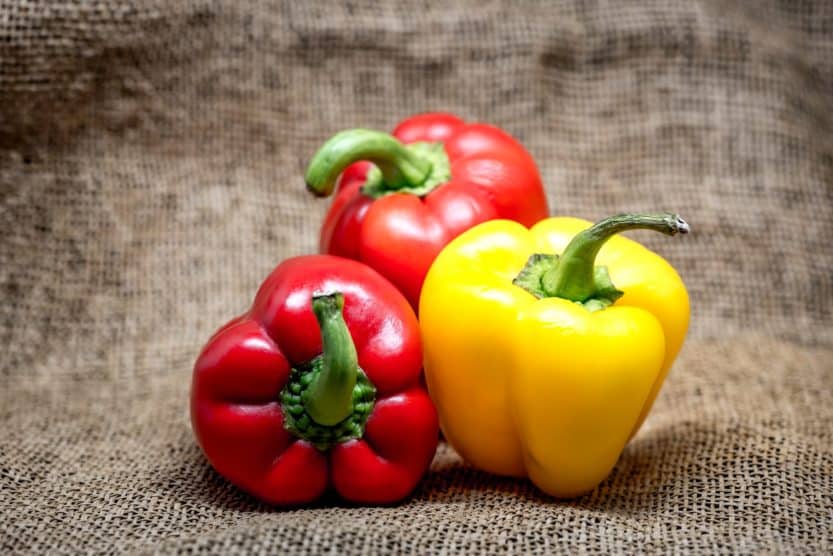
October is a great time to plant certain perennial pepper varieties in Zone 9, especially if you select shorter, quick-maturing cultivars. Bell peppers, jalapeños, and serranos can still flourish if planted early in the month to take advantage of the season’s warmth before the temperature drops significantly.
Select a sunny location for your pepper plants, as they require at least 6-8 hours of sunlight daily. Soil quality plays a critical role in the success of pepper plants; aim for well-draining soil that is rich in organic matter. When planting, bury the seedlings up to their first set of leaves to promote strong root development. Space plants about 18-24 inches apart to allow for optimal airflow.
Regular irrigation is crucial for peppers, particularly during their formative stages. As the weather cools, adjust your watering schedule to avoid over-saturation, which can lead to fungal diseases. Using mulch can help retain soil moisture and keep the roots warm as temperatures begin to dip. A balanced fertilizer applied every few weeks will ensure adequate nourishment for healthy fruit production.
Peppers are typically ready to harvest between 60 and 90 days after planting, depending on the variety. Regular picking encourages more fruit to develop, so don’t hesitate to harvest even immature peppers, especially if you’re looking for spiciness in your dishes. The vibrant colors of the peppers—green, yellow, red, or orange—add a pop of visual interest to any garden, while also providing a wealth of culinary possibilities.
Eggplant
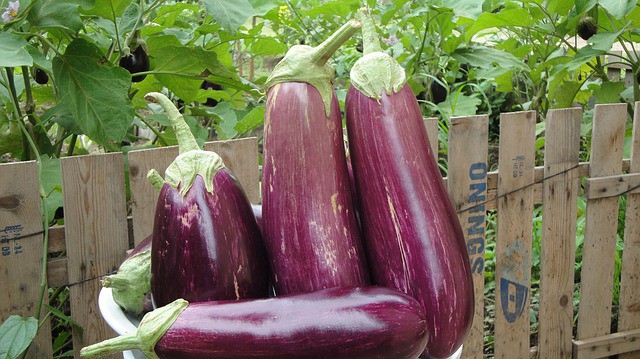
Eggplant, with its glossy skin and rich flavor, is another excellent crop to consider planting this October in Zone 9. This versatile vegetable is prized in cuisine across the globe and is beloved for its ability to absorb flavors beautifully. While eggplants are typically classified as warm-season crops, selecting faster-maturing varieties can yield successful harvests even in the cooler months.
To start, choose a sunny area for your eggplant, ensuring it receives at least 6-8 hours of full sun daily. Preparation of the soil is essential; it should be well-drained and rich in organic matter for optimal growth. Plant eggplant seedlings about 2 inches deep, burying them up to their stem’s first set of true leaves, and space them approximately 24-36 inches apart to accommodate their leafy growth.
Eggplants are sensitive to fluctuating temperatures, so maintaining consistent moisture is crucial, particularly when the plants are young. Water thoroughly, allowing the soil to dry slightly between waterings to promote healthy root systems. Implementing a layer of mulch can assist with moisture retention and prevent weed competition.
Typically, eggplants take about 70-90 days to mature and be ready for harvest. You can expect to see the first flowers within weeks, followed by the development of fruit. Harvest eggplants when they reach a shiny, deep color and are firm to the touch. They are best picked young and tender for the best taste and texture.
Cucumbers
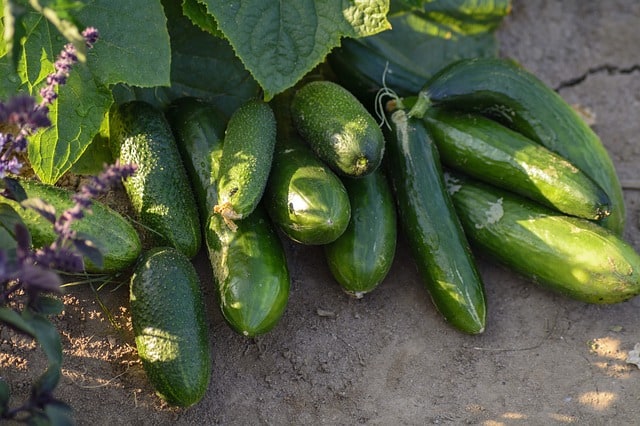
With their crisp texture and refreshing taste, cucumbers are a summer favorite that can still be planted in October in Zone 9, particularly if you choose fast-maturing varieties. These versatile vegetables can be enjoyed fresh, pickled, or as an ingredient in salads, making them a valuable addition to your garden.
When planting cucumbers, select a location that receives full sunlight for at least 6-8 hours daily. The soil should be well-drained, rich in organic matter, and slightly acidic to neutral in pH. You can start by sowing seeds directly into the ground or transplanting seedlings. If sowing seeds, plant them about 1 inch deep and space them 36 inches apart since cucumber vines spread quite a bit. Using raised beds or hills can improve drainage and promote healthy root development.
Cucumbers love moisture, so maintaining consistent watering is essential, especially during their early growth stages. Water deeply once or twice a week, ensuring that the soil is moist, but not waterlogged to prevent root rot. Mulching around the plants can help retain soil moisture, suppress weeds, and regulate soil temperature as the weather cools.
With the right growing conditions, cucumbers can be harvested in as little as 50-70 days after planting. Check the cucumbers regularly, as they grow quickly; you’ll want to pick them when they are firm and still small, typically 6-8 inches long, to enjoy the best flavor. Regular harvesting can promote more fruit production, allowing you to enjoy fresh cucumbers well into the season.
Okra
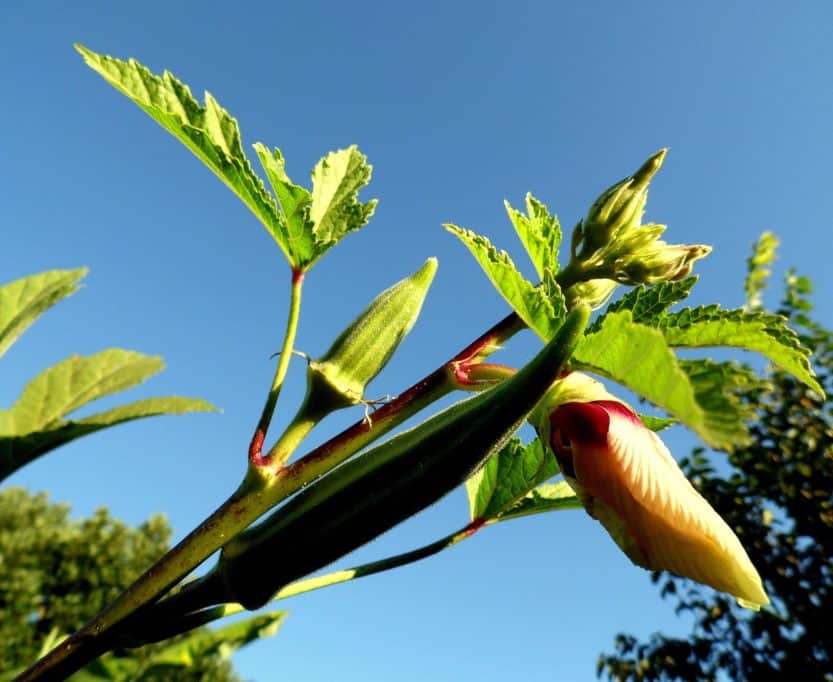
Okra is a heat-loving plant typically associated with summer, but in Zone 9, it can be planted in October for a late harvest that carries into the milder winter months. This unique vegetable is prized for its distinct flavor and is commonly found in dishes like gumbo and stews. Not to mention, its stunning hibiscus-like flowers add beauty to the garden.
Select a sunny spot for your okra, as it requires at least 6-8 hours of direct sunlight to thrive. Prepare the soil by ensuring good drainage and amending it with organic matter, such as compost, which enriches the nutrient content. Sow okra seeds about 1-2 inches deep and space them 12-18 inches apart to allow for their bushy growth.
Despite being drought-tolerant once established, regular watering is important during the germination period to promote healthy seedlings. When established, water okra deeply to encourage strong root systems—typically about once a week during dry spells. Adding mulch around the plants can help retain moisture and deter weeds.
Okra generally yields its first harvest around 50-60 days after planting, making it a relatively fast-growing crop. The fruit can be picked when it is about 3-4 inches long and still tender; waiting too long can lead to a tougher texture. Frequent harvesting encourages the production of additional pods. With proper care, okra can continue to produce throughout the mild winter, giving you an extended harvest season.
Sweet Potatoes
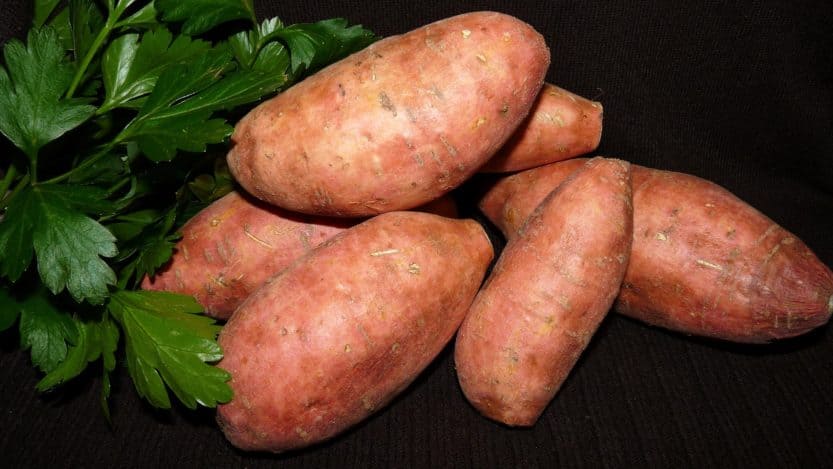
Sweet potatoes are a unique and nutritious addition to the fall garden and can be planted in October in Zone 9, particularly if you use slips that have been started earlier in the season. These tubers are not only delicious but also packed with vitamins and fiber, making them a healthy staple in many diets.
When planting sweet potatoes, choose a well-drained location with plenty of sunlight; they thrive in warm conditions. Prepare the soil by incorporating organic material, ensuring it is loose and free of rocks, which can impede the growth of the tubers. Plant sweet potato slips (young shoots) about 12-18 inches apart, burying them about 4-6 inches deep.
Maintaining moisture is vital for establishing sweet potato plants, especially in the early stages. Water regularly, ensuring the soil remains moist but not soggy. As they grow, reduce the frequency of watering to encourage drought resistance, but make sure to water deeply to promote robust root development.
Sweet potatoes require about 90 to 150 days to mature, depending on the variety. Harvesting usually occurs after the foliage starts to yellow, indicating that the tubers are reaching maturity. To harvest, gently dig around the base of the plant and lift the tubers carefully to avoid bruising. Cure the harvested sweet potatoes in a warm, dry place for about two weeks before storing; this helps to enhance their sweetness and flavor.
Herbs
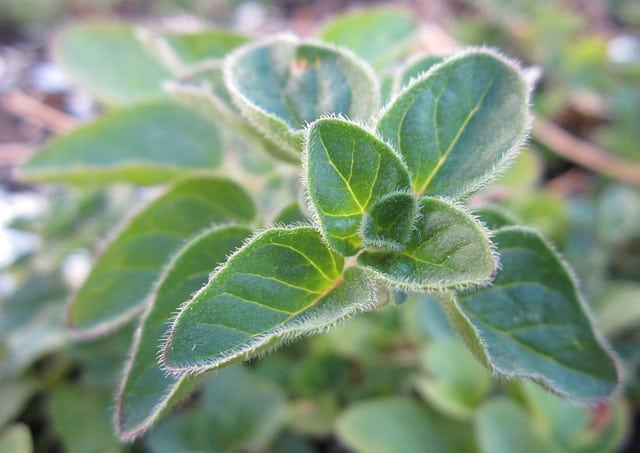
October is a delightful time to plant herbs in Zone 9, particularly perennial varieties that can thrive and contribute to your garden year after year. Herbs such as rosemary, thyme, oregano, and chives are perfect for planting during this month. They not only bring fresh flavors to your culinary creations but also enhance the biodiversity of your garden by attracting beneficial insects.
When planting herbs, choose a sunny spot that receives at least 6 hours of sunlight each day. Most herbs prefer well-draining soil with a slightly acidic to neutral pH. Preparing your garden bed by incorporating organic matter, such as compost or well-rotted manure, can provide essential nutrients.
For annual herbs like basil and cilantro, you can directly sow seeds into the soil. Sow seeds about ¼ inch deep and thin them as they begin to sprout to ensure good airflow around the plants. Perennial herbs can be planted as seeds or as nursery-grown transplants. Space them appropriately, usually around 12 inches apart, to allow them room to thrive.
Regular watering is important for establishing your herbs, especially as they get settled into their new environment. After they are established, many herbs are drought-tolerant, allowing you to reduce watering frequency. However, maintaining moisture in the soil will promote better growth and flavor.
Harvesting herbs can begin as soon as they have enough foliage to be productive. Regular trimming encourages bushy growth and prevents flowering in annual herbs, which can affect flavor. Rain or dew can often help ensure that your herbs remain hydrated, but checking the moisture content frequently is still essential.
October Flowers to Plant in Florida
Passion Flower

Passion flower (Passiflora) is an exquisite addition to any Zone 9 garden, blooming profusely with unique, exotic flowers. The vine is not only stunning but also serves a practical purpose; the fruit produced by some varieties is edible and has a mildly sweet flavor, often used in desserts or beverages. Planting passion flower in October allows it to establish itself before the onset of cooler temperatures.
Select a sunny spot for planting passion flower, as it requires full sun to flourish. While the plant can tolerate various soil types, it thrives best in well-drained, nutrient-rich soil. When planting, dig a hole twice the size of the root ball and amend the soil with compost. Space plants 4-6 feet apart, as they can spread out significantly and benefit from good airflow.
Watering is essential when establishing the vine. Keep the soil consistently moist, especially during dry spells, but avoid letting it become waterlogged. Once established, passion flower is relatively drought-tolerant; however, regular moisture aids in promoting healthier fruit and vibrant blooms.
Passion flower can attract pollinators such as bees and butterflies to your garden, enhancing the overall ecosystem. Additionally, the stunning blooms can often be seen throughout the growing season, and many species produce fruit that can be harvested after a few months. It’s advisable to check for the specific varieties suited to your taste preference and climate, as some are more prolific in fruit production than others.
Black-eyed Susan Vine
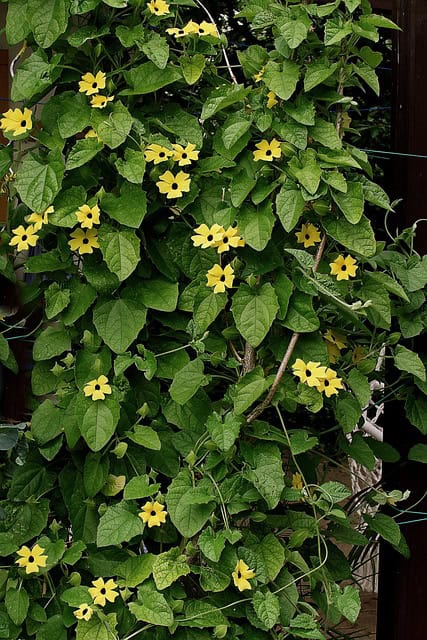
The black-eyed Susan vine (Thunbergia alata) is a fast-growing, annual climbing vine that can add a burst of color and vibrancy to any garden in Zone 9. Known for its cheerful yellow-orange flowers with a prominent dark center, this plant can quickly cover trellises, fences, or arbors, creating stunning vertical displays. October is a strategic time for planting black-eyed Susan vines, allowing them to establish roots before the cooler weather sets in.
Choose a location with full sun for optimal growth, as these vines thrive when they receive at least 6-8 hours of sunlight daily. Prepare your planting area by ensuring the soil is well-drained, fertile, and rich in organic material. When planting, space the seedlings 12-18 inches apart to give them room to spread and climb.
Black-eyed Susan vines require regular watering, especially when they are young. Be mindful to water deeply, allowing the soil to dry between watering to prevent root rot. Mulching around the base can help retain moisture and suppress weeds as the plants establish themselves.
This vine can start blooming within 6 to 8 weeks of planting, providing a quick splash of color to your garden. As it flowers, it attracts pollinators such as butterflies and bees, contributing to the overall health of your garden ecosystem. Additionally, regularly deadheading spent blooms encourages new flowering, ensuring a vibrant display throughout the season.
Verbena
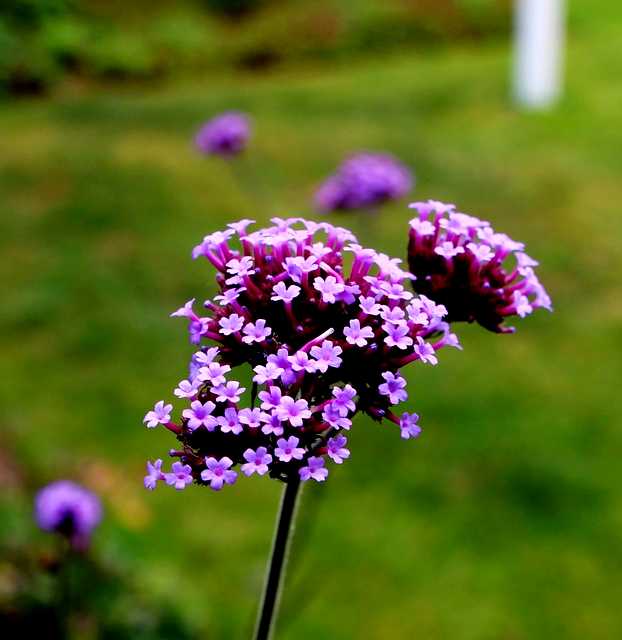
Verbena is a delightful flowering plant known for its vibrant clusters of blooms and long-lasting flowering period. With a range of colors from purple to pink, red to white, verbena can brighten up garden beds, hanging baskets, and containers alike. Its ability to thrive in sunny conditions makes it perfect for October planting in Zone 9, where the heat from summer begins to dissipate but sunlight remains abundant.
When planting verbena, select a location that receives full sun for at least six to eight hours each day. Verbena prefers well-draining soil enriched with organic matter, so amending your soil with compost before planting is advisable. Plant verbena seedlings or cuttings at a spacing of 12-18 inches apart to allow air circulation and to accommodate their spreading nature.
Regular watering is important, especially during the establishment phase. Water deeply but infrequently to encourage strong root development. Once established, verbena is drought-tolerant, making it low-maintenance and perfect for gardeners seeking a hassle-free option. Avoid overhead watering to prevent fungal diseases; instead, water at the soil level.
Verbena blooms continuously from spring to fall and is a magnet for pollinators like butterflies and bees, enhancing biodiversity in your garden. The flowers can be used in borders for a striking display or as a ground cover plant to suppress weeds while providing color and charm.
Oleander
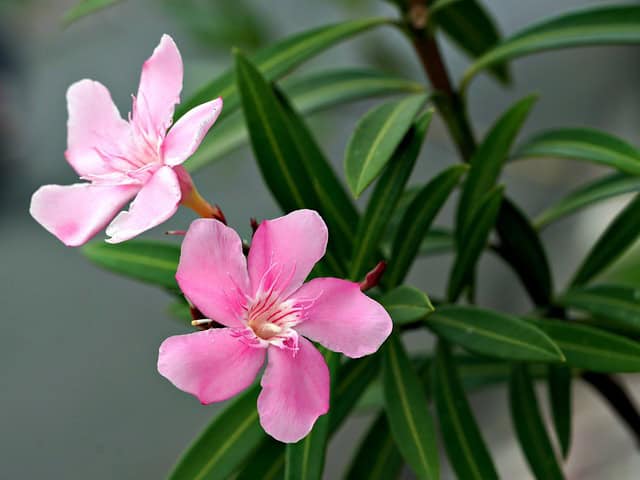
Oleander (Nerium oleander) is an evergreen shrub that brings lush greenery and stunning flowers to gardens in Zone 9. Known for its fragrant blossoms, which can range from white to pink, and red, oleander thrives in bright sunshine and heat, making it an excellent choice for planting in October when temperatures begin to cool.
When selecting a planting site, ensure it receives full sun, as oleander prefers hot, sunny environments. The soil should be well-drained, as oleander does not tolerate waterlogged conditions. Before planting, enhance the soil by incorporating compost to improve drainage and fertility. Space oleander plants about 4 to 10 feet apart, depending on the variety, as they can grow into substantial shrubs.
Oleander is a drought-tolerant plant once established, but regular watering during the initial weeks after planting will help the roots to establish. Be cautious not to overwater, as oleander prefers soil that dries out between waterings. Pruning can enhance airflow and shape, encouraging a fuller plant and promoting healthy growth.
While oleander is exquisite and hardy, it is important to note that all parts of the plant are toxic if ingested, so consider this when planting in areas accessible to children or pets. Nevertheless, its robust nature and ability to thrive in poor soil make oleander a popular choice for low-maintenance gardens. In addition to its visual appeal, oleander can provide privacy boundaries and serve as a windbreak.
Begonia
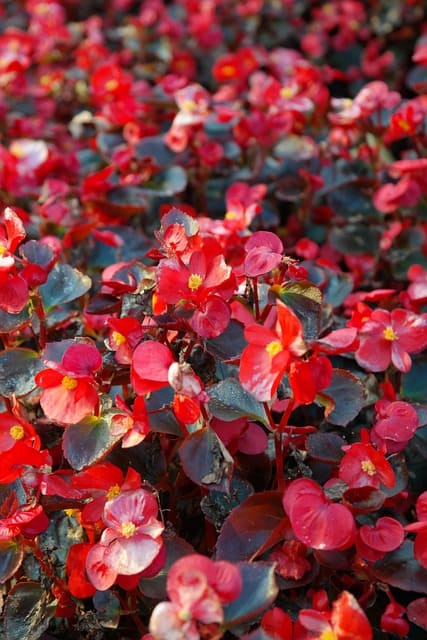
Begonias are beloved for their stunning foliage and exquisite flowers, adding a rich layer of color and texture to any garden bed, container, or hanging basket. With a wide variety of species, begonias can accentuate shaded areas or brighten up sun-kissed spots in your garden, making them an excellent option for October planting in Zone 9.
Choose a planting site based on the specific begonia variety, as some prefer partial shade while others thrive in full sun. Prepare the soil with excellent drainage, amending it with organic compost for added nutrients. When planting, position begonias 12-18 inches apart to allow for proper airflow and room to grow.
Depending on the variety, begonias typically require consistent moisture. Water them thoroughly when the top inch of the soil feels dry, ensuring that the roots are not sitting in water, which can lead to root rot. Using mulch can help retain soil moisture and keep the roots cool as temperatures drop.
Begonias are well-known for their extended blooming period, often stretching into late fall or even winter in mild climates. Their different leaf patterns and colors provide visual interest that complements other plants and blooms in your garden. Consider incorporating begonias into your shaded areas, under trees, or among perennial plants to create a beautiful tapestry of blooms.
Canna Lily
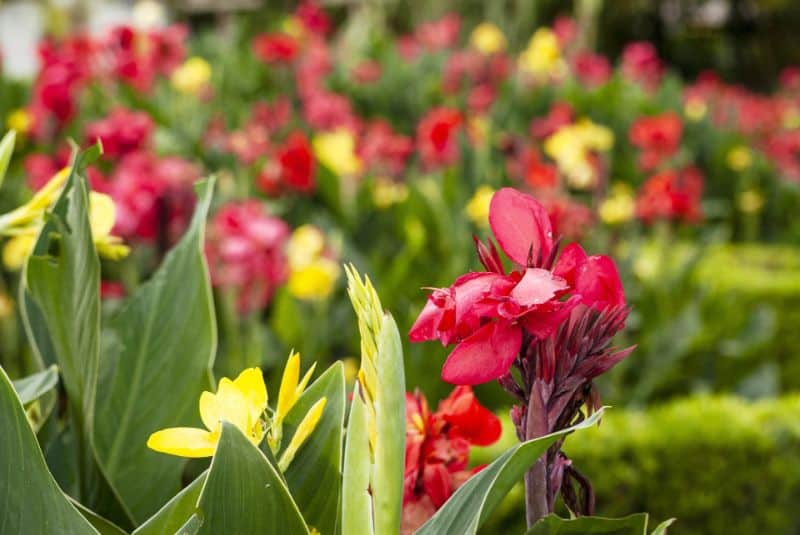
Canna lilies are striking tropical plants known for their bold foliage and brightly colored flowers that can range from fiery reds to golden yellows. Ideal for adding a sense of drama to any garden space, canna lilies thrive in warm climates, making October an excellent time to plant them in Zone 9. These plants will typically bloom from late spring until the first frost, offering a long season of color.
When selecting a spot for canna lilies, opt for a location that receives full sun for at least six hours a day. They flourish in rich, well-draining soil that is kept consistently moist. Before planting, enhance your soil by adding organic matter such as compost or well-rotted manure. This not only improves nutrition but also aids in retaining moisture around the plants.
Plant the rhizomes—horizontal underground stems—about 4-6 inches deep and 18-24 inches apart as they can spread considerably. Water the rhizomes thoroughly after planting, and maintain regular moisture, especially during dry spells, as canna lilies prefer consistently moist conditions. Mulching can help retain moisture and suppress weeds around the base of the plants.
As the cooling weather sets in, canna lilies may need additional protection. If you live in an area where frost is a concern, consider lifting the rhizomes after the first frost and storing them in a cool, dry place for the winter. When the weather warms up again in spring, you can replant them for another stunning season of colorful blooms.
Dahlia

Dahlias are beloved for their stunning array of colors and their intricate flower shapes, making them a favorite among gardeners looking to create vibrant displays. With their ability to thrive in the fall season, now is the perfect time to plant dahlias in Zone 9, where they will invigorate your garden with color while the growing season winds down.
Select a well-drained location with at least six hours of sunlight daily. Dahlias prefer rich, fertile soil that is amended with compost, which helps improve drainage and adds necessary nutrients. When planting, bury the tubers about 4-6 inches deep, spacing them 12-18 inches apart to allow ample airflow and room for growth.
Water dahlias carefully during their establishment period. They require consistent moisture but do not respond well to heavy, waterlogged soil. After they are established, dahlias are relatively drought-tolerant, but they will benefit from regular deep watering during dry spells to encourage healthy blooms.
As dahlias bloom, they can bring a flurry of color to your fall garden, attracting bees and butterflies. They typically flower from early summer until the first frost, making them a staple for extended fall displays. For those interested in cut flowers, dahlias make stunning arrangements—harvest them regularly to encourage more blooms throughout their growing season.
As October progresses, be mindful of cooler temperatures. In case of a hard frost, it’s advisable to cut back the plant on days where the temperature is expected to dip significantly. If you choose to lift the tubers post-frost, store them in a cool, dark place until the next planting season.
Blanket Flowers
![]()
![]()
Blanket flowers (Gaillardia) are hardy perennial plants known for their striking, daisy-like blooms that feature vibrant combinations of red and yellow. Easy to grow and tolerant of poor soil conditions, blanket flowers are perfect for October planting in Zone 9, where they can add warmth and color to your garden as the days grow shorter and cooler.
When selecting a planting site for blanket flowers, choose a location that receives full sun for at least six hours a day. These flowers thrive in well-drained soil and are particularly tolerant of sandy or rocky textures, making them ideal for drier landscapes. Before planting, amend the soil with some compost to provide a boost of nutrients and ensure good drainage.
You can plant blanket flower seeds directly into the ground or transplant young seedlings. If sowing seeds, do so about 1/4 inch deep in the soil, spacing them about 12 inches apart to allow for their spreading growth. If you’re transplanting established seedlings, ensure they are spaced similarly to promote good air circulation and prevent fungal diseases.
Blanket flowers are drought-tolerant once established, requiring minimal water beyond their initial planting phase. Water them regularly for the first few weeks to help them get acclimated, then reduce the frequency as they start to grow. Despite their tolerance to dry conditions, a regular deep watering during prolonged drought can encourage more prolific blooming.
Million Bells

Million bells (Calibrachoa) are beloved for their profuse, small bell-shaped flowers that bloom in a vibrant spectrum of colors, providing a cheerful and colorful display that enlivens any garden. These plants are particularly suited for hanging baskets, containers, or as ground cover, creating stunning cascades of flowers that can last from spring until late fall. October is an ideal time to plant million bells in Zone 9 as the cooler weather encourages vigorous growth without the stress of summer heat.
When planting million bells, select a sunny spot that receives at least six hours of sunlight daily. They thrive in well-draining soil that is rich in organic matter; incorporating compost or a high-quality potting mix will give them the nutrients they need for healthy growth. If planting in containers, ensure there are drainage holes at the bottom to prevent waterlogging.
When establishing your million bells, water them thoroughly but allow the soil to dry out slightly between waterings. Overwatering can lead to root rot, a common issue with these delicate plants. Once established, million bells are relatively low-maintenance and can tolerate short periods of drought, though regular deadheading of spent flowers will promote continuous blooming and keep the plants looking fresh throughout the season.
These charming flowers also attract pollinators such as bees and butterflies, adding an ecological benefit to their ornamental appeal. Consider combining million bells with other plants in mixed containers or borders to create a visually striking garden composition that showcases their bright blooms against a backdrop of varying textures.
Moon Flower
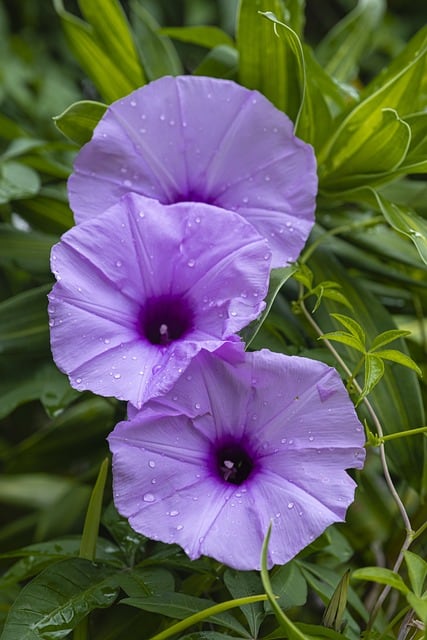
The moonflower (Ipomoea alba), with its large, fragrant white blossoms that open at dusk, is a captivating addition to any garden in Zone 9 as the days grow shorter. This twining vine is perfect for adding vertical interest, thriving in full sun and providing a magical nighttime display that enchants gardeners and passersby alike.
To plant moonflowers, choose an area with full sunlight and well-draining soil. As a vigorous grower, they will require ample space to climb—a trellis, fence, or arbor can serve as a perfect support structure. For planting, dig holes spaced about 12 to 24 inches apart, as these vines can spread significantly. If using seeds, soak them overnight before planting to help with germination, and sow them about 1-2 inches deep once the risk of frost has passed.
While moonflowers are drought-tolerant, they will benefit from regular watering during dry spells to ensure healthy growth and vibrant blooms. Organic mulch can be applied around the base to retain moisture and supplant any weeds that might compete for nutrition. These flowers tend to bloom from late spring to early fall, but planting in October can allow for a longer growing season within milder climates.
One of the most enchanting aspects of moonflowers is their nighttime bloom and captivating scent, which attracts nocturnal pollinators such as moths. Position them near patios, walkways, or sitting areas where you can enjoy their fragrance and visual spectacle during the evenings. With the right conditions, moonflowers can become a standout feature in your garden, creating a serene and enchanting atmosphere.
Purslane
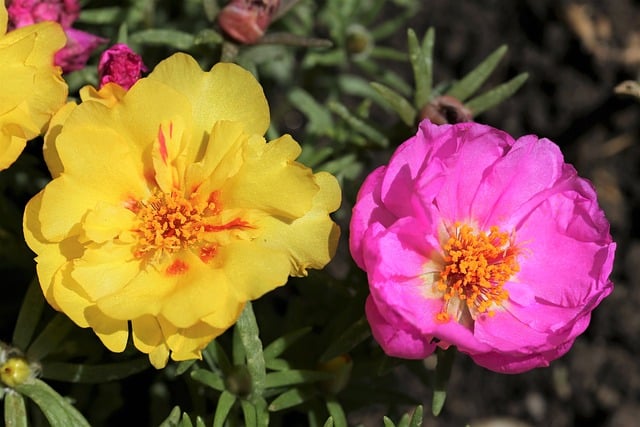
Purslane (Portulaca oleracea) is a unique succulent plant that offers bright, succulent leaves and vibrant flowers, making it a fantastic addition to any garden in Zone 9. Known for its adaptability and low maintenance, purslane is not only an ornamental plant but also an edible one, prized for its nutritious leaves that can add a refreshing crunch to salads.
When planting purslane, it’s best to choose a spot that receives full sun, as these plants thrive in hotter conditions. They prefer well-draining soil, so if your garden is prone to water retention, consider planting purslane in raised beds or rocky areas where they can flourish. Seeds can be sown directly into the ground or soil, approximately 1/4 inch deep, with spacing of about 12 inches apart.
Purslane is relatively drought-resistant and requires very little water once established. In fact, its fleshy leaves store moisture, allowing the plant to survive in less-than-ideal conditions. Water them sparingly, allowing the soil to dry out between watering sessions, which is typical of their native habitats.
Once in bloom, purslane showcases blossoms in shades of yellow, pink, orange, and red, making them a delightful ground cover and garden filler. Moreover, their ability to attract pollinators, coupled with their edible nature, creates a practical and enjoyable addition to your edible landscape. You can harvest the leaves as a nutritious addition to salads
Citrus Trees
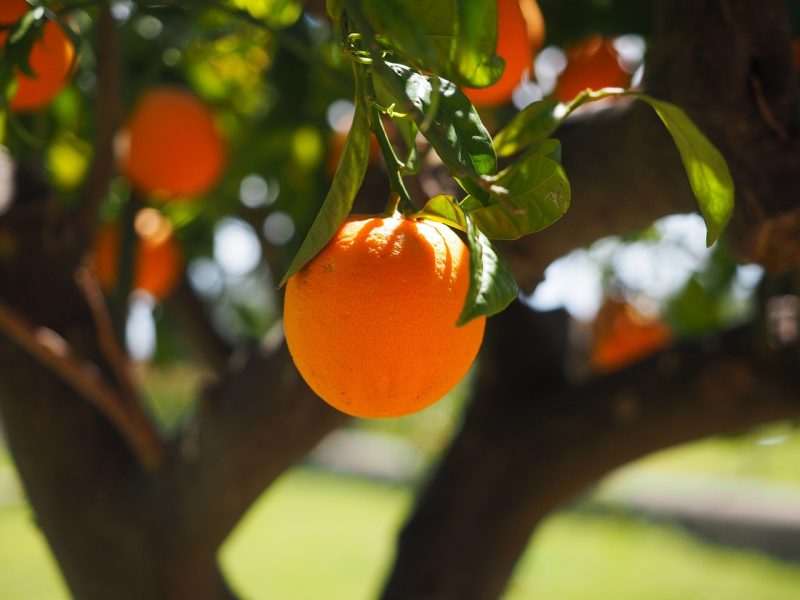
Citrus trees, including varieties such as oranges, lemons, limes, and grapefruits, are prized in Zone 9 for their vibrant foliage and sweet, juicy fruits. October is an excellent time to plant citrus trees, as the cooler temperatures allow the roots to establish before the warmer months return. These trees thrive in well-drained soil, making proper planting technique essential for their growth.
When selecting a planting site for your citrus tree, choose a location that receives full sun for at least six to eight hours a day. Citrus trees prefer sandy loam soil with a slightly acidic pH of 6.0 to 7.0. Before planting, enrich the soil with organic matter, like compost or aged manure, to enhance drainage and provide essential nutrients.
When planting, dig a hole that is wider than the root ball but only as deep as it is high. Gently place the tree in the hole and backfill with soil, ensuring that the graft union (the bulging area where the tree variety was grafted onto the rootstock) sits above the soil line. Water the tree thoroughly after planting to settle the soil and remove any air pockets around the roots.
Citrus trees require regular watering, especially during their early establishment phase. As they mature, they prefer to dry out slightly between watering, as overwatering can lead to root rot. Mulching around the base can help retain moisture and regulate soil temperature. Additionally, applying a slow-release fertilizer designed for citrus trees in early spring can promote healthy growth and fruit production.
Beyond their bounty of delicious fruit, citrus trees are also attractive to pollinators and beneficial insects, making them an important addition to your garden ecosystem. Their aromatic blossoms are a delightful bonus that fills your garden with a sweet scent in springtime.
Olive Trees
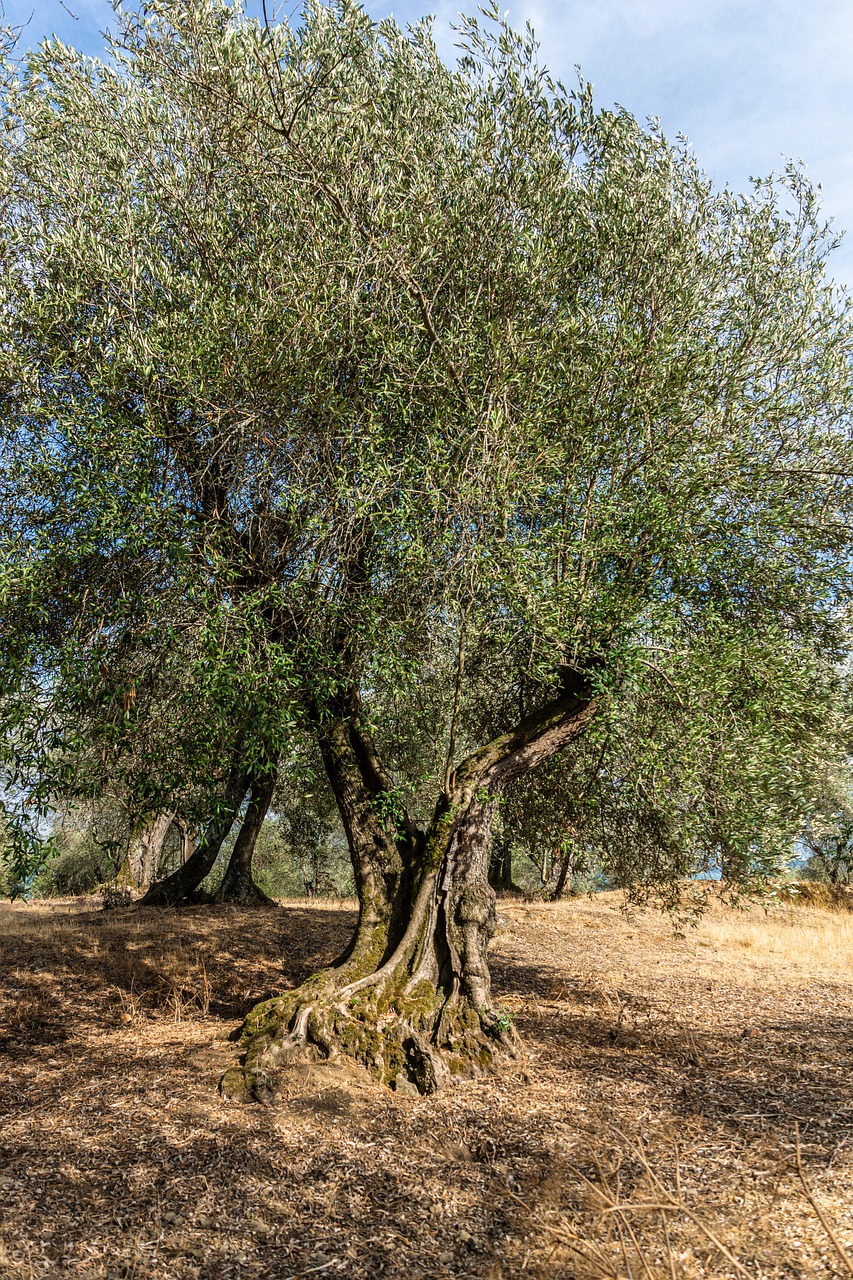
Olive trees (Olea europaea) are well-adapted to the warm climates of Zone 9, making them a worthwhile investment for gardeners looking to cultivate their own fruit. October is the perfect time to plant olive trees, as the cooler days and nights support root establishment without the stress of extreme summer heat. Known for their stunning silvery foliage and gnarled trunks, olive trees lend a Mediterranean flair to any landscape.
When choosing a location for your olive tree, prioritize a sunny site receiving full sun for at least six to eight hours daily. Olive trees thrive in well-draining, sandy or loamy soil with a neutral to slightly alkaline pH. To set your tree up for success, amend heavy clay soils with sand and organic matter to enhance drainage before planting.
For planting, dig a hole that is twice as wide as the root ball and just as deep. Position the olive tree in the center of the hole and backfill with soil, ensuring that the grafting point remains above the ground. After planting, water the tree thoroughly to help settle the soil and encourage deep root growth.
Olive trees are drought-tolerant once established, so water them sparingly. They prefer drier conditions and may experience root rot if overwatered. A layer of mulch around the base can help conserve moisture while reducing competition from weeds. Young trees will benefit from regular monitoring to ensure they receive enough water during their first growing season.
In addition to producing nutritious olives that can be harvested for consumption or oil production, olive trees are valued for their ornamental qualities. They are also resistant to pests and diseases, making them a low-maintenance addition to any garden.
Star Fruit
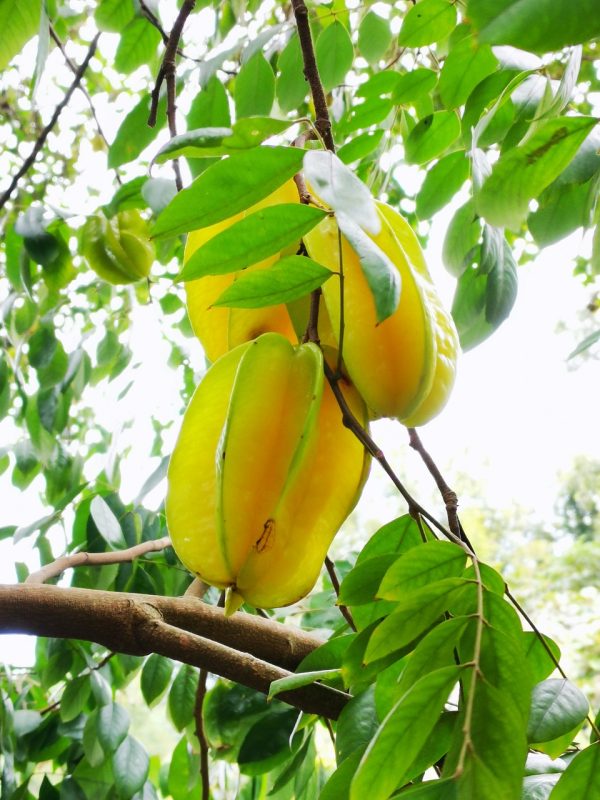
Star fruit (Averrhoa carambola) is a tropical gem that brings an exotic touch to any garden in Zone 9. Named for its unique star-shaped cross-section, star fruit not only adds aesthetic appeal but also offers a sweet and tangy flavor that can enhance many dishes. October presents an ideal time to plant star fruit trees, allowing them to establish roots in the mild autumn conditions.
When selecting a planting site, ensure the star fruit tree will receive full sun, as these tropical trees thrive on warmth and light. They prefer well-draining, sandy loam soil rich in organic matter. It would be beneficial to amend your soil with compost or well-rotted manure before planting to promote healthy growth and fruit production.
When planting, choose a young tree with a sturdy trunk and ensure you dig a hole that is slightly shallower and wider than the root ball. Place the tree in the hole gently, taking care not to damage the roots. After planting, fill in the hole with soil, making sure that the grafting point is just above the soil level, and water thoroughly.