This guide will break down the optimal planting times, considerations for your specific climate, the best varieties to choose, and tips on care to ensure your radish crop is successful.
Understanding Radish Varieties and Their Growth Cycles
Before delving into the specifics of when to plant radishes, it’s vital to familiarize ourselves with the different types of radishes available and their respective growth cycles. There are two primary categories of radishes: spring (or summer) radishes and fall radishes.
Spring Radishes
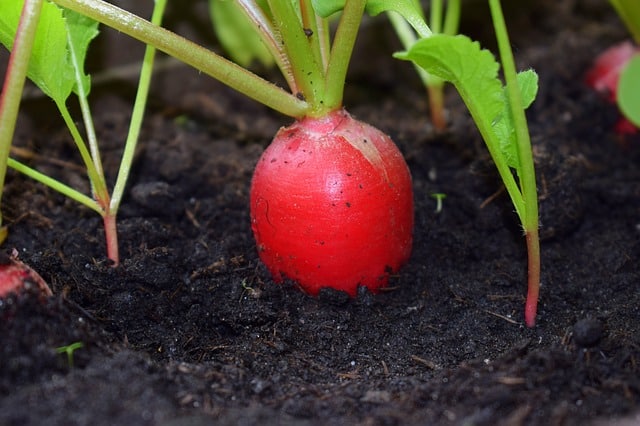
Spring radishes, such as the classic Red Globe and Cherry Belle, are typically planted in early spring as soon as the soil can be worked. These radishes are known for their quick maturation, often ready for harvest in just three to four weeks. They thrive in cooler weather, making them perfect for a spring garden. In fact, they often enjoy a mild temperature range of 50°F to 70°F (10°C to 21°C).
Spring radishes are renowned for their crisp texture and vibrant colors, adding a decorative and tasty touch to salads and various dishes. Planting them early maximizes your chances of avoiding pests like the radish maggot, which tends to appear later in the season.
Fall Radishes
On the other hand, fall radishes, such as Daikon or Black Spanish, require a different approach. These radishes can be planted later in the season, around late summer to early fall, allowing them to mature as the days shorten and temperatures cool. Fall radishes can take longer to grow—typically six to eight weeks—but they often develop a heartier flavor and can be stored for extended periods if harvested at the right time.
Knowing the type of radish you want to plant will largely dictate the timing of your planting. Each variety has its own unique characteristics, influencing not only the planting schedule but also the care requirements during their growing cycle.
Optimal Planting Times Based on Climate Zones
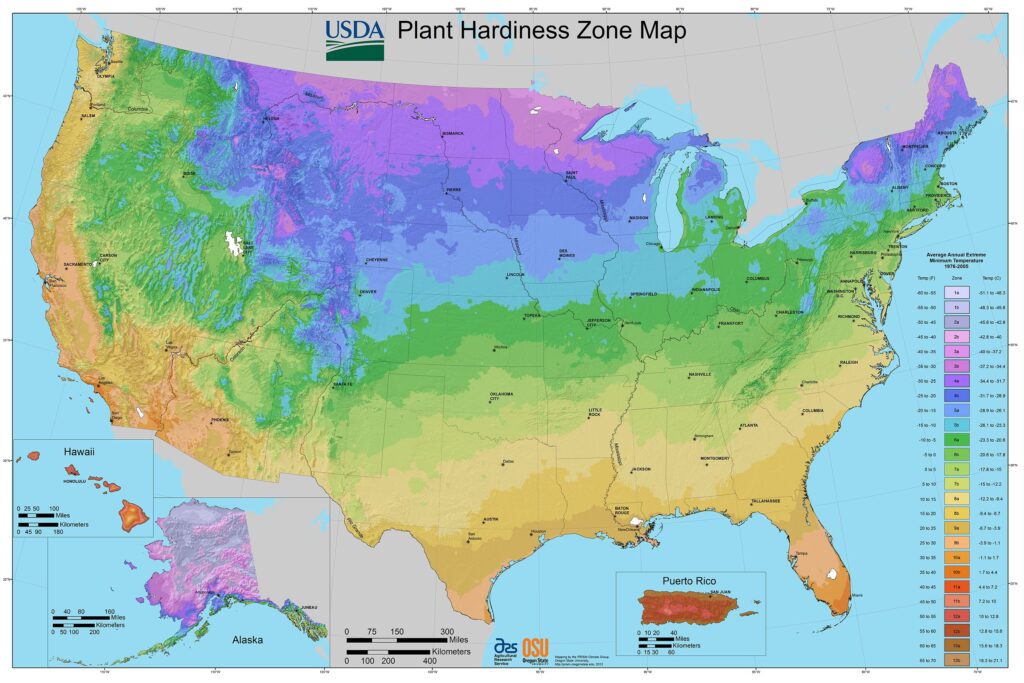
Planting radishes at the right time is influenced heavily by your climate zone. The United States has been divided into USDA hardiness zones, which help gardeners determine the best planting times based on average temperatures.
USDA Hardiness Zones Overview
Zones 1-3: These zones experience harsh winters and short growing seasons. In these areas, spring radishes can be sown as soon as the soil thaws, typically between late March and early April. For fall radishes, sowing can start in late July, allowing them to mature before the first frost.
Zones 4-5: Moderate climates in zones 4 and 5 allow for a more extended growing season. Spring radish planting can begin from early April to late May, while fall radishes can be sown from late July to mid-August.
Zones 6-8: These areas have a longer and warmer growing season. Gardeners can plant spring radishes from mid-March to late June. For a second crop of fall radishes, sowing can occur from late July to early September.
Zones 9-10: These warm climates allow for year-round gardening. You can plant spring varieties in January for a winter garden and again from early February to March. Fall radishes can be successfully sown from September to November, allowing for a winter harvest.
Knowing your specific zone will enable you to plant radishes at the prime time for your region, ensuring they grow healthily and develop that crisp, peppery flavor we all love.
Preparing Your Soil for Planting Radishes

Timing and the right environment contribute to successful radish growth, and the foundation of this is well-prepared soil. Healthy soil is rich in organic matter, has good drainage, and is moderately fertile.
Soil Requirements
Soil Type: Radishes prefer loose, well-drained soil with a pH between 6.0 and 7.0. Heavy clay can lead to stunted growth, so consider amending your soil with compost, peat moss, or well-rotted manure to improve its texture and nutrients.
Nutrients: While radishes are not heavy feeders, they will benefit from a balanced fertilizer application. A nitrogen-rich fertilizer at planting time can support leafy growth, while a later application of potassium and phosphorus can help with root development.
Soil Temperature
Soil temperature is another crucial factor. The ideal temperature for radish seeds to germinate is between 45°F and 85°F (7°C to 29°C). If the soil is too cold, germination will be delayed. If it gets too warm, seeds may rot or fail to sprout. Use a soil thermometer to confirm optimal conditions before planting your seeds.
Seed Spacing and Planting Techniques
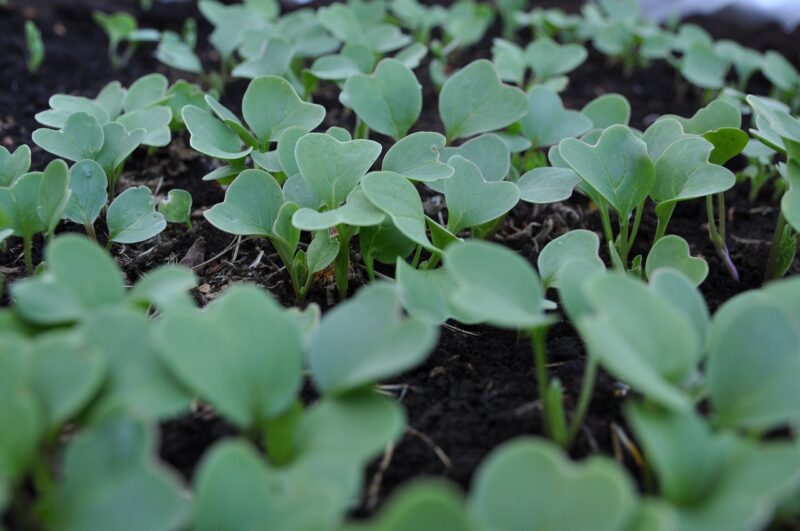
Once your soil is ready and you’ve determined the right time to plant, it’s essential to follow proper planting techniques for radishes.
Sowing Seeds
Depth: Generally, radish seeds should be planted about ½ inch deep. This ensures they receive adequate moisture without being buried too deeply.
Spacing: Space your seeds about 1 inch apart. If you’re planning to thin your radishes later, you could plant them slightly closer together initially. Once they begin to sprout, thin them to a spacing of 2-4 inches apart, depending on the variety. Thinning helps prevent overcrowding, allowing the remaining radishes to develop fully.
Row Width: Create rows about 12-18 inches apart. This space allows for good air circulation and access when harvesting the radishes.
Companion Planting
Radishes can also benefit from companion planting. Certain plants, such as lettuce and spinach, grow well alongside radishes because they share similar water and nutrients requirements. Additionally, planting radishes near cucumbers can help deter cucumber beetles due to the strong scent of the radishes.
Caring for Your Radish Plants

Timing your planting is just the beginning. Once your radishes are in the ground, proper care is needed to ensure a successful harvest.
Watering
Maintain consistent soil moisture without overwatering. Radishes thrive in moist conditions, but too much water can lead to rot. A gentle watering regimen of an inch per week, adjusting based on rainfall, is generally sufficient. Make sure the soil drains well, as standing water can damage the roots.
Weeding
Weed regularly to reduce competition for nutrients and water. Using mulch can help suppress weed growth, conserve moisture, and keep soil temperatures stable. Always check that your mulch layer is not too thick, which can inhibit germination.
Pest and Disease Control
While radishes are relatively hearty, they can still fall prey to pests such as aphids, flea beetles, and root maggots. Monitoring your plants regularly, using row covers when necessary, and promoting a diverse planting ecosystem can minimize issues. In addition, practicing crop rotation each season can reduce the chances of disease and pest establishment.
Harvesting Radishes: The Final Timing
Knowing when to harvest your radishes is as crucial as knowing when to plant them. Harvest time will depend on which variety you chose to grow and the conditions they’ve faced.
Signs of Maturity
Typically, you can expect to harvest spring radishes about 3-4 weeks after planting, while fall varieties may take up to 8 weeks. Look for the following signs of maturity:
Size: Spring radishes are usually ready when they reach about an inch in diameter. Fall radishes can grow significantly larger, sometimes over a foot long depending on the type.
Soil Cracks: Occasionally, you may see the soil around the roots cracking. This can indicate that your radishes are ready to be pulled. Delaying harvest beyond this point may lead to overly mature, woody, or bitter roots.
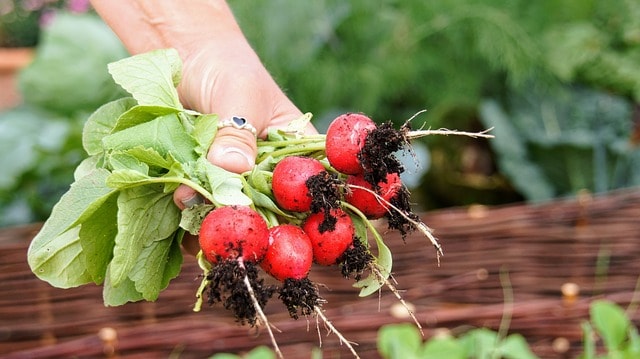
Taste Test: Pull one of your radishes to check the flavor. If it’s crunchy and has that delightful spicy flavor, it’s time to harvest!
Storing Your Harvest
Once harvested, it’s essential to handle radishes carefully to avoid bruising. For immediate use, you can wash them and store them in the fridge for freshness. If you have an abundant harvest, radishes can be kept in a cool, dark place or even stored in the refrigerator crisper drawer wrapped in a damp cloth for about a week or two.
Conclusion
Radishes are a delightful and straightforward vegetable to grow, offering a rewarding experience for gardeners of all levels. Understanding when to plant them, considering your climate zone, ensuring the soil is well-prepared, and knowing how to care for them will greatly improve your chances of a successful crop.