In this guide, we will cover all the nuances of growing watermelon—from understanding its growth cycle and climate preferences to tips for planting and care. Let’s explore the best practices for cultivating this delightful fruit, ensuring you reap nature’s sweet rewards.
Understanding Watermelon Growth Cycles
Before we tackle exactly when to plant watermelon, it’s essential to understand its growth cycles. Watermelon (Citrullus lanatus) is a warm-season crop that thrives in conditions where the temperatures consistently remain warm. The watermelon growth cycle can be divided into several key phases: germination, vegetative growth, flowering, and fruiting.
Germination: This is the initial stage when seeds are activated by warmth and moisture. Watermelon seeds generally germinate best when soil temperatures are between 70°F and 90°F (21°C to 32°C). Under ideal conditions, you’ll typically see sprouts within 5 to 10 days.
Vegetative Growth: After germination, seedlings will grow rapidly, developing leaves and vines. This phase can last from a few weeks to several months. The vine’s sprawling nature is crucial for the plant’s ability to absorb sunlight and nutrients, which will, in turn, support fruit development.
Flowering: Watermelons produce both male and female flowers, with the male flowers appearing first. The fertilization of female flowers ultimately leads to fruit development. This period coincides with warmer temperatures and usually occurs about 4 to 6 weeks after planting.
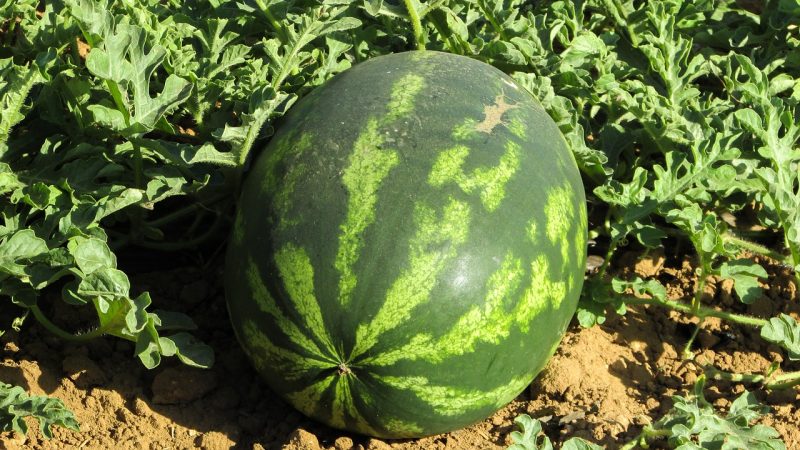
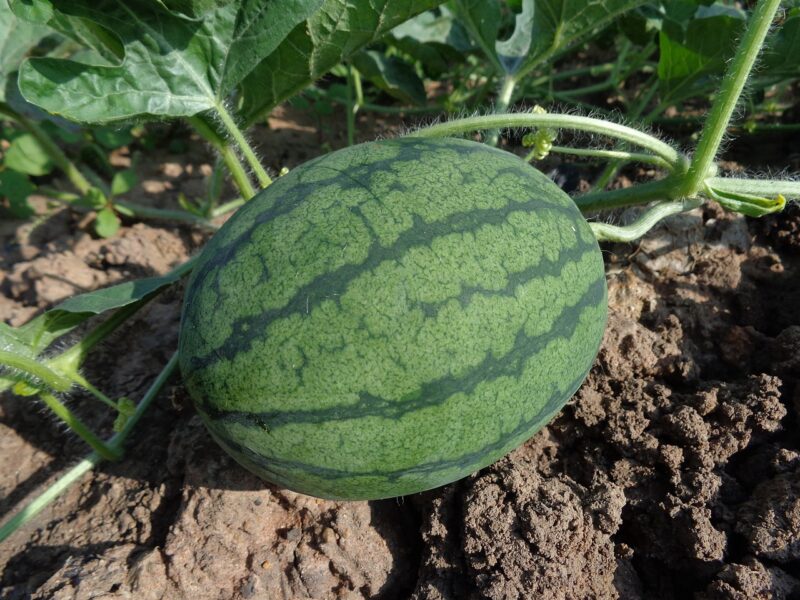
Fruit Development: Once pollination occurs, the fruit begins to grow. The size of the watermelon will depend on the variety and environmental factors. This stage can last from 30 to 80 days, depending on the specific type of watermelon.
Understanding these stages will help you determine optimal planting times and care practices that align with watermelon’s natural growth patterns.
Ideal Planting Time Based on Climate
The most crucial factor influencing when to plant watermelon is climate. Watermelons are sensitive to frost and flourish in warm weather, which means that timing can vary widely depending on your local growing zone. Generally, the consensus among growers is to wait until the soil temperature has reached at least 70°F (21°C) consistently.
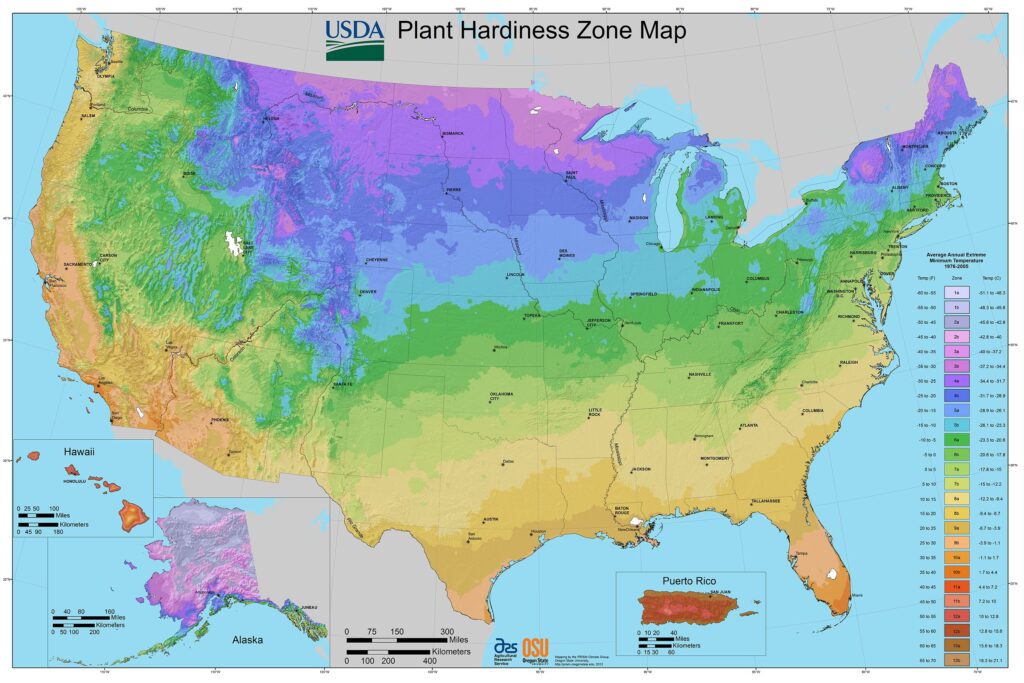
USDA Hardiness Zones
The United States Department of Agriculture (USDA) has classified the U.S. into various hardiness zones, which range from 1 (the coldest) to 13 (the warmest). Most watermelon varieties thrive best in USDA zones 3 to 11, where the growing season is long enough to accommodate their warm-weather preferences.
Zone 3-5: Here, the growing season is relatively short. It’s best to start seeds indoors about 4-6 weeks before the last expected frost, typically transplanting seedlings outdoors after the risk of frost has passed, usually in late May.
Zone 6-7: You can start seeds indoors but may also directly sow them outdoors after the last frost date, usually in mid to late April or early May.
Zone 8-11: These warmer zones allow for direct sowing in early to mid-April, given that the soil temperature is appropriate. Late spring (May) is prime time for sowing seeds outdoors.
Monitoring Local Conditions
To further refine your planting plan, keep an eye on the local weather forecast and soil temperatures. Use a soil thermometer to check the temperature before planting, as watermelons will not perform well in cold, damp soil.
Additionally, pay attention to microclimates within your garden, such as areas that receive full sunlight versus those that may be shaded. These small variations can significantly affect your watermelon growth.
Choosing Between Transplants and Direct Sowing

When determining when to plant watermelon, you have two main approaches: starting seeds indoors (transplants) or directly sowing them into your garden. Each method has its benefits and challenges.
Direct Sowing
Direct sowing involves planting seeds directly into the soil where they will grow. This method is often recommended for gardeners in warmer climates where soil temperatures are reliably warm by late spring.
Advantages:
Reduced Stress on Plants: Seeds adapt to soil conditions naturally without the stress of transplanting.
Reduced Labor: You simply plant and wait, with less work involved in transferring seedlings.
Disadvantages:
Pest and Disease Risks: Seeds are directly exposed to soil-borne diseases and pests.
Delayed Start: If the weather remains cool, germination may be delayed.
Starting Indoors
Transplanting involves starting seeds indoors and moving them outside later. This method provides an opportunity to get a jump-start on the growing season.
Advantages:
Early Start: You can begin growing as early as late winter or early spring, potentially yielding a quicker harvest.
Controlled Environment: Seedlings can grow in a more controlled environment, reducing the chance of diseases and pests impacting early growth.
Disadvantages:
Transplant Shock: Maintaining the health of seedlings during transfer can be challenging, leading to transplant shock.
More Labor-Intensive: Requires additional materials and time for potting, watering, and nurturing young plants.
Ultimately, whether you choose to start seeds indoors or direct sow will depend on your gardening style and climate conditions.
Selecting the Right Watermelon Variety
Another vital consideration in planning when to plant watermelon is the variety you choose to grow. Watermelons can be categorized based on size, shape, color, and days to maturity. Understanding these factors can help you align your planting time with desired characteristics.
Types of Watermelon
Seedless Varieties: Perfect for those who want to enjoy the sweetness without the hassle of seeds. Popular varieties include ‘Yellow Crimson’ and ‘Sugar Baby’.
Mini Watermelons: Smaller and easier to grow, these typically reach maturity quicker. Examples include ‘Mini Love’ and ‘Personal Size’.
Heirloom Varieties: For those who appreciate taste and historical significance, heirloom varieties like ‘Black Diamond’ and ‘Moon and Stars’ offer unique flavors and textures.
Hybrid Varieties: Generally exhibit disease resistance and uniformity. Breeds like ‘Allsweet’ and ‘Crimson Sweet’ are excellent for home gardeners looking for reliable options.
Each variety has a distinct number of days until maturity, which can be anywhere from 70 to 90 days or more. If your growing season is short, opt for faster-maturing varieties to ensure a harvest before the first frost.
Planting Watermelon: Tips and Tricks
Once you’ve decided on the right planting time and variety, it’s time to get down to the practical aspects of planting watermelon. Here are some tips to ensure a healthy and fruitful season.
Soil Preparation
Watermelon thrives in well-drained soil that is rich in organic matter. Aim for a soil pH between 6.0 and 6.8 for optimal growth.
Testing Soil: Conduct a soil test to assess pH and nutrient levels. Amend the soil as necessary with lime to raise pH, or sulfur to lower it.
Adding Organic Matter: Incorporate compost or well-rotted manure into your soil several weeks before planting to enhance fertility and improve drainage.
Spacing and Planting Technique
Watermelon vines require ample space to sprawl.
Plant Spacing: Place seedlings about 36-42 inches (91-107 cm) apart in rows that are 5 to 8 feet apart. If planting multiple rows, provide enough space for walking and caring for the plants.
Mounding Technique: When planting in rows, consider creating small mounds for each seedling, which can help with drainage and root establishment.
Watering and Fertilization
Proper hydration is imperative during the growing season.
Watering Schedule: Water deeply and regularly, particularly during the flowering and fruiting stages. Aim for about 1 inch (2.5 cm) of water per week.
Fertilization: Use a balanced fertilizer at planting and a nitrogen-rich fertilizer during vegetative growth, transitioning to a phosphorus-rich formula as fruit begins to set.
Pest and Disease Management
Watermelons can be susceptible to certain pests, such as aphids and cucumber beetles, as well as diseases like powdery mildew or downy mildew. Here are some preventive measures:
Companion Planting: Interplanting watermelon with plants like basil or marigolds can naturally deter pests.
Regular Monitoring: Keep an eye out for pest activity or disease signs and act promptly with organic insecticides or fungicides if necessary.
Harvesting: Knowing When to Enjoy Your Watermelon
After all the hard work put into growing your watermelons, knowing when to harvest is the final piece of the puzzle. Watermelons are ready to pick when:
The tendril closest to the fruit has turned brown and dried out.
The bottom of the watermelon, where it touches the ground, has turned creamy yellow.
The sound produced when thumped is dull, not a hollow sound.
Harvesting watermelons too early might result in an unripe taste, while harvesting too late can lead to overripe, mushy fruit.
Conclusion
Planting watermelon is as much an art as it is a science. By understanding the growth cycle, climate, variety selection, soil preparation, and maintenance practices, you can set yourself up for success. Whether you’re a seasoned gardener or a newbie, the joy of picking your homegrown watermelon and sharing it with family and friends is an unparalleled delight. Embrace the warmth of summer, enjoy the luscious taste, and relish in the achievement of cultivating nature’s sweetest treat!