Whether you’re a home cook or a seasoned chef, knowing how to dry basil opens up a seasonal bounty of opportunities to use this aromatic herb long after the growing season has passed. Drying basil allows you to preserve its delightful flavor and fragrance, ensuring you have this essential ingredient at your fingertips throughout the year.
In this extensive guide, we’ll explore the intricacies of drying basil, from the best harvesting techniques to different drying methods, storage, and practical culinary applications.
The Many Varieties of Basil
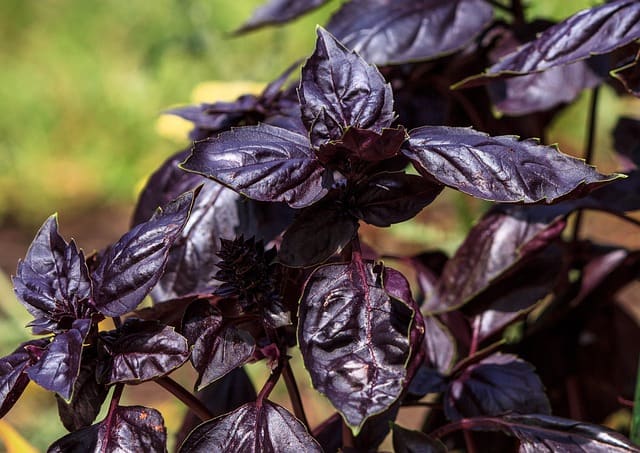
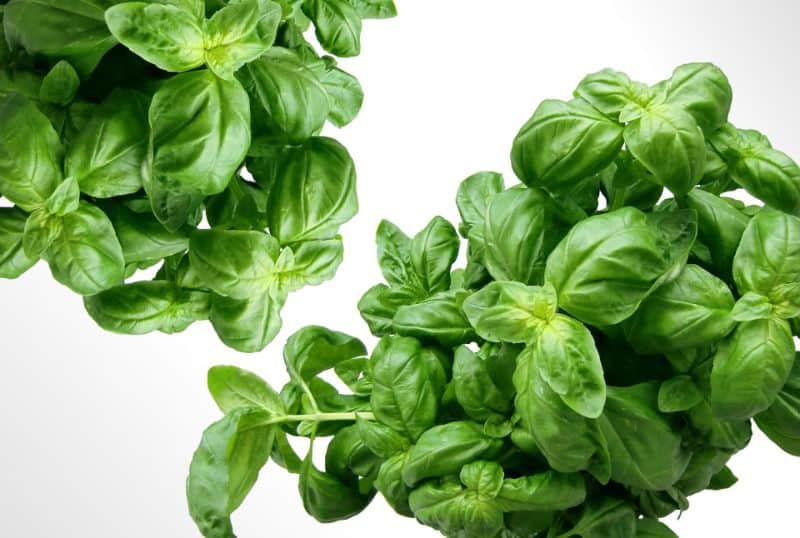
Before diving into the drying process, it’s essential to appreciate the various types of basil available. The most common variety is Sweet Basil, known for its sweet, slightly pepperminty flavor, ideal for Italian dishes. Then there’s Thai Basil, which has a robust flavor profile and a distinct anise aroma, making it a staple in Southeast Asian cooking. Other varieties, such as Holy Basil, Genovese Basil, and Purple Basil, offer different flavors and aesthetic benefits.
Understanding the subtleties among these varieties not only enhances your culinary experience but also influences your approach to drying. For instance, Holy Basil, with its unique flavor, may be best suited for herbal teas and infusions, whereas Sweet Basil harmonizes beautifully with tomato-based sauces.
Harvesting Basil: The First Step to Drying

A successful drying process begins with the careful harvesting of basil. Timing is crucial; the best time to pick basil is mid-morning, after the dew has evaporated but before the sun fully heats the leaves. This moment ensures that the essential oils, responsible for basil’s aromatic profile, are at their peak.
When harvesting, follow these tips:
Choose Healthy Plants: Look for robust plants free of pests or disease. The leaves should be vibrant green and devoid of yellowing or browning.
Cutting Technique: Use scissors to snip off whole stems, preferably above a leaf node, which encourages bushier growth. Aim for stems that are at least 6-8 inches long.
Collect Wisely: Gather only what you need to avoid waste. If you have an overabundance, consider sharing with neighbors or friends.
Harvesting basil not only connects you with your garden but also sets the tone for the drying journey ahead. The anticipation of transforming fresh basil into a fragrant kitchen staple adds a personal touch to the process.
Preparing Basil for Drying
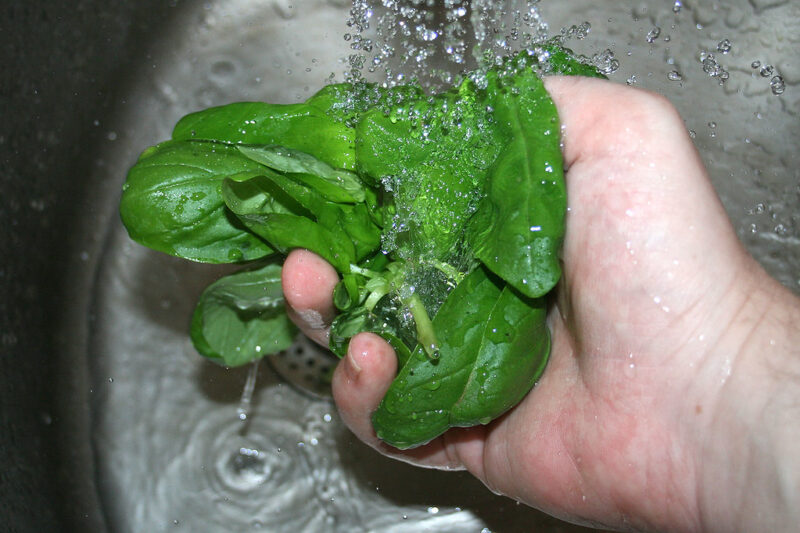
Once you’ve harvested your basil, the next step is preparation. This phase is crucial for ensuring the best flavor in your dried product. Begin by rinsing the basil under cold water to remove any dirt or insects. It’s advisable to avoid soaking as it can lead to waterlogged leaves that won’t dry properly.
After washing, gently pat the leaves dry with a paper towel or a clean dishcloth. This is an often overlooked step, but moisture retention can lead to mold during the drying process. When the leaves are dry, you can choose to strip them from the stems or keep them attached—this will depend on your preferred drying method.
Different Methods for Drying Basil
There are several methods for drying basil, each offering unique advantages and affecting the herb’s final flavor and aroma. Let’s explore these methods in detail.
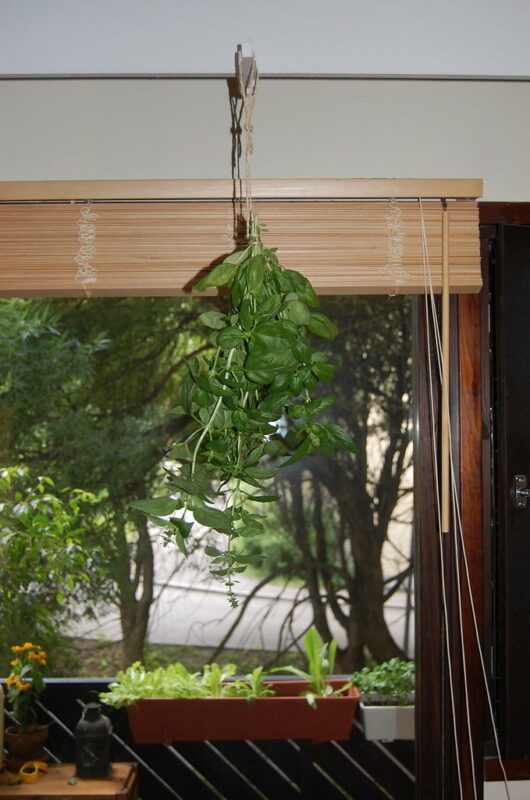
Air Drying: This traditional method requires the least equipment and preserves maximum flavor. To air dry basil:
Bundle stems together in small groups, securing with string.
Hang them upside down in a cool, dark, well-ventilated space. High humidity or direct sunlight can degrade the flavor, so a pantry or a shaded room is often ideal.
It typically takes about 1-2 weeks for the basil to dry completely, but check regularly for dryness and signs of mold.
Oven Drying: If you need to dry basil quickly, the oven is a speedy alternative. Here’s how to do it safely:
Preheat your oven to the lowest setting (ideally around 170°F or 77°C).
Spread the basil leaves in a single layer on a baking sheet lined with parchment paper.
Place the sheet in the oven and leave the door slightly ajar to allow moisture to escape. Monitor the basil closely, checking every 15 minutes. The leaves are done when they crumble easily.
This method usually takes about 30 minutes to an hour, depending on the oven temperature and moisture content.
Dehydrator Drying: A dehydrator is an efficient tool for drying basil while retaining its vibrant color and flavor. Here’s the process:
Arrange the basil leaves in a single layer on the dehydrator trays.
Set the temperature to around 95°F (35°C) to maintain flavor integrity.
Depending on your dehydrator and the basil’s moisture content, this process may take 1-4 hours. Check for crispness before removing.
Microwave Drying: For the fastest method, microwaving basil is effective, although it can be riskier regarding flavor retention. Here’s how to do it:
Place basil leaves between two paper towels in the microwave.
Heat in 20-30 second increments, checking until the leaves are crisp.
This method can take about 1-2 minutes but requires careful monitoring to avoid burning.
Ensuring Quality: Signs Your Basil is Ready
Regardless of the method used, you’ll want to ensure your basil is thoroughly dried. The leaves should feel crisp and crumble easily between your fingers. If they feel leathery or retain moisture, they require more drying time. Properly dried basil will maintain its essential oils and flavor, while improperly dried basil can become a health risk and lose its aroma.
Storing Your Dried Basil
Once your basil is fully dried, storage is paramount to preserving its flavor. Here are practical tips for storing your dried basil:
Choose the Right Container: Airtight containers are essential. Glass jars, vacuum-sealed bags, or dark, opaque bins work well to reduce exposure to air and light.
Labeling: Clearly label containers with the date of drying, helping you remember when it was prepared.
Cool, Dark Place: Store the containers in a cool, dark place like a pantry or cupboard. Heat and light can degrade the oils and flavor over time.
Crushing and Powdering: If you prefer ground basil, you can crush it before storing, but keep some whole leaves intact for recipes requiring fresh basil’s texture. Ground basil may lose flavor faster than whole leaves.
Culinary Uses for Dried Basil
Dried basil is as versatile as its fresh counterpart. Here are some inspiring ways to use dried basil:
Soups and Stews: Add dried basil to your favorite soups, stews, and sauces while cooking. Dried herbs often benefit from longer cooking times, allowing their flavors to meld expertly.
Pasta Dishes & Pizzas: Sprinkle on pasta or pizza right before serving to enhance flavor without the hassle of fresh herbs.
Herbal Teas: Some varieties of basil, like Holy Basil, are revered for their health benefits. Dried leaves can be steeped to create soothing herbal teas known for their calming properties.
Seasoned Oils and Vinegars: Infuse olive oil and vinegar with dried basil for an aromatic twist on salads, marinades, and cooking.
Herb Blends: Incorporate dried basil into homemade herb mixes for sauces, dressings, and seasoning blends.
The Health Benefits of Basil
Beyond culinary applications, basil is also cherished for its health benefits. This herb has been a part of traditional medicine practices for centuries, notably in Ayurveda and Traditional Chinese Medicine. Some of the potential benefits include:
Antioxidant Properties: Basil contains powerful antioxidants that help combat oxidative stress, protecting your cells from damage.
Digestive Aid: Traditionally, basil has been used to alleviate digestive issues and promote better gut health.
Anti-Inflammatory Effects: The phytochemicals in basil may help reduce inflammation in the body.
Stress Relief: Some studies suggest that basil’s essential oils can help reduce cortisol levels and promote feelings of calm.
Understanding the benefits of basil can further inspire your use of this incredible herb, enhancing not just your dishes but also your well-being.
A Personal Touch: My Basil Journey
As a chef and home gardener, my love for basil blossomed when I first nurtured my small herb garden. I vividly remember the day I plucked my first batch of sweet basil, its intoxicating scent guiding me through the kitchen as I prepared a classic Margherita pizza. It was in that moment of triumph that I realized the magic of homegrown herbs.
As late summer approached, I faced an inevitable decision—how could I preserve this bounty? I experimented with various drying methods, each yielding different flavors and aromas. I found delight in air drying my basil, knowing it would maintain its vibrancy. The smell wafting through my home inspired more than just cooking; it motivated gatherings around the dinner table, cultivating not only flavors but memories with friends and family.
Dried basil became my go-to flavor booster, transforming ordinary meals into extraordinary culinary experiences. Whether it was a comforting marinara sauce bubbling on the stove or a simple Caprese salad with a drizzle of olive oil—dried basil made it sing.
Concluding Thoughts
Learning how to dry basil is not merely an instructional process; it is a celebration of the herb’s journey from garden to kitchen. Each step—from harvesting and preparation to drying and storage—holds significance in preserving the essence of basil, lending it a celebration of flavor that transcends seasons.