In this guide, we’ll cover everything you need to know about harvesting green beans, ensuring you enjoy the best of your garden’s bounty.
When to Harvest Green Beans
Timing your harvest is crucial for the best flavor and texture. Green beans can be harvested at several stages, but the best time to pick them is when they are young and tender. Here are some key signs to look for:
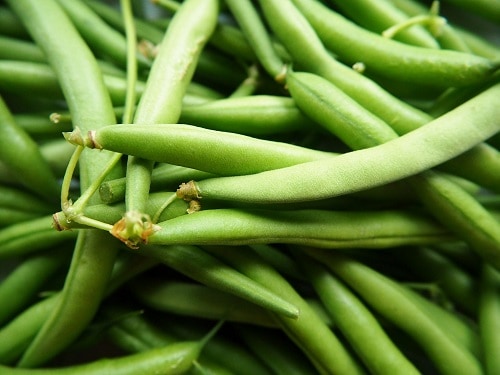
Size: Depending on the variety, green beans are typically ready to harvest when they are about 4 to 6 inches long. The exact size may vary, so do some research on the specific type of green bean you are growing.
Color: Look for vibrant green color without any dullness or yellowing, which can indicate overripeness.
Firmness: Freshly harvested green beans should feel firm to the touch. Avoid beans that feel soft or mushy, as this can indicate they are past their prime.
Seeds: If you can see the seeds bulging through the pod, it’s a sign that they are getting too mature. Ideally, the seeds should not be overly visible when you pick them.
How to Harvest Green Beans
Once you’ve determined that your green beans are ready to be harvested, it’s time to get to work. Here’s how to do it:
Tools You’ll Need
A pair of sharp garden scissors or pruning shears
A basket or container to collect your beans
Harvesting Technique
Check Your Beans: Go through your plants and look for pods that meet the size and quality criteria mentioned earlier.
Use Snipping Motion: Place your finger and thumb around the stem just above the bean pod. Use your scissors to snip the stem instead of pulling the beans off; this helps avoid damage to the plant and allows it to continue producing.
Be Gentle: Handle the beans with care to prevent bruising. Collect them in your basket or container.
Keep on Picking: For continual harvest, pick beans every few days. This encourages the plant to produce more beans.
Storage Tips for Fresh Green Beans
To keep your freshly harvested green beans at their best, follow these simple storage tips:
Immediate Use: If you plan to use your green beans right away, rinse them quickly under cold water, pat them dry, and they’re ready for cooking.
Refrigeration: If you can’t use your green beans immediately, place them in a perforated plastic bag and store them in the refrigerator. This helps to maintain their freshness for about a week.
Freezing: For longer storage, blanch your green beans in boiling water for about 3 minutes, then transfer them to ice water to halt the cooking process. Once cooled, drain them well, and pack them in airtight bags before freezing.
Common Issues and Solutions
While harvesting green beans can be straightforward, here are a few common issues gardeners might face:
Pests
Aphids and Spider Mites: These pests can attack green bean plants. Inspect your plants regularly and consider using insecticidal soap or neem oil as a natural deterrent.
Disease
Powdery Mildew: This fungal disease can affect green beans, especially in humid conditions. Maintaining good air circulation and ensuring that plants are spaced appropriately can help prevent it.
Overripe Beans
If you happen to find overly mature beans, don’t despair! They can still be used in compost or left on the plant for seeds for next year’s crop.
Conclusion
Harvesting green beans is a rewarding experience that not only yields delicious produce but also enriches your gardening skills. With proper timing and techniques, you can gather a harvest that enhances your meals and provides a sense of accomplishment. Whether you’re preparing a fresh salad, sautéing them as a side dish, or freezing them for later, the harvest is just the beginning of enjoying your green beans