In this comprehensive guide, we will explore everything from the basic needs of scallions to advanced cultivation techniques, ensuring you have all the insights necessary for a successful harvest.
Understanding Scallions: What Are They?
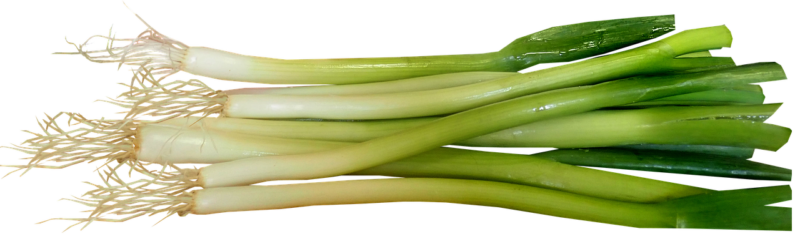
Scallions belong to the Allium family, which includes onions, garlic, leeks, and chives. Unlike fully mature onions, scallions are harvested when they are still immature, focusing on the green stalks and onion bulbs that are tender and flavorful. Their mild taste makes them a favorite in salads, soups, and as a garnish for countless dishes.
Scallions can be categorized into two main varieties: those with a white base and those with a more pronounced green shoot. While both types can be used interchangeably in cooking, their visual appeal often makes them a popular choice for garnishing plated dishes.
Preparing Your Space: Choosing the Right Location

Before sowing scallions, it’s crucial to select an appropriate location. Scallions thrive in areas with full sun; aim for at least 6 to 8 hours of direct sunlight daily. The soil should be well-drained, rich in organic matter, and slightly acidic to neutral (pH of 6.0 to 7.0).
Consider the following aspects when preparing your garden space:
Soil Composition
Scallions prefer loamy or sandy soil that allows for proper drainage. If your soil is heavy clay or too compacted, consider amending it with compost or aged manure. This not only enhances soil structure but also provides the necessary nutrients for vigorous growth.
Raised Beds vs. Traditional Rows
If you face challenging soil conditions, raised beds can be an optimal choice. They allow for better drainage and soil warmth, both of which are beneficial for seedlings. Additionally, raised beds often preclude weeds, making maintenance simpler.
Companion Planting
Scallions do well when planted alongside other crops such as carrots, lettuce, and cabbage. Avoid planting them near beans or peas, which may hinder their growth. Adopting companion planting strategies can lead to healthier plants and higher yields.
Starting from Seeds or Sets: Choosing Your Method
You can grow scallions from seeds or sets—small bulbs meant for planting. Both methods have their merits, and choosing one depends on your gardening style.
Growing from Seeds
Starting from seeds for scallions offers the most control over the variety and the growing conditions. If you’re starting seeds indoors, plant them about ¼ inch deep in seed starting trays filled with seed starting mix. Keep the soil consistently moist and provide bottom heat for germination.
Here’s a step-by-step guide to seed germination:
Choose Quality Seeds: Opt for certified organic seeds or seeds from a reputable supplier.
Timing is Key: Start seeds indoors 8-10 weeks before the last frost date or sow them directly into your garden once the soil temperature reaches about 60°F.
Water Regularly: Ensure consistent moisture but avoid waterlogging.
Growing from Sets
If you’re eager to harvest scallions sooner, consider planting sets. They’re typically available at garden centers and are easier for beginners. To plant sets:
Depth and Spacing: Place them 1-2 inches apart in rows. Ensure they’re slightly covered with soil, leaving the green tops exposed.
Watering: Like seeds, sets need regular watering to establish roots quickly.
Cultivating Your Scallions: Essential Care Techniques

With the groundwork laid, it’s time to focus on care and maintenance. Understanding the ongoing requirements of your scallions will ensure healthy growth and a bountiful harvest.
Watering Wisely
Scallions require consistent moisture throughout the growing season. Inconsistent watering can lead to bolting or stunted growth. Aim for about an inch of water weekly, either through rainfall or supplemental watering. A soaker hose or drip irrigation system will deliver moisture directly to the roots, minimizing evaporation.
Fertilizing for Success
To promote robust growth, scallions benefit from balanced fertilization. Before planting, mix a slow-release fertilizer into the soil, focusing on one low in nitrogen to prevent excessive leaf growth at the expense of bulb development.
As scallions grow, a side-dressing of compost or a water-soluble fertilizer can encourage vigor. However, keep an eye on the nitrogen levels—high nitrogen can lead to lush greens but tender, underdeveloped bulbs.
Weed Control
Weeds compete with your scallions for sunlight, nutrients, and moisture. Mulching around the plants can help suppress weed growth while also retaining soil moisture. Hand weeding is often preferable to avoid disturbing the shallow roots of scallions.
Pest and Disease Management
Scallions are relatively hardy and resistant to pests and diseases, though they can attract aphids and thrips. Regular checks can help catch infestations early—if you spot any, use insecticidal soap or neem oil as a natural treatment.
Common diseases include downy mildew and white rot. To prevent these, space your scallions adequately to promote airflow and rotate crops yearly to minimize pathogen buildup in the soil.
Harvesting Scallions: Knowing When and How
The anticipation builds as your scallions mature! Harvesting is one of the most rewarding aspects of gardening, allowing you to enjoy the fruits of your labor.
When to Harvest
Generally, scallions are ready for harvest approximately 60 to 90 days after planting, depending on the variety and growing conditions. Look for thick green stalks that are about 6-8 inches tall. If the bulbs are small, wait a little longer, but don’t let them bolt—once flowers begin to form, the flavor diminishes.
How to Harvest
Gentle Tug: Use your hands to gently pull the scallions from the soil, ensuring you don’t damage the other plants nearby.
Cutting Method: Alternatively, you can use a sharp knife or scissors to cut the foliage and bulbs at the soil line. This method can increase yield if you allow them to regrow.
Post-Harvest Handling
After harvesting, rinse the scallions gently under running water to remove dirt. They store best in a cool, dry place or in the refrigerator crisper drawer. You can also chop and freeze them for future use.
Regrowing Scallions: A Sustainable Approach
One fascinating aspect of scallions is their ability to regrow from kitchen scraps. This sustainable practice is not only economical but also an excellent way to teach kids about gardening.
The Regrowing Process
Save the Roots: Cut the scallions about an inch above the roots, leaving the base.
Water Method: Place the roots in a glass of water, ensuring the bottom is submerged. Change the water every few days.
Soil Method: Alternatively, you can plant the root ends directly in potting soil. Keep it moist, and you’ll notice regrowth after a few days!
Benefits of Regrowing
Not only does this technique provide a continuous supply of scallions, but it also minimizes waste, making it a fantastic practice for environmentally conscious gardeners. It’s a great project for children, nurturing an understanding of food sources and fostering responsibility through gardening.
Troubleshooting Common Issues
Every gardener faces challenges, and scallion cultivation is no exception. Being aware of common problems can help you address them before they escalate.
Yellowing Leaves
If scallion leaves turn yellow, this could indicate nitrogen deficiency or overwatering. Evaluate your fertilization schedule, and ensure the soil drains well.
Stunted Growth
Stunted growth can result from overcrowding, insufficient sunlight, or poor soil health. Thin out seedlings as necessary and ensure they receive ample sunlight.
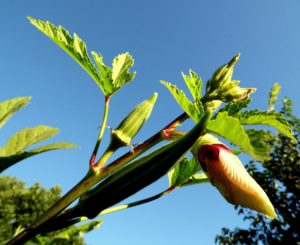
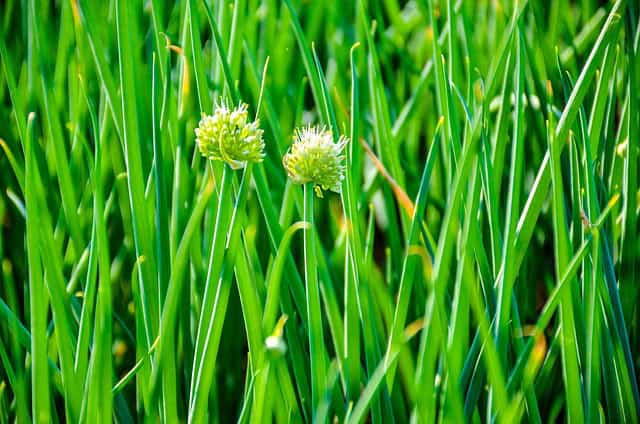
Bolting
Bolting occurs when a plant flower prematurely. While some gardeners appreciate the flowers for their beauty, they often signify that the plant is under stress, usually due to temperature fluctuations or a lack of consistent moisture. Once scallions bolt, the edible parts can become bitter.
Culinary Uses: From Garden to Table

Scallions have transcended their humble beginnings to find a place in cuisines worldwide. Their mild flavor enhances various dishes, making them a staple in many kitchens.
Flavor Profiles
The white part of the scallion is typically stronger and more pungent than the green tops, which offer a fresher, lighter flavor. When preparing dishes, consider using the whites for sautéing or braising and the greens as garnishes or in salads.
Versatile Recipes
Onion Soup: Scallions can replace traditional onions in homemade soups, providing a milder taste.
Stir-Fries: Chop scallions and toss them into stir-fries during the last few minutes for a burst of fresh flavor.
Salads: Thinly sliced scallions add a delightful crunch to salads, offering visual appeal as well as taste.
Toppings: Use scallions as a garnish for baked potatoes, tacos, and various noodle dishes; they elevate even the simplest meals.
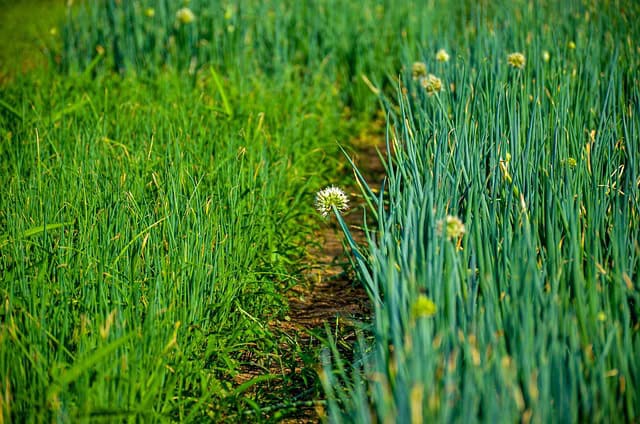
Seasonal Considerations: Growing Scallions Year-Round
One of the unique advantages of scallion cultivation is their adaptability across seasons.
Spring and Summer Planting
In spring, scallions can be sown directly into the garden as the soil warms up. In the early summer, ensure consistent watering as they reach maturity.
Fall and Winter Harvesting
In areas with mild winters, scallions can continue to grow through the colder months. For northern gardeners, consider using a cold frame or row cover to protect them from frost and extend your growing season.
Learning from Experiences: Anecdotes from Fellow Gardeners
Ultimately, gardening is a journey filled with lessons learned through trial and error. Fellow gardeners often share their heartfelt stories:
My neighbor, Jane, a gardening enthusiast, recounts her first scallion planting. “I didn’t expect them to grow. I thought I was just wasting time. But in less than a month, I was picking fresh scallions for my morning omelet. That taste of homegrown was outstanding! I now plant them every season.”
Such anecdotes resonate deeply and serve as encouragement for newer gardeners, embodying the passion and fulfillment that comes from nurturing one’s food.
Conclusion: Embracing the Joy of Growing Scallions
Growing scallions is not just about nurturing a plant; it’s an enriching journey filled with knowledge and satisfaction. From understanding the soil requirements to successfully harvesting and enjoying their bold flavors, each step reinforces the connection between the gardener and the earth.