In this guide, we’ll explore everything you need to know about pruning crape myrtle, from timing and techniques to tools and tips. So, whether you’re a seasoned gardener or a budding enthusiast, grab your shears and join us as we dive into the art of crape myrtle pruning.
Understanding Crape Myrtle’s Growth Habits

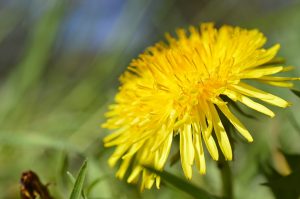
Before we venture into pruning techniques, it’s essential to understand the growth habits of crape myrtle. This versatile plant can be shaped as a multi-trunk tree or a sprawling shrub, depending on how you tend to it. Varieties vary not only in height—ranging from small shrubs about three feet tall to majestic trees that tower over 30 feet—but also in flowering periods and overall hardiness.
Crape myrtles are generally hardy in USDA zones 7 to 10. They thrive in full sun and well-drained soil, producing vibrant blooms from late spring to fall. One of the most notable characteristics of these plants is their distinct bark, which peels away to reveal a smooth, mottled surface beneath—adding winter interest when the flowers have faded.
Understanding these factors is crucial to proper pruning. Knowing how your specific variety grows allows for better decision-making regarding shape and size.
The Science of Pruning: Why It Matters

Pruning isn’t merely about aesthetics; it’s a vital part of plant health management. Regular pruning enhances airflow and sunlight penetration to the interior of the plant, reduces the risk of diseases and pests, and encourages new growth. In the case of crape myrtle, proper pruning can also stimulate more prolific blooming and even longer-lasting flowers.
Furthermore, pruning helps instill a structured growth habit that can withstand heavy rains or winds. During storms, weak branches can snap, detracting from the plant’s beauty and vitality. Thoughtfully pruning crape myrtle can provide the resilience needed to withstand nature’s tests.
Timing Your Pruning: The Best Season

The timing of your crape myrtle pruning is critical to ensure healthy blooms and vitality. The ideal time to prune crape myrtle is late winter or early spring, just before new growth begins. Doing this too early may expose the plant to harsh winter conditions, while waiting too long can lead to reduced blooming, as flower buds begin to set on new growth.
Many experienced gardeners advocate for pruners to wait until you see the buds swelling on the branches—this is the plant’s way of signaling readiness for the upcoming growing season. Avoid pruning in the fall, as this can stimulate new growth that won’t have time to harden off before winter.
Tools of the Trade: Essential Pruning Equipment
Having the right tools can make all the difference in the pruning experience. Here’s a list of must-have equipment:
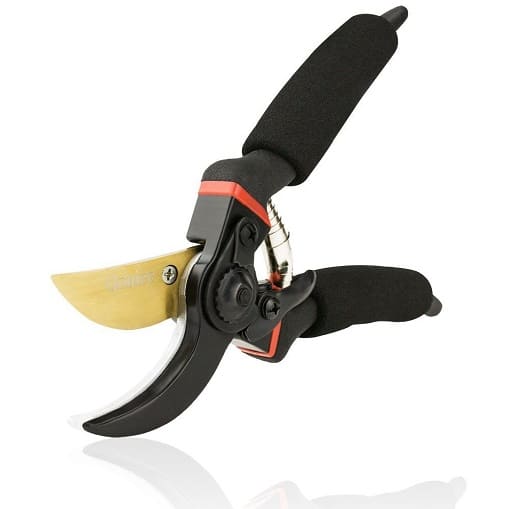
Hand Pruners: Ideal for small branches and for making precise cuts.
Loppers: Useful for larger branches that are too thick for hand pruners.
Saw: A small pruning saw can tackle thicker trunks or branches that require more effort.
Gloves: Protect your hands from sharp branches and splinters.
Safety Goggles: Especially important if you’re working near susceptible areas with potential debris.
Always ensure your tools are clean and sharp before starting. Dull tools can damage branches and make it easier for diseases to enter the plant.
The Pruning Process: Step-by-Step Guide

Now comes the moment we’ve all been waiting for: the actual pruning of the crape myrtle. The process can be broken down into several important steps:
Assessing Your Plant
Before cutting anything, take a good look at your crape myrtle. Examine its overall shape, size, and condition. Identify any dead, damaged, or crossing branches that can be removed first. This initial assessment sets the stage for effective pruning, allowing you to visualize the final shape you desire.
Removing Dead or Damaged Wood
Start by cutting away any dead, damaged, or diseased branches. These areas can inhibit healthy growth and combat pests. Look for discolored or brittle branches, as these are likely candidates for removal. Make your cuts at the branch bark collar—this is the swollen area where the branch meets the trunk. Doing so helps the plant heal and prevents further damage.
Thinning Out the Center
Crape myrtle can become crowded in its center, restricting airflow and light. To mitigate this, selectively prune some of the older branches that may be growing inward. Aim to create an open vase shape, allowing sunlight to penetrate and air to circulate through the middle of the plant. This will promote healthier growth and enhance blooming.
Shaping the Plant
Once the dead and damaged wood is removed, begin shaping your crape myrtle. This step is where your artistic vision comes in—determine whether you want a more rounded shrub or a more structured tree-like shape. Keep in mind the specific variety you have, as some lend themselves better to one style over the other.
When pruning, maintain a balance between aesthetics and the natural growth habit of the plant. Avoid the infamous practice of “crape murder,” where excessive cutting leaves only stubs behind. Such techniques may shock the plant and lead to overgrowth in future seasons or an unshapely appearance.
Final Touches
After achieving your desired shape, finish up by cleaning up the area around your crape myrtle. Remove all trimmings and debris to prevent pests and diseases from congregating around the plant base. Consider applying a light layer of mulch to retain moisture and support new growth in the coming season.
Common Mistakes to Avoid
Even seasoned gardeners can find themselves falling into a few common traps during the pruning process. Here are some mistakes to steer clear of:
Pruning at the Wrong Time: Timing is critical; pruning during the growing season can drastically reduce blooms.
Over-Pruning: Cutting too much can put your crape myrtle into shock, resulting in stunted growth.
Ignoring Branch Orientation: Not paying attention to how branches grow can lead to an uneven shape and poor health.
Neglecting Safety: Not adhering to safety practices, such as wearing goggles, can lead to injury—remember, your health matters too!
Crape Myrtle Varieties and Their Pruning Needs
Different crape myrtle varieties may have distinct pruning needs based on their growth habits. The Delta Blues variety, for example, grows in a more compact form and requires less heavy pruning compared to the towering Muskogee variety. Conversely, the Natchez, with its beautiful white blooms, may need more extensive shaping due to its larger size.
Understanding the specific needs of your variety will allow you to cater your pruning approach effectively. Researching local crape myrtle varieties can substantially boost your confidence as a gardener and improve your results.
Post-Pruning Care: Maintaining Health
After your crape myrtle has been pruned, it’s vital to keep an eye on its ongoing care. Applying a balanced fertilizer can help the plant recover after pruning, encouraging new growth as spring begins in earnest.
Additionally, ensure to water your crape myrtle adequately, especially during dry periods. Newly pruned plants may be more susceptible to drought stress, and keeping your crape myrtle hydrated will encourage lush growth.
Seasonal Maintenance: Beyond Pruning
While pruning is a crucial part of quality crape myrtle care, seasonal attention to watering, fertilizing, and monitoring for pests is equally important. Spring is the ideal time for fertilization, while summer should emphasize adequate watering. Fall presents a great time to clean up fallen leaves and debris, reducing pest habitats. Winter, despite the dormancy of your crape myrtle, is an excellent time for equipment maintenance and preparation for the next season’s pruning.
Conclusion: The Beauty of Pruning Crape Myrtle
Crape myrtles are a delight to grow, enriching landscapes with vibrant foliage and blooms. Understanding how to prune these magnificent plants is a stepping stone toward nurturing them into mature specimens that stand the test of time. By mastering the fundamentals of pruning, recognizing the importance of timing, and caring for your crape myrtle through the seasons, you cultivate not only a thriving plant but also a deeper connection to the beauty of your garden.