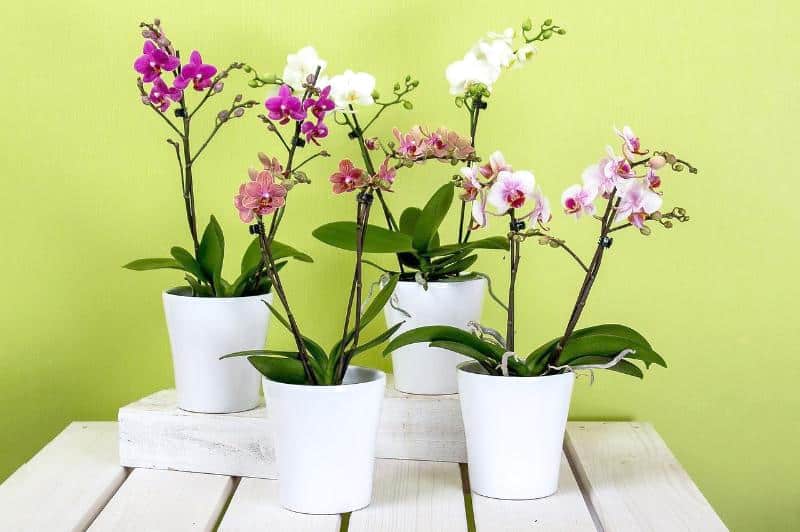
Repotting orchids is a vital part of their care, ensuring they remain healthy and vibrant. In this guide, we’ll explore the ins and outs of repotting orchids, covering everything from the right time to repot to the specific techniques and materials that will help your orchids thrive. Along the way, we’ll share personal anecdotes, tips, and insights to make the process accessible and enjoyable.
Understanding the Need for Repotting
First and foremost, why should you consider repotting your orchids at all? Unlike typical houseplants that thrive in soil, most orchids prefer a unique growing medium that allows for excellent drainage and airflow. Over time, this medium can break down, leading to issues like root rot or insufficient nutrients for your orchid to flourish.
As an orchid enthusiast, I’ve noticed that my plants signal when they need a new home. A couple of years ago, I nearly lost a stunning Phalaenopsis orchid because I ignored the warning signs: yellowing leaves, wilting blooms, and a medium that felt more like mud than a supportive base. That experience taught me the importance of keeping an eye on the condition of my orchids’ pots and mediums.
Identifying the Signs
Before you jump into repotting, it’s essential to recognize when it’s time for this plant care procedure. Orchids typically need repotting every 1-2 years, though there are signs that may prompt you to act sooner:
Medium Breakdown: If the potting mix has turned into a dense, compact matter, it can suffocate the roots. This is often characterized by a dark color and a foul smell.
Root Overgrowth: When roots begin to grow out of the drainage holes or become thick and gnarled, it’s a sure sign that your orchid is ready for a larger pot.
Dehydration: If the medium dries out too quickly—within a day or two of watering—this indicates that it’s losing its ability to retain moisture.
Pest Infestation: Sometimes, an orchid may carry pests or disease. In such cases, repotting is an opportunity to inspect the roots and treat any infestations.
Choosing the Right Time to Repot

Timing is everything when it comes to repotting orchids. Generally, the best time to repot is just after the blooming period when the plant enters its growing phase. For many orchid varieties, this is in late spring or early summer. Repotting during this time minimizes stress and gives the plant a chance to establish its roots in the new medium before the next bloom cycle.
For instance, when I repotted my last Cymbidium, it was right after the final flowers dropped, and the plant was showing new growth. This timing not only facilitated a smoother transition but also encouraged vibrant blooms for the coming season.
Selecting the Right Pot
The pot you choose can significantly impact your orchid’s health. While most orchids benefit from plastic pots due to their lightweight nature and excellent drainage properties, there are also clay pots to consider. Each material has its pros and cons:
Plastic Pots: Light and easy to handle. They retain moisture longer and usually come with ample drainage holes, making them ideal for the majority of orchids.
Clay Pots: Heavier and more stable, clay pots offer more aeration but can dry out more quickly. They are best for orchids that prefer drier conditions.
When selecting the pot size, it’s vital to avoid going too large. Orchids prefer snug spaces, so a pot only slightly larger than the previous one is ideal. This helps with moisture retention and allows the roots to feel secure.
Preparing the Potting Mix
A crucial aspect of repotting orchids is selecting the right potting mix. Unlike traditional potting soil, orchid mixes are often comprised of materials that promote good drainage and airflow. Common components include:
Bark: The most common medium, providing aeration and drainage.
Coconut Husk Chips: Retain moisture better than bark and decompose more slowly.
Perlite: Helps improve drainage and aeration.
Sphagnum Moss: Provides moisture retention but must be used sparingly to avoid over-watering.
Creating a custom mix can be a rewarding task. For example, I often combine bark and perlite in a 70/30 ratio for my Phalaenopsis orchids, as it offers ideal drainage while retaining some moisture.
Tools You Will Need

Before diving into the repotting process, gather the necessary tools to ensure a smooth experience. Here are the essentials:
Clean Potting Planter: Ensure it has drainage holes.
Quality Orchid Mix: Choose a suitable mix based on your orchid type.
Disinfected Scissors or Pruning Shears: For trimming any dead or damaged roots.
Gloves: To protect your hands while handling potting materials.
Water: To hydrate the plant and soak the new medium if necessary.
Having everything ready will make the process much more efficient and less stressful.
The Repotting Process Step by Step
Now, let’s delve into the step-by-step process of repotting orchids:
Step One: Prepare the New Pot and Mix
Begin by preparing your new pot and potting mix. If you’re using a new pot, wash it thoroughly with soap and warm water to remove any residues. For the potting mix, you might want to soak it in water to ensure adequate moisture retention before you proceed.
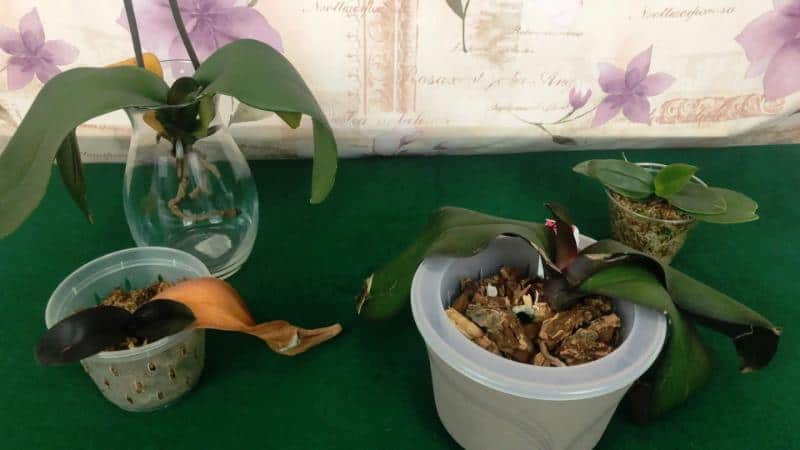
Step Two: Remove the Orchid from Its Current Pot
Gently squeeze the sides of the pot to loosen the medium and wiggle the orchid free, being cautious not to damage the roots. If the plant clings stubbornly to the pot, you can use a clean knife to carefully cut around the edges.
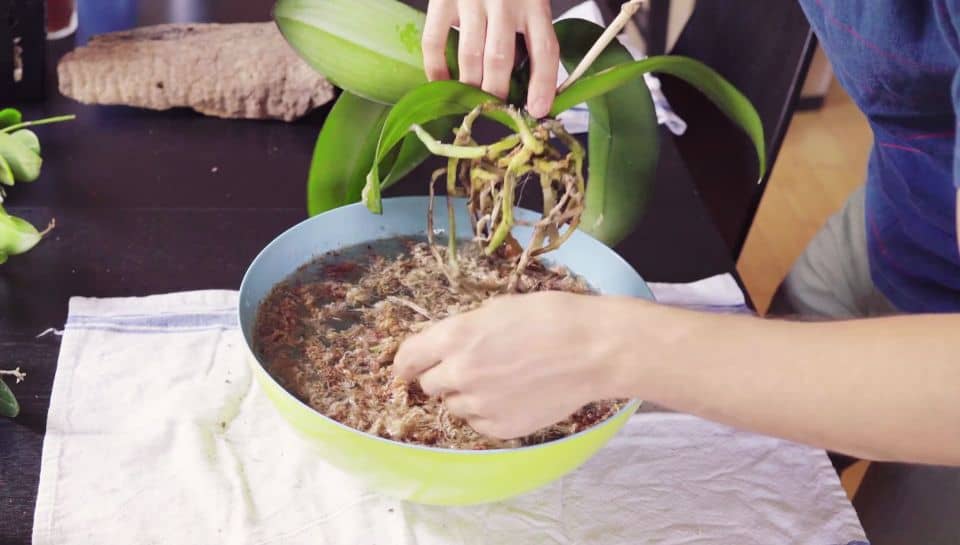
Step Three: Clean the Roots
Examine the roots as you free the plant. Healthy roots should be firm and green, while dead roots appear brown and mushy. I often take this opportunity to clean off any old medium by gently rinsing the roots under lukewarm water. Don’t hesitate to remove any dead or damaged roots with your sanitized scissors.
Step Four: Place the Orchid in the New Pot
Position the orchid in the center of the new pot, ensuring that the base of the leaves is above the potting medium. If you are potting a type that requires specific orientation, like a Vanda or a Cattleya, ensure you align them accordingly.
Step Five: Add the Potting Mix
Gradually fill in around the roots with your prepared potting mix. Gently press down to remove any air pockets but avoid compacting the mix too much. You want to ensure stability without restricting airflow around the roots.
Step Six: Water Thoroughly
Once you’ve added the mix and ensured the orchid is stable, give it a good watering. Allow the excess water to drain through the holes at the bottom. This step is critical—it helps to settle the roots in and allows the medium to adhere properly.
Step Seven: Aftercare
After repotting, place your orchid in a shaded area for a week to minimize stress levels. Gradually reintroduce it to bright, indirect light. During this period, watch for signs of distress, such as drooping leaves or stunted growth.
Common Post-Repotting Issues
Repotting can sometimes lead to challenges, but being aware of potential issues can help you mitigate them:
Transplant Shock: Sometimes, orchids may experience a shock after being moved. This can lead to wilting or dropped leaves. Patience is key, and it will typically resolve itself within a few weeks.
Watering Adjustments: After repotting, the orchid’s watering needs may change. The new medium will retain moisture differently than before, so monitor its water requirements closely.
Pest Incidences: Any disturbance can sometimes attract pests. Regularly inspecting your repotted orchids is vital for early detection and treatment.
Caring for Your Newly Repotted Orchid
Once the repotting process is complete, it’s time to refocus on care to help your orchid thrive in its new environment:
Light Conditions: Orchids adore bright, indirect light. Position your newly repotted orchid in a location where it receives adequate but filtered sunlight.
Humidity Levels: Orchids thrive in humid environments. If the air in your home is dry, consider using a humidity tray or misting the orchid regularly.
Fertilization: After a few weeks, you can resume fertilizing your orchid. Use a balanced orchid fertilizer diluted to half strength to encourage healthy growth.
Watering Schedule: Monitor the moisture level in the new medium to avoid over-watering or under-watering. Typically, wait until the top inch of the medium is dry to the touch before watering again.
An Anecdote on Patience
One of the most memorable orchids I repotted was a Dendrobium that had seen better days. After a hasty repotting, I noticed it was not responding well. Just as I was about to give up, I remembered the importance of patience in orchid care. Over the ensuing weeks, I adjusted its conditions slightly, ensuring it received the right light and humidity. Slowly but surely, the plant started to bounce back, eventually blooming with a magnificent display of fragrant flowers. This experience taught me that even when things look bleak, a bit of patience and care can lead to astounding results.
Elevating Your Orchid Game: Advanced Techniques

For those looking to take their orchid care to the next level, consider experimenting with some advanced techniques:
Mounting: Some orchids, such as epiphytes, can thrive on mounts, which allows for optimal airflow and drainage. This method can mimic their natural growing conditions and create stunning visual displays.
Semi-Hydroponics: This system uses a self-watering pot with a nutrient solution in the bottom. It’s becoming increasingly popular among orchid enthusiasts for its ability to maintain a consistent moisture level.
Hybrid Orchids: Explore hybrid varieties that might perform better in indoor settings. These hybrids often have unique resilience traits and can bloom more frequently than traditional species.
Conclusion
Repotting orchids is an essential but often intimidating task for many plant lovers. By understanding why, when, and how to repot, you can ensure that your orchids remain healthy and continue to grace your home with their stunning flowers.