In this comprehensive guide, we’ll explore everything you need to know about how to get orchids to bloom, delving into the intricacies of their care, environmental needs, and overall growth cycles while sharing personal anecdotes and insights along the way.
Understanding the Orchid Lifecycle
Before delving into the specifics of how to encourage orchids to bloom, it is crucial to understand their lifecycle. Orchids, like all flowering plants, follow a natural rhythm that includes phases of growth, rest, and dormancy.
Orchids typically originate from tropical and subtropical environments, which means their natural blooming cycles are often tied to season changes in those regions. Many orchids require specific signals — environmental cues like changes in temperature, light, and moisture levels — to trigger blooming. Recognizing these cues as part of their lifecycle not only helps you understand their needs better but also enhances your ability to care for them effectively.
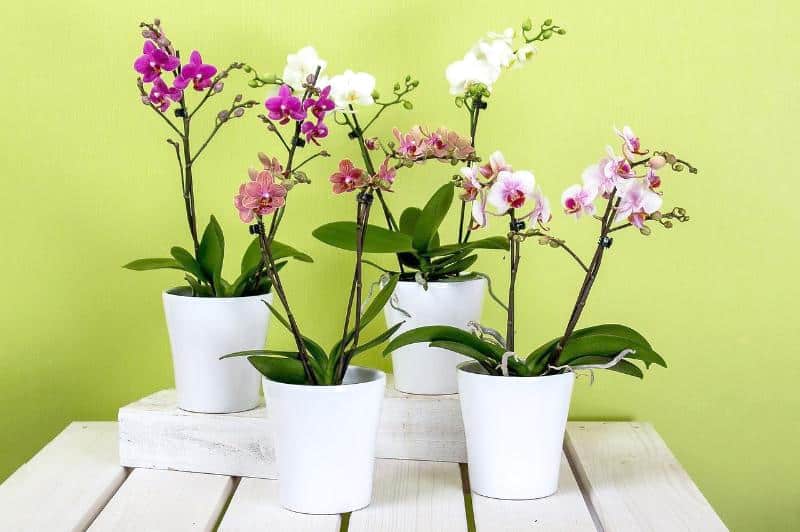
Having cared for orchids for years, I’ve discovered that each plant type comes with its own unique demands. For instance, Phalaenopsis orchids (commonly known as moth orchids) generally bloom once a year with the right care, while Cattleya and Dendrobium orchids may offer multiple blooms throughout the year. Each type has an individual blooming pattern, and deciphering this is vital to coaxing your orchids into flower.
Creating the Ideal Environment

When it comes to getting orchids to bloom, providing the right environment is paramount. Orchids thrive in conditions that replicate their native habitats, and it’s essential to consider factors like light, temperature, humidity, and air circulation.
Light Requirements
Proper lighting is one of the most critical aspects of orchid care. Orchids require bright, indirect sunlight for optimal blooming. Direct sunlight can scorch their delicate leaves, while insufficient light can hinder growth and flowering altogether.
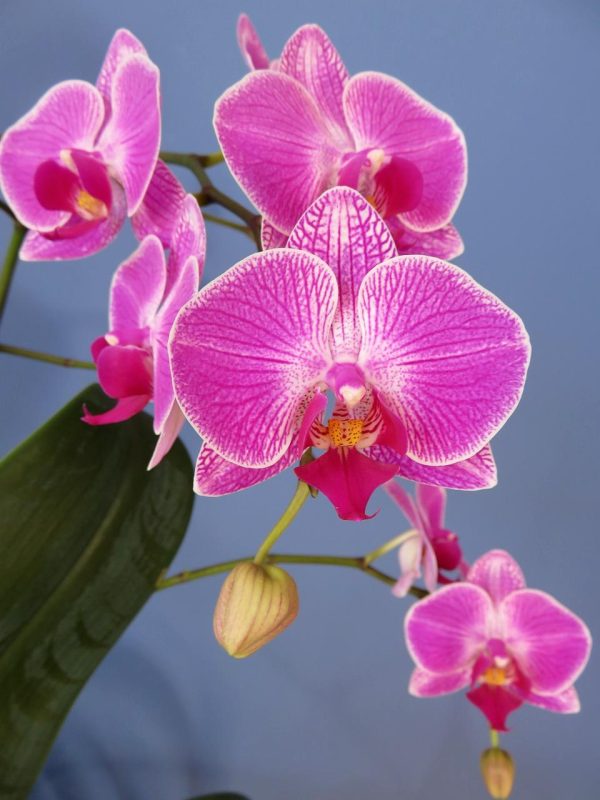
I remember the first orchid I purchased—a vibrant purple Phalaenopsis. I placed it on a windowsill that received direct morning sunlight without realizing that the bright light was too harsh. The leaves quickly became sunburned, and my poor plant only produced a few wispy flowers. After relocating it to a spot where it received filtered sunlight, I witnessed a transformation. The flowers bloomed with vibrancy the following season, a testament to the importance of light.
For indoor cultivation, south or east-facing windows might be ideal, providing ample but gentle light. Use sheer curtains if necessary to diffuse harsh rays. If you see your orchid extending its stems toward the light source, it’s a clear sign it needs more brightness.
Temperature and Humidity
In addition to light, orchids are responsive to temperature fluctuations. Most orchids prefer daytime temperatures between 70°F and 85°F (21°C to 29°C) and nighttime temperatures around 60°F to 70°F (16°C to 21°C). Such temperature variations create a natural environment that encourages blooming.
Humidity levels also play a significant role in orchid health. Most species thrive in humidity levels of 40% to 70%. If you notice the tips of the leaves browning, dry air could be the culprit. For those raising orchids in dry climates, you may wish to invest in a humidifier or place a shallow tray of water near the orchids to increase humidity.
Air Circulation
Another element that many indoor gardeners overlook is air circulation. Orchids need good airflow to prevent fungal infections and maintain overall health. Consider placing a fan nearby, ensuring it doesn’t blow directly on the plants but rather allows for gentle circulation around them.
During my first few years of orchid care, I relied heavily on a humidifier to maintain moisture but neglected air circulation. It wasn’t until I learned the importance of airflow that I noticed a significant improvement in my orchids’ health and blooming ability. It’s a small but vital aspect that shouldn’t be overlooked.
Essential Orchid Care Practices

To encourage orchids to bloom, consistent and attentive care is crucial. This includes proper watering, fertilizing, and repotting practices that keep your plants healthy and happy.
Watering Techniques
Watering orchids correctly can often feel like an art form. Overwatering can lead to root rot, while underwatering will stress the plant and reduce its ability to bloom. Most orchids prefer to dry out slightly between waterings.
A general rule of thumb is to water once a week, but it’s essential to gauge each plant’s needs. Using a pot with drainage holes is crucial. When watering, ensure water runs through the bottom, allowing the roots to absorb moisture while preventing standing water.
After a frustrating experience with overwatering one of my first orchids, I’ve since adopted a “soak and dry” method. I soak the potting medium well, then allow it to dry out before the next watering. This practice improved my orchids’ health significantly and encouraged delightful blooms.
Nutrient Needs
Fertilizing orchids can further enhance blooming potential. Regular feeding is essential, especially during the growing season (spring and summer). Look for a balanced orchid fertilizer with a ratio such as 30-10-10 or 20-20-20, demonstrating equal parts nitrogen, phosphorus, and potassium. These nutrients promote healthy foliage and strong blooms.
I found success in using a diluted fertilizer mixture during the growing season, applying it every other week. This routine not only nourished my plants but also ensured robust growth, leading to abundant blooming. During the fall and winter, it’s wise to reduce fertilization as many orchids enter their dormant phase.
Repotting
Repotting is an essential practice for thriving orchids, typically required every one to two years. Over time, potting media breaks down, retaining moisture longer and affecting root health. Choose a potting mix suitable for orchids — usually a mixture of bark, sphagnum moss, and perlite or a specialized orchid mix.
I vividly recall the first time I repotted my Phalaenopsis orchid. I was hesitant, worried I might inadvertently harm its roots. Still, after reading up on the process, I followed the steps and discovered that repotting not only refreshed the plant but also encouraged new root growth. Repotting in spring, just before the bloom cycle, gives orchids a fresh start and a healthy medium to thrive.
Identifying Bloom Triggers

Understanding what triggers blooming in orchids can help you create the right conditions. Many orchids bloom after a period of rest or dormancy, which is often triggered by a change in the environment.
Temperature Changes
As mentioned earlier, temperature plays a crucial role in orchid blooming. Many orchids benefit from a slight drop in temperatures at night, simulating their natural habitat. For example, fluctuating temperatures of about 10°F (5°C) between day and night can help sweeten the blooming process in many species.
Light Duration
Photoperiod, or the length of daylight exposure, also profoundly influences blooming. Orchids typically require around 12 hours of light daily, and extending their light exposure during the winter months can coax them into bloom. I often use a grow light during the winter, ensuring my orchids receive sufficient light even on the darkest days. The results were remarkable; blooms appeared steadily, bringing joy even in the depths of winter.
Stress Techniques
While it may seem counterintuitive, certain stressors can stimulate flowering. Slightly reducing watering or introducing a temperature shift can encourage some orchids to bloom. However, this should be approached with caution. Understanding the specific needs of your orchid species is vital to ensure you’re providing the right kind of stress.
Special Considerations for Different Orchid Species
As every type of orchid has its own blooming preferences and requirements, it’s insightful to explore care practices tailored to specific species.
Phalaenopsis Orchids
These are perhaps the most common house orchids and generally bloom once a year, though some gardeners report consistent blooms throughout the year with proper care. They thrive in lower light and higher humidity compared to many other orchids.
A personal experience stands out here; a friend introduced me to her watering routine: she would completely soak her Phalaenopsis once a week but always check to ensure the potting medium was approaching dryness without being bone dry. After adopting a similar routine, I noticed my orchids began to reward my efforts with stunning flowers.
Cattleya Orchids
Known for their large, fragrant blooms, Cattleya orchids typically require brighter light and a drier resting period between growth cycles. They prefer to dry out a bit more between waterings and flourish with more frequent fertilization during their active growth stage. Understanding this increased light requirement was pivotal for me, leading to vibrant blooms that raised eyebrows from fellow plant aficionados.
Dendrobium Orchids
These orchids vary significantly in their needs based on species but often require alternating care between a wet and dry cycle. For example, the Dendrobium nobile enjoys a dry resting period after blooming. Implementing this alternating wet-dry cycle proved vital for me, as my Dendrobiums frequently rewarded my mindfulness with breathtaking sprays of blossoms.
Common Problems and How to Solve Them
No journey with orchids is without its challenges, and recognizing potential issues early is crucial.
Lack of Blooms
If your orchid is healthy but not blooming, check your watering schedule, the balance of light received, and confirm it is not overly pot-bound. Recommendations include adjusting light conditions and temperature; slight modifications can often reignite blooming triggers.
Wilting Leaves
When orchids exhibit wilting leaves, assess water levels. Wilting could indicate both overwatering and underwatering. Observing the roots can be telling; green and firm roots indicate hydration, while brown, mushy roots suggest excess water.
Pest Infestations
Pests like mealybugs, aphids, and scale can impact the health of your orchids. A regular inspection can help catch infestations early. I’ve had effective outcomes from using a cotton swab dipped in rubbing alcohol as a natural remedy, gently wiping away pests from the leaves.
Seasonal Care for Blooms
Your approach to orchid care will change with the seasons, and understanding these changes can help keep your plants healthy and blooming.
Spring and Summer
These are typically the growing and blooming seasons. Increased light and humidity will spur growth, and regular fertilization can encourage blossoming. During this time, be vigilant about checking for pests and diseases that flourish in warmer conditions.
Autumn and Winter
During the cooler months, reduce watering and fertilization as many orchids enter dormancy. Dropping temperatures and shorter light conditions signal to the orchids to prepare for rest. I’ve often found that giving them a more minimalistic approach during these months has effectively led to lush blooms come spring.