In this comprehensive guide, we’ll explore everything you need to know about how to grow shallots, from selecting the right variety to harvesting and storing your crop.
Understanding Shallots: A Culinary Favorite

Before diving into the practicalities of cultivation, it’s essential to understand what makes shallots so special. Shallots have a milder flavor than onions, often described as a subtle blend of garlic and onion. They have a unique built-in sweetness, making them ideal for salad dressings, sauces, and sautés. A quick sauté of shallots can elevate any dish, providing depth and complexity that transforms the simplest of meals into something extraordinary.
Interestingly, shallots also have roots deeply embedded in ancient cuisines. They are believed to have originated in Central or Southwest Asia and were highly prized in Egyptian culture. Their popularity spread across Europe and beyond, with notable uses in French cuisine, which often celebrates shallots for their refined taste. Understanding this historical context not only enriches your knowledge but also connects you to a culinary tradition that has thrived for centuries.
Choosing the Right Variety

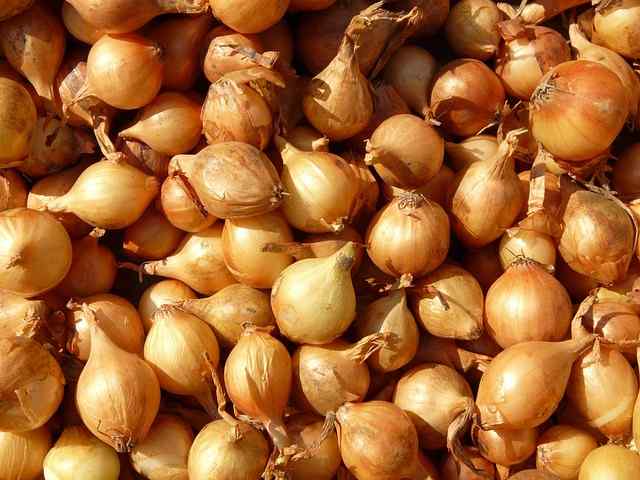
When venturing into shallot cultivation, the first step is selecting the right variety suited to your growing conditions and culinary preferences. There are several varieties, each with distinct flavor profiles, sizes, and colors. Common types include:
French Shallots: Known for their rich, complex flavor, they come in light brown to reddish-brown skin. These are often considered the premium choice for chefs.
Yellow Shallots: These have a milder, sweeter taste and are excellent for use in diverse culinary applications. They typically feature a copper-colored skin.
Echalion Shallots: Also known as “banana shallots,” these have an elongated shape and a sweeter flavor. They are great when roasted or used in a variety of dishes.
Gray Shallots: Less commonly found, they offer a robust flavor ideal for gourmet cooking.
Selecting shallots based on your taste preferences and intended recipes can significantly influence your gardening success. Additionally, consider your local climate: some varieties perform better in specific conditions. It’s worth taking the time to research which shallots have thrived in your area.
Preparing the Garden Bed

Once you’ve chosen your variety, the next step is preparing the ideal growing environment. Shallots thrive best in well-draining, fertile soil. Follow these steps for effective garden bed preparation:
Location
Choose a sunny area where shallots can soak up at least six hours of sunlight each day. A position with good air circulation helps minimize disease risks.
Soil Type and Amendments
Shallots prefer slightly acidic to neutral soil (pH 6.0-7.0). Conduct a soil test to determine its pH and nutrient content. Amend the soil with organic matter like compost or well-rotted manure to improve fertility and drainage. Mixing in nutrients like phosphorus (bone meal) can promote strong bulb development.
Tilling and Bed Formation
Loosen the soil to a depth of 12 inches using a spade or tiller. This helps create good drainage while allowing roots to spread easily. Form raised beds if your soil does not drain well – this can help prevent bulb rot, especially in rainy conditions.
Weeding and Debris Removal
Clear the area of weeds and debris; competition for nutrients and space can adversely affect shallot growth. A clear bed gives your shallots the best opportunity to flourish.
Planting Shallots
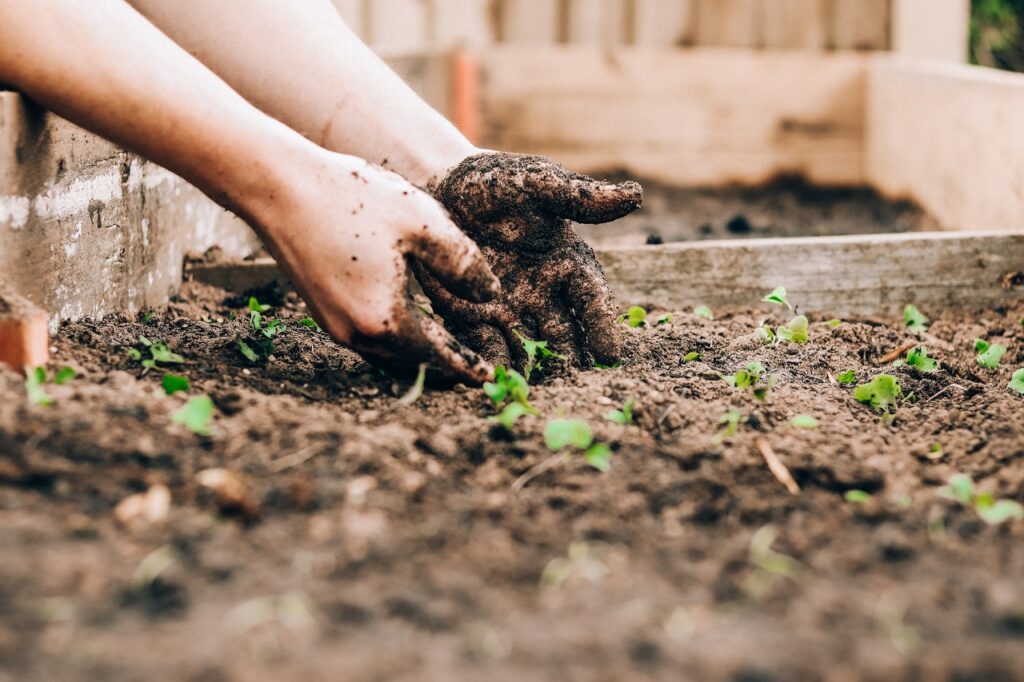
Planting is an exciting phase, marking the beginning of your shallot-growing journey. Knowing when and how to plant can make all the difference in your yield.
Timing
Shallots can be planted in spring (as soon as the soil is workable) or in fall, depending on your climate. In milder regions, fall planting allows shallots to establish roots before winter. If you decide on spring planting, aim for late March to early April.
Planting Techniques
Choosing Seed Stock: Use shallot bulbs from a reputable source. Never plant shallots from the grocery store, as they may be treated with chemicals that inhibit sprouting.
Spacing: Plant shallots 4-6 inches apart in rows spaced about 12-18 inches apart. This spacing allows ample room for growth and air circulation.
Depth: Plant bulbs with the pointed end facing up, about 1-2 inches deep. Cover them lightly with soil and gently pat down to remove air pockets.
Watering: After planting, water the bed thoroughly to settle the soil around the bulbs. Ensure the soil remains consistently moist but not waterlogged during the growing season.
Caring for Shallots

Caring for your shallots is essential for achieving a bountiful harvest. Regular attention can significantly affect your plants’ health and productivity.
Watering
Shallots require about an inch of water per week, especially during dry spells. Drip irrigation or soaker hoses are ideal, as they provide moisture directly to the roots while minimizing the chances of fungal diseases that can occur with overhead watering.
Fertilization
Fertilizing is vital during the growing season. Approximately four weeks after planting, apply a balanced fertilizer. Keep an eye on the growth; if shallots show signs of nutrient deficiency (like yellowing leaves), consider a side-dressing of nitrogen-rich fertilizer.
Pest and Disease Management
Be diligent in monitoring for pests such as thrips, onion maggots, and aphids. You can use organic methods like neem oil or insecticidal soap to manage infestations while maintaining the health of your garden ecosystem.
Shallots can also succumb to diseases like downy mildew and bulb rot. Ensure proper air circulation and avoid wetting foliage when watering to prevent these issues. Rotating crops each year can also help break disease cycles.
Weeding
Weeds can compete for resources with shallots. Regularly check your garden and remove weeds by hand or with mulching materials. Organic mulches can also retain moisture in the soil, aiding shallot growth while suppressing weed growth.
Harvesting Shallots

Knowing when and how to harvest shallots will ensure you maximize your yield and flavor. Timing is critical.
Signs of Maturity
Shallots typically take about 90-120 days to mature. As they near maturity, the foliage will start to yellow and die back. When around half of the tops have fallen over, it’s time to think about harvesting.
Harvesting Technique
Gentle Uprooting: Use a garden fork or spade to gently lift shallots, being careful not to damage the bulbs. Start a little distance away from the bulb to avoid puncturing it.
Cleaning: Shake off excess dirt and leave the skins intact as they help protect the bulbs during storage.
Curing: Allow shallots to cure in a dry, airy location away from direct sunlight for two to four weeks. This process enhances their flavor and improves storage longevity.
Storing Shallots

Proper storage techniques can help you enjoy your shallots long after the growing season is over.
Ideal Conditions
Store cured shallots in a dark, cool, and dry place with good airflow. A basement or cellar can work well, provided it remains dry.
Long-term Storage Options
Braiding: If you have multiple shallots, consider braiding the tops and hanging them for storage. This method not only saves space but also adds rustic charm to your kitchen.
Mesh Bags: Alternately, place shallots in a mesh bag to allow air circulation. Ensure the bag is lightweight, as heavy pressure can bruise the bulbs.
Refrigeration: For shallots that are cut and peeled, storing them in airtight containers in the refrigerator can extend their freshness for a couple of weeks.
Culinary Applications of Shallots

Now that you have successfully grown and stored shallots, it’s time to explore their culinary potential. Shallots can add depth and nuanced flavor to a variety of dishes, making them invaluable in the kitchen.
Dressings and Sauces
Shallots can be finely minced and whisked into salad dressings, lending a subtle sharpness and richness. They’re also a critical component in classic French sauces like beurre blanc.
Sautéing and Roasting
Shallots can be sautéed until golden brown, acting as a flavorful base for stews and sauces. They can also be roasted with vegetables, bringing out their natural sweetness.
Soups and Stews
A mirepoix featuring shallots can elevate soups and stews, infusing them with layers of flavor that delight the palate. Their mild flavor won’t overpower other ingredients, making them a dependable choice.
Condiments and Preserves
Shallots can be pickled or made into a chutney, adding a burst of flavor to sandwiches and charcuterie boards.
Every dish benefits from the use of shallots, transforming ordinary meals into something memorable. That tiny bulb may seem inconspicuous, but its influence in culinary creations is profound.
Troubleshooting Common Issues
As with any gardening endeavor, challenges may arise during your shallot-growing journey. Let’s tackle some common problems you might face.
Yellowing Leaves
If you notice yellowing leaves early in the season, it could indicate nutrient deficiency or disease. A thorough check of soil nutrients is advisable, along with ensuring proper watering practices to prevent stress on the plants.
Rotting Bulbs
Bulb rot can happen due to excessive moisture or poor drainage. Amending your soil to improve drainage and avoiding overwatering will mitigate this risk.
Poor Flavor
If your shallots turn out to be mild or lack flavor, this could be a result of insufficient sunlight or nutrients. Ensure your shallots receive adequate light and consider side-dressing with fertilizer when necessary.
The Joy of Homegrown Produce
There’s something truly special about growing your food. Shallots, with their easy care and delightful flavor, are a wonderful project for both novice and experienced gardeners alike. The satisfaction of harvesting and cooking with shallots you’ve nurtured yourself is an experience unlike any other.
Every time you chop a shallot for a dish, take a moment to appreciate the journey it took—from seed to bulb to flavor enhancer—transforming the mundane task of cooking into a celebration of nature’s bounty. The fresh aroma that wafts through your kitchen while cooking with shallots can elevate everyday meals, allowing you to share the fruits of your labor with family and friends.