Whether you’re a seasoned horticulturist or a novice gardener, this guide will walk you through every aspect of cultivating these stunning flowers in your own backyard.
Understanding Tulips: A Brief History

To appreciate how to grow tulips effectively, it’s essential to understand the rich history behind them. Tulips originated from the mountainous regions of Central Asia, particularly in modern-day Turkey. In the 16th century, they became highly coveted in Ottoman gardens, eventually spreading to Europe when they were introduced to the Netherlands.
During the 17th century, tulip mania took hold, with bulbs being auctioned for extraordinary prices. This not only illustrates the flower’s beauty but also its impact on culture and economy. By understanding this backdrop, we can appreciate tulips not just as plants, but as symbols of history, love, and artistry.
Choosing the Right Tulip Varieties
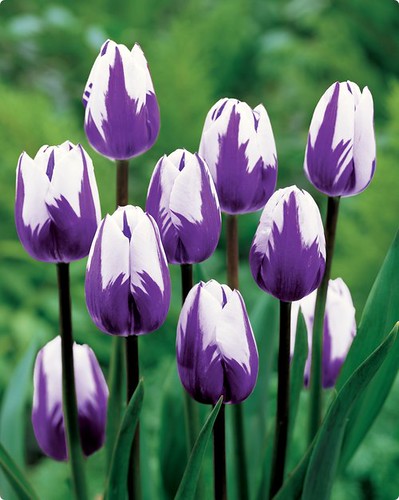
The first step in growing tulips involves selecting the right varieties. With hundreds of species and hybrids available, understanding their differences is crucial. Tulips are broadly classified into 15 groups based on their flowering time and shape, including:
Early Blooming Tulips like Darwin Hybrids are hardy and bloom in spring, providing an early burst of color.
Triumph Tulips are a popular choice due to their broad color range and sturdy stems.
Parrot Tulips exhibit extravagant fringed petals resembling the feathers of exotic birds, perfect for adding flair.
Darwin Hybrid Tulips are appreciated for their longevity and vibrant blooms.
Rembrandt Tulips recall the historical art movement with their unique color patterns.
Choosing the right variety depends on the region’s climate, blooming period preference, and landscape design. Local gardening centers often provide expert advice on what works best in your area.
When and Where to Plant Tulips
Timing and location play critical roles in growing tulips. Ideally, tulip bulbs should be planted in the fall, six to eight weeks before the ground freezes. This window allows roots to establish before winter sets in.
When selecting a location, opt for a spot that receives full sunlight—6 to 8 hours a day is ideal. Tulips thrive in well-draining soil, so consider raised beds or areas with good drainage to prevent bulb rot. If your garden has clay soil, amending it with compost or sand helps improve texture and drainage.
As a personal anecdote, I once planted tulips in a half-shaded area, hoping they would flourish despite limited sunlight. While they eventually bloomed, the result was considerably less vibrant than anticipated, underscoring the importance of proper placement.
Preparing the Soil for Tulip Growth

The foundation of any successful garden lies in its soil. For tulips, a pH level of 6.0 to 7.0 is ideal. Before planting, conduct a soil test to determine its composition and nutrient levels. The key steps in preparing your soil include:
Loosening the Soil: Dig up the area to a depth of about 12 inches to improve aeration.
Amending with Organic Matter: Incorporating compost not only enhances soil structure but also provides vital nutrients.
Testing for Drainage: To ensure your site drains well, dig a hole about a foot deep, fill it with water, and observe how quickly it drains. It should completely empty within 24 hours.
Taking these steps lays a solid groundwork, ensuring your tulips will have what they need to thrive once planted.
Planting Tulips: Techniques and Tips
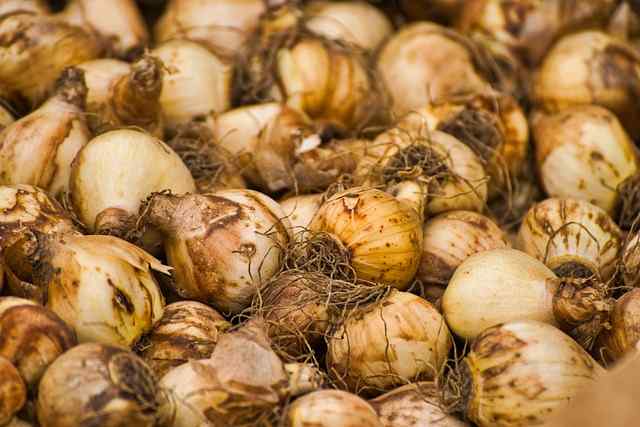
Once your soil is prepared, it’s time to plant the tulip bulbs. Begin by choosing healthy bulbs—each should be firm and free from rot or damage. The planting process involves:
Digging Holes: Plant tulip bulbs about 6 to 8 inches deep. The general rule is to plant bulbs at a depth three times their height.
Spacing Considerations: Space bulbs about 4 to 6 inches apart to allow them room to grow without crowding.
Orientation Matters: Always plant the bulbs with the pointed end facing up.
Watering: After planting, water thoroughly to help settle the soil around the bulbs.
I find planting tulips to be a meditative experience, especially in the quietude of autumn when the world prepares for winter. Each bulb carefully placed is like a promise of vibrant flowers to come, a reminder of resilience and renewal.
Understanding Water Needs

After planting, the focus shifts to understanding the water needs of tulips. While tulips require moisture to establish healthy roots, overwatering can be detrimental. Once the bulbs are planted, they rely mainly on fall rains to keep the soil moist.
As spring rolls around and shoots begin to emerge, monitor for additional water needs, particularly if you’re experiencing a dry spell. A slow, deep watering once a week encourages deep root growth, but always check the soil moisture before applying water.
Fertilizing Tulips for Robust Growth
Fertilization is vital for nurturing strong, vibrant tulip growth. Before planting, mixing a balanced fertilizer into the soil can provide essential nutrients. Once tulips begin to grow, a light application of fertilizer high in phosphorus (the middle number on the fertilizer label) can help promote blooming.
Be cautious not to over-fertilize, as this can lead to excessive foliage growth at the expense of flowers. As tulips finish blooming, deadhead the flowers but leave the foliage intact. The leaves photosynthesize and provide energy for the bulbs for next year’s growth. This step is crucial, as it allows the bulbs to store energy for a robust display the following spring.
Pest and Disease Management
Even the most careful gardeners can encounter pests and diseases when growing tulips. Common pests like aphids and tulip weevils may threaten your plants, while fungal issues like gray mold can result from overly damp conditions.
To combat pests naturally, consider introducing ladybugs to your garden or using neem oil sprays. Monitor your tulips regularly for signs of discolored leaves or wilting, and promptly remove any affected plants to halt the spread of disease.
It’s essential to maintain a clean garden, as debris can harbor pests and bacteria. During the gardening season, I’ve found that a few preventative measures, such as rotating where I plant my tulips each year, can help mitigate pest problems.
Aftercare: Post-Bloom Care for Tulips
Once the spring bloom demonstrates its spectacular colors, the excitement may start to wane. However, the care of tulips doesn’t end with the blooming period. After flowering, it’s essential to provide proper aftercare.
As mentioned previously, deadhead the flowers promptly after they wilt, which directs energy back to the bulb rather than producing seeds. Leave the foliage intact until it turns yellow and dies back naturally; this process may take several weeks.
Once the foliage dies, you can cut it back, but refrain from digging up the bulbs right away. In many cases, spring bulbs can remain in the ground for several years, but if they start to decline, consider digging them up and replanting or storing them for replanting in the fall.
Seasonal Considerations and Regional Variations

Tulips require different care depending on the climate and region. In USDA hardiness zones 3 to 8, tulips typically thrive, but care varies in regions with severe winters compared to those with mild, wet winters.
In colder climates, tulips may require extra insulation in the form of mulch to protect bulbs during winter. Conversely, in milder climates, it’s crucial to plant tulips deeply to protect them from heat-induced dormancy.
For example, living in a temperate climate, I once mistakenly planted tulips too close together, leading to a decline in their vigor in warmer spring months. Adjusting my planting strategy taught me the significance of considering local weather patterns.
Engaging Your Community: Sharing Your Passion
Growing tulips is not just a solitary joy; it can be a communal activity that brings people together. Hosting or participating in local garden clubs, workshops, or flower shows serves as an excellent way to share knowledge and experiences.
Drawing upon the traveler’s spirit, consider visiting tulip festivals or farms to learn from seasoned gardeners and discover regional varieties that may inspire your next planting endeavor. Each interaction can heighten your appreciation for gardening and tulips, fostering a richer experience.
In my own life, sharing my tulip-growing journey with friends has sparked conversations about gardening, culture, and the many ways flowers can brighten our lives.
Creative Applications of Tulips in Your Landscaping

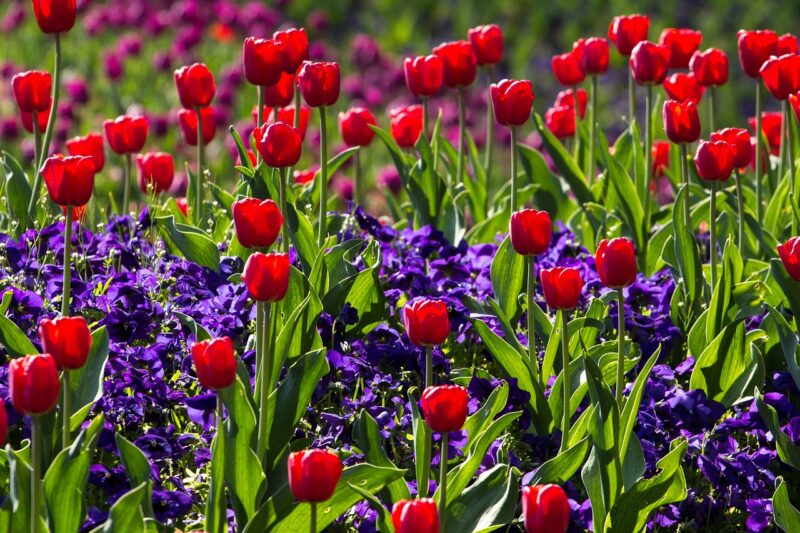
Beyond traditional garden beds, tulips offer flexibility in landscaping. Their vibrant colors and versatility make them an enticing addition to various settings, including:
Container Gardening: Perfect for balconies or patios, containers allow you to showcase tulips’ beauty in small spaces.
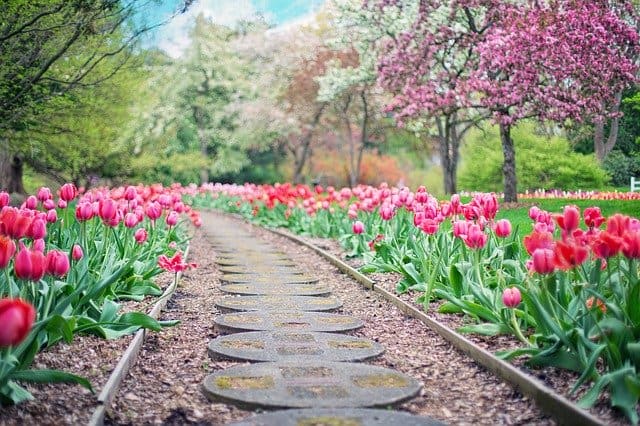
Borders and Edges: Planting tulips along pathways creates an enchanting entrance to your garden.
Mixing with Perennials: Combine tulips with other flowering perennials to extend the bloom season, creating a continuous display of color.
As you explore creative applications for tulips in your garden, remember to consider their height, color, and blooming period to create a cohesive design. Each season brings new inspiration, and tulips can be a canvas for your gardening artistry.
Experimenting with Dutch Treats: Forcing Tulips Indoors
For those eager to experience tulips beyond the garden, forcing them indoors is a gratifying method. This technique allows you to enjoy their blooms in winter, brightening up the cold months.
Here’s how to force tulips:
Select Healthy Bulbs: Choose bulbs intended for forcing, often labeled as such.
Chill the Bulbs: Store bulbs in a cool, dark place (ideally 35-50°F) for 12-16 weeks.
Plant in Containers: Use well-draining potting mix, planting the bulbs at a depth about three times their height.
Winter Care: Water lightly and keep the containers in a dark area until shoots appear. Once visible, set them in a sunny location, allowing them to flourish.
Several winter seasons ago, a friend gifted me forced tulips, and watching them bloom indoors was a delightful surprise amidst the dull winter landscape. It’s a magical experience that fosters reverence for nature.
Common Mistakes and How to Avoid Them
Even seasoned gardeners can overlook crucial care practices. Here are common mistakes made during tulip cultivation and how to sidestep them:
Neglecting Soil Quality: Ensure your soil is well-draining and rich in organic matter to prevent bulb rot.
Planting at the Wrong Depth: Adjust bulb planting depth according to size—planting too shallow or too deep can hinder growth.
Ignoring Hardiness Zones: Understand your USDA hardiness zone to select appropriate varieties, ensuring successful blooms each season.
Overwatering: Monitor moisture levels, especially in spring, to avoid causing root rot.
Reflecting on my gardening journey, learning from these missteps has been an invaluable part of my growth as a gardener, shaping my gardening philosophy in profound ways.
Conclusion: The Journey Ahead with Tulips
Growing tulips is more than merely cultivating flowers; it’s about embracing a journey filled with anticipation, care, and reward. With this comprehensive understanding of how to grow tulips, you’re equipped to create a blossoming spectacle that brings joy not only to you but to friends, family, and neighbors alike.