In this post, we’ll explore everything from the basics of chickpea cultivation to the nuances of pest management and harvesting. By the end, you’ll be equipped with the knowledge and confidence to embark on your own chickpea-growing adventure.
Understanding Chickpeas

Chickpeas belong to the family Fabaceae and are one of the oldest cultivated legumes, with a history tracing back thousands of years to the Middle East. These resilient plants thrive in diverse environments, ranging from Mediterranean climates to arid regions across the globe. Understanding their growth patterns and environmental needs is essential for successful cultivation.
Chickpeas exist in two primary varieties: Desi, which has a small, dark seed and is primarily grown in developing countries, and Kabuli, characterized by its larger, lighter seeds, popular in the West. Both varieties have unique qualities and applications, influencing the choice of plants depending on your intended use.
Historically, chickpeas have been a staple food source due to their high protein content, making them an essential part of vegetarian diets. Cultivating chickpeas provides not just sustenance but also a sustainable crop that enriches soil health thanks to its nitrogen-fixing properties.
Preparing for Planting

Preparing to grow chickpeas starts long before the plants take root in the soil. The first step is selecting the right variety based on your climate and intended use. If you’re in a cooler climate, consider growing Kabuli chickpeas. Alternatively, if you reside in a warmer region, Desi types might be more suited to your environment.
Soil Selection and Preparation
Healthy soil is paramount for successful chickpea growth. Chickpeas prefer well-drained soil that is slightly acidic to neutral with a pH between 6.0 and 7.0. Conduct a soil test to gauge the nutrient levels and pH. Incorporating organic matter such as compost can help improve soil structure and fertility.
Once you’ve prepared your soil, consider the following steps:
Tillage: Turn the soil about 6 to 8 inches deep to aerate and prepare it for planting. This is an excellent time to mix in compost or other organic amendments.
Weed Management: Chickpeas are sensitive to weed competition. It’s crucial to clear the planting area of existing weeds to give your young plants a fighting chance.
Soil Moisture: Chickpeas are drought-tolerant but need moisture for germination. Soil moisture levels should be monitored closely during the early stages of growth.
Plan Your Layout: If you’re planting a large crop, consider row planting, which allows for easier maintenance, especially during weeding and harvesting.
Climate Considerations
Chickpeas flourish in a Mediterranean climate, characterized by warm, dry summers and cool, wet winters. The ideal temperature for chickpeas ranges between 65°F to 85°F (18°C to 29°C). In cooler areas, late spring planting ensures that the last frost has passed.
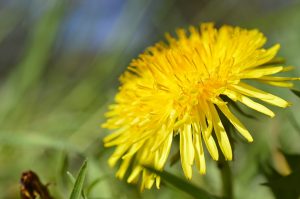
However, it’s important to understand local climate patterns and adapt your planting schedule accordingly. Many gardeners look for date markers, like the first bloom of dandelions, to time planting with seasonal changes.
Sowing Chickpeas

After preparing the soil, it’s time to sow those chickpeas. You can start with seeds purchased from a reliable supplier or utilize seeds saved from the previous harvest, provided they are healthy and disease-free.
Planting Method
Chickpeas can be seeded directly into the soil. When planting, follow these guidelines:
Spacing: Space the seeds about 2 to 3 inches apart, in rows that are 18 to 30 inches apart. This allows for adequate airflow and makes it easier to manage the crop throughout its growth cycle.
Depth: Plant seeds about 1 to 2 inches deep. If your soil is sandy, you might go deeper, while clay soils would require shallower planting.
Timing: Ideally, sow chickpeas in late spring after the threat of frost has passed, as they require warm soil temperatures (at least 60°F or 15°C) for optimal germination.
Watering Input
While chickpeas have drought-resistant characteristics, proper watering is crucial during the early stages of germination. After planting, ensure the soil remains moist but not waterlogged. Once established, chickpeas naturally go dormant during dry spells, needing significantly less water.
Caring for Chickpeas

Nurture your chickpeas through the growing season with attention to their specific needs.
Fertilization
Chickpeas have a unique advantage; they enrich the soil by fixing atmospheric nitrogen. Consequently, the need for fertilizers is minimal. However, if soil tests show deficiencies in potassium or phosphorus, a balanced fertilizer can be applied following the manufacturer’s guidelines.
Weed Management
Weeds can outcompete chickpeas for light, nutrients, and water. Regularly hoeing and cultivating shallowly can keep weeds at bay without disturbing the chickpea roots. Mulching around plants can also help suppress weeds while conserving moisture.
Pest and Disease Control
Chickpeas are relatively resilient but are susceptible to certain pests and diseases such as:
Aphids: These tiny pests can wreak havoc by sucking sap from young plants. Natural predators, like ladybugs, can help control their population.
Chickpea Midge: This pest lays eggs in the developing pods, leading to grain loss. Regular monitoring and timely interventions can mitigate damage.
Fungal Diseases: Root rot and leaf blight can occur in overly moist conditions. Ensure good drainage and avoid overhead watering to reduce the risk.
Maintaining a crop rotation schedule with non-legume plants can bolster health and mitigate disease buildup in the soil.
Harvesting Your Chickpeas

As the summer wanes and the plants mature, it’s time to prepare for harvest. Knowing when to pick chickpeas can significantly influence quality and yield.
Signs of Maturity
Chickpea pods typically turn a pale yellow to brown color as they ripen. The leaves on the plants will begin to yellow and dry out, signaling that it’s almost time for harvest.
Timing: Harvesting too early can result in immature seeds, whereas waiting too long can lead to shattering, causing seeds to fall to the ground prematurely.
Testing Pods: If the pods make a crisp sound when lightly crushed, they are likely ready for harvest.
Harvesting Techniques
Hand Harvesting: Ideal for small gardens. Use scissors or garden shears to cut off the entire plant at the base.
Mechanical Harvesting: For larger crops, consider using a combine harvester equipped with a chickpea header designed for minimal seed loss.
After harvesting, it’s essential to dry your chickpeas. Spread them in a single layer in a shaded, dry area until they reach a moisture level between 12% and 14%. This moisture content is crucial for long-term storage.
Storage Considerations
Chickpeas can be stored in a cool, dry place in airtight containers. Vacuum-sealed bags are optimal for maintaining freshness. Properly stored, dried chickpeas can last for years, making them a convenient pantry staple and a sustainable choice.
Cooking and Culinary Uses

Once your chickpeas are harvested, you’ll want to explore their culinary applications. These nutritious legumes are incredibly versatile.
Dried vs. Canned
Dried chickpeas offer a unique texture and flavor. Before cooking, they should be soaked overnight and then boiled until tender. Canned chickpeas are pre-cooked and convenient, suitable for adding to salads, soups, or stews without needing additional preparation.
Popular Recipes
Hummus: Blend cooked chickpeas with tahini, lemon juice, garlic, and olive oil for a rich dip.
Chickpea Salad: Mix with cucumbers, tomatoes, red onion, and a lemon vinaigrette for a refreshing salad.
Curries and Stews: Chickpeas are excellent in various curries, offering substance and protein.
Nutritional Benefits
Chickpeas are packed with protein and fiber, making them an ideal food for plant-based diets. They are also rich in vitamins and minerals, such as iron, potassium, and folate. Incorporating chickpeas into your meals can contribute to overall health, including improved digestion and heart health.
Sustainability and Environmental Impact
Growing chickpeas not only benefits your health but also contributes positively to environmental sustainability. Known for their nitrogen-fixing capabilities, chickpeas enrich the soil and can be part of a crop rotation plan that enhances soil fertility.
Additionally, chickpeas require less water than many other crops, making them an excellent choice for arid climates, thus promoting sustainable agriculture practices. As global interest in plant-based diets grows, the importance of growing legumes like chickpeas becomes increasingly relevant.
Overcoming Challenges
While the journey to grow chickpeas can be fulfilling, it’s not without its challenges. Be prepared for unforeseen issues such as unexpected weather patterns or pest invasions that may threaten your crop. Education and adaptability are key.
Weather Unpredictability: Invest in season extension techniques like row covers or hoop houses to protect against frost or unseasonably cool temperatures.
Community Support: Joining local gardening groups can provide invaluable support. Sharing insights, challenges, and experiences with fellow growers fosters community and resilience.
Final Thoughts
Growing chickpeas is more than just an agricultural venture; it’s a journey into sustainable living and personal fulfillment. The sense of accomplishment that comes from nurturing a plant from seed to harvest is unparalleled.